Summary of Findings
I conducted this set of experiments to try out the feasibility of photographing drinks01 with my Q2. The Q2 has a wide focal length (28mm). I’d never used it with a tripod or a flash, and I’d never used lighting control devices (diffusers or reflectors).
The results of the experiments were:
-
Good: Casual / situational shots. The excellent color, depth-of-field, and portability of the Q2 will make it useful to include in the lineup.
-
Bad: Standard cocktail stills. The wide focal length (28mm) didn’t seem like a natural fit. My poor abilities at controlling light and composing the scene meant most of these shots look corny.
-
Ugly: The flash. While the Q2 would get the flash to fire, it lacked the ability to programmatically adapt to its added lighting the way other cameras can. This led to shooting completely blind on manual, way underexposing to hope to compensate for the flash.
I’m excited to try more experiments using
- a camera with a longer focal length lens (telephoto)
- more natural light, especially back-lighting
- better scene composition (so much here: surface, backdrop, props, garnish)
- more in-depth editing (especially processing drink vs bg separately)
Takeaways
I wrote the summary above after looking at all the photos. But while combing through them in great detail to write the rest of this post, I came up with a handful of detailed takeaways. Here they are all in one place:
-
The surface is a huge element of the shot. If a nice texture isn’t naturally available in furniture, a mat (e.g., I think I’ve seen black reflective acrylic) seems like a great idea.
-
Don’t forget about lamps!
-
Direct sunlight is huge. Replacing it entirely with artificial lights requires substantial equipment and work.
-
Don’t forget to turn down minimum shutter speed while on a tripod!
-
For a black backdrop, use something without texture (e.g., no folds) and as dark as possible. Ideas: foamboard, curtain. Also, maybe don’t shine light onto it.
-
While having an ultra-narrow DoF can be stylistically nice for some occasions, make sure you have at least one shot where the entire (front of the) drink is in focus.
-
Pay attention to the ISO when staging. If it goes up, add more light.
-
Next time trying burst shots, try it slow.
-
Next time I encounter banding, see whether the mechanical shutter alone fixes it.
-
Go through your photos in detail. You will learn a lot.
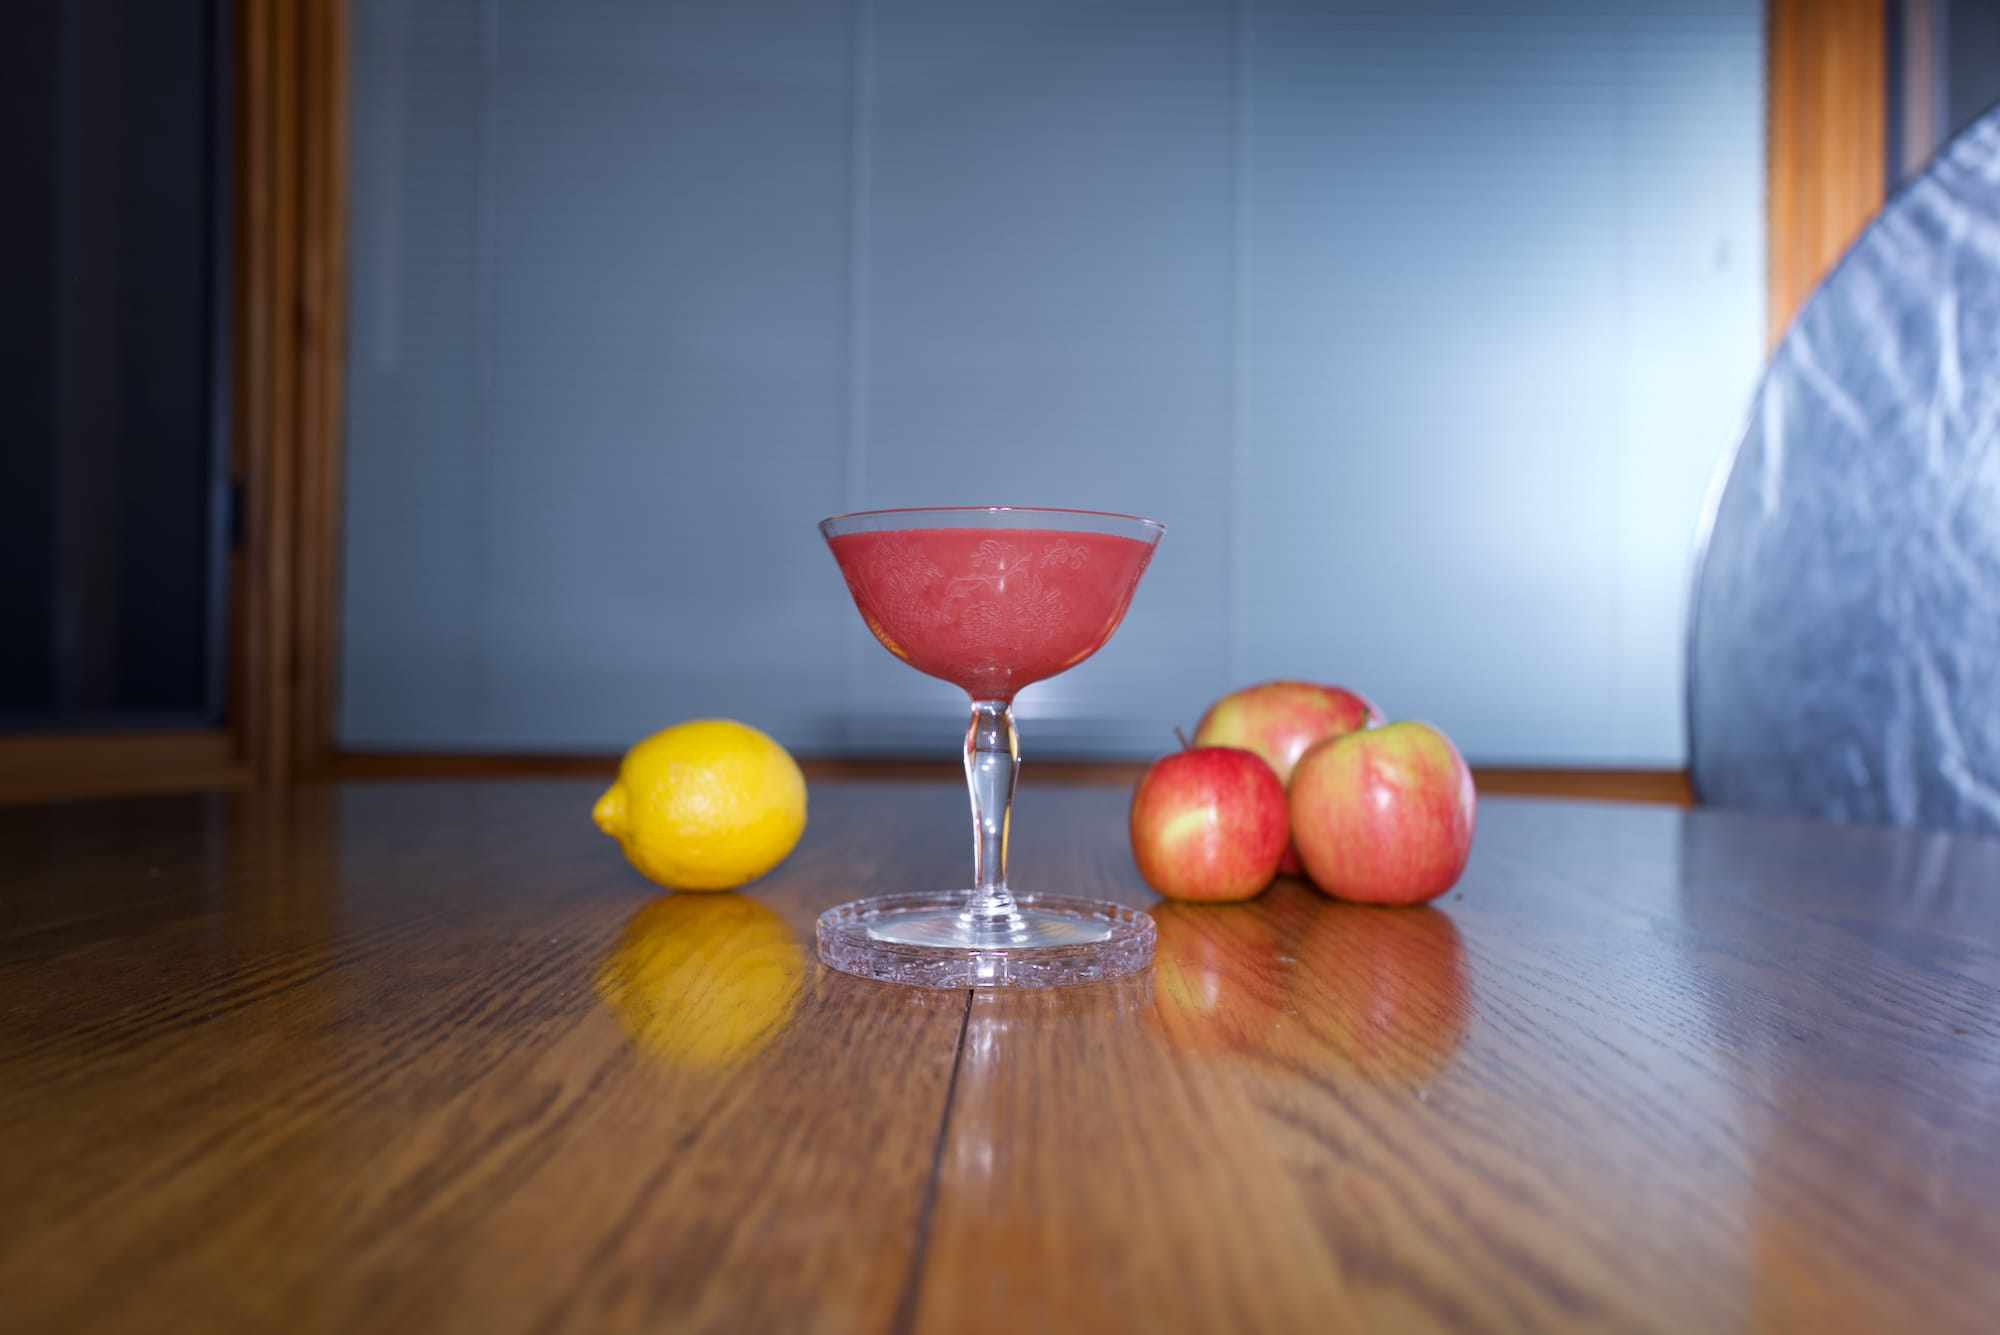
Experiment 1: Straight-on Tabletop
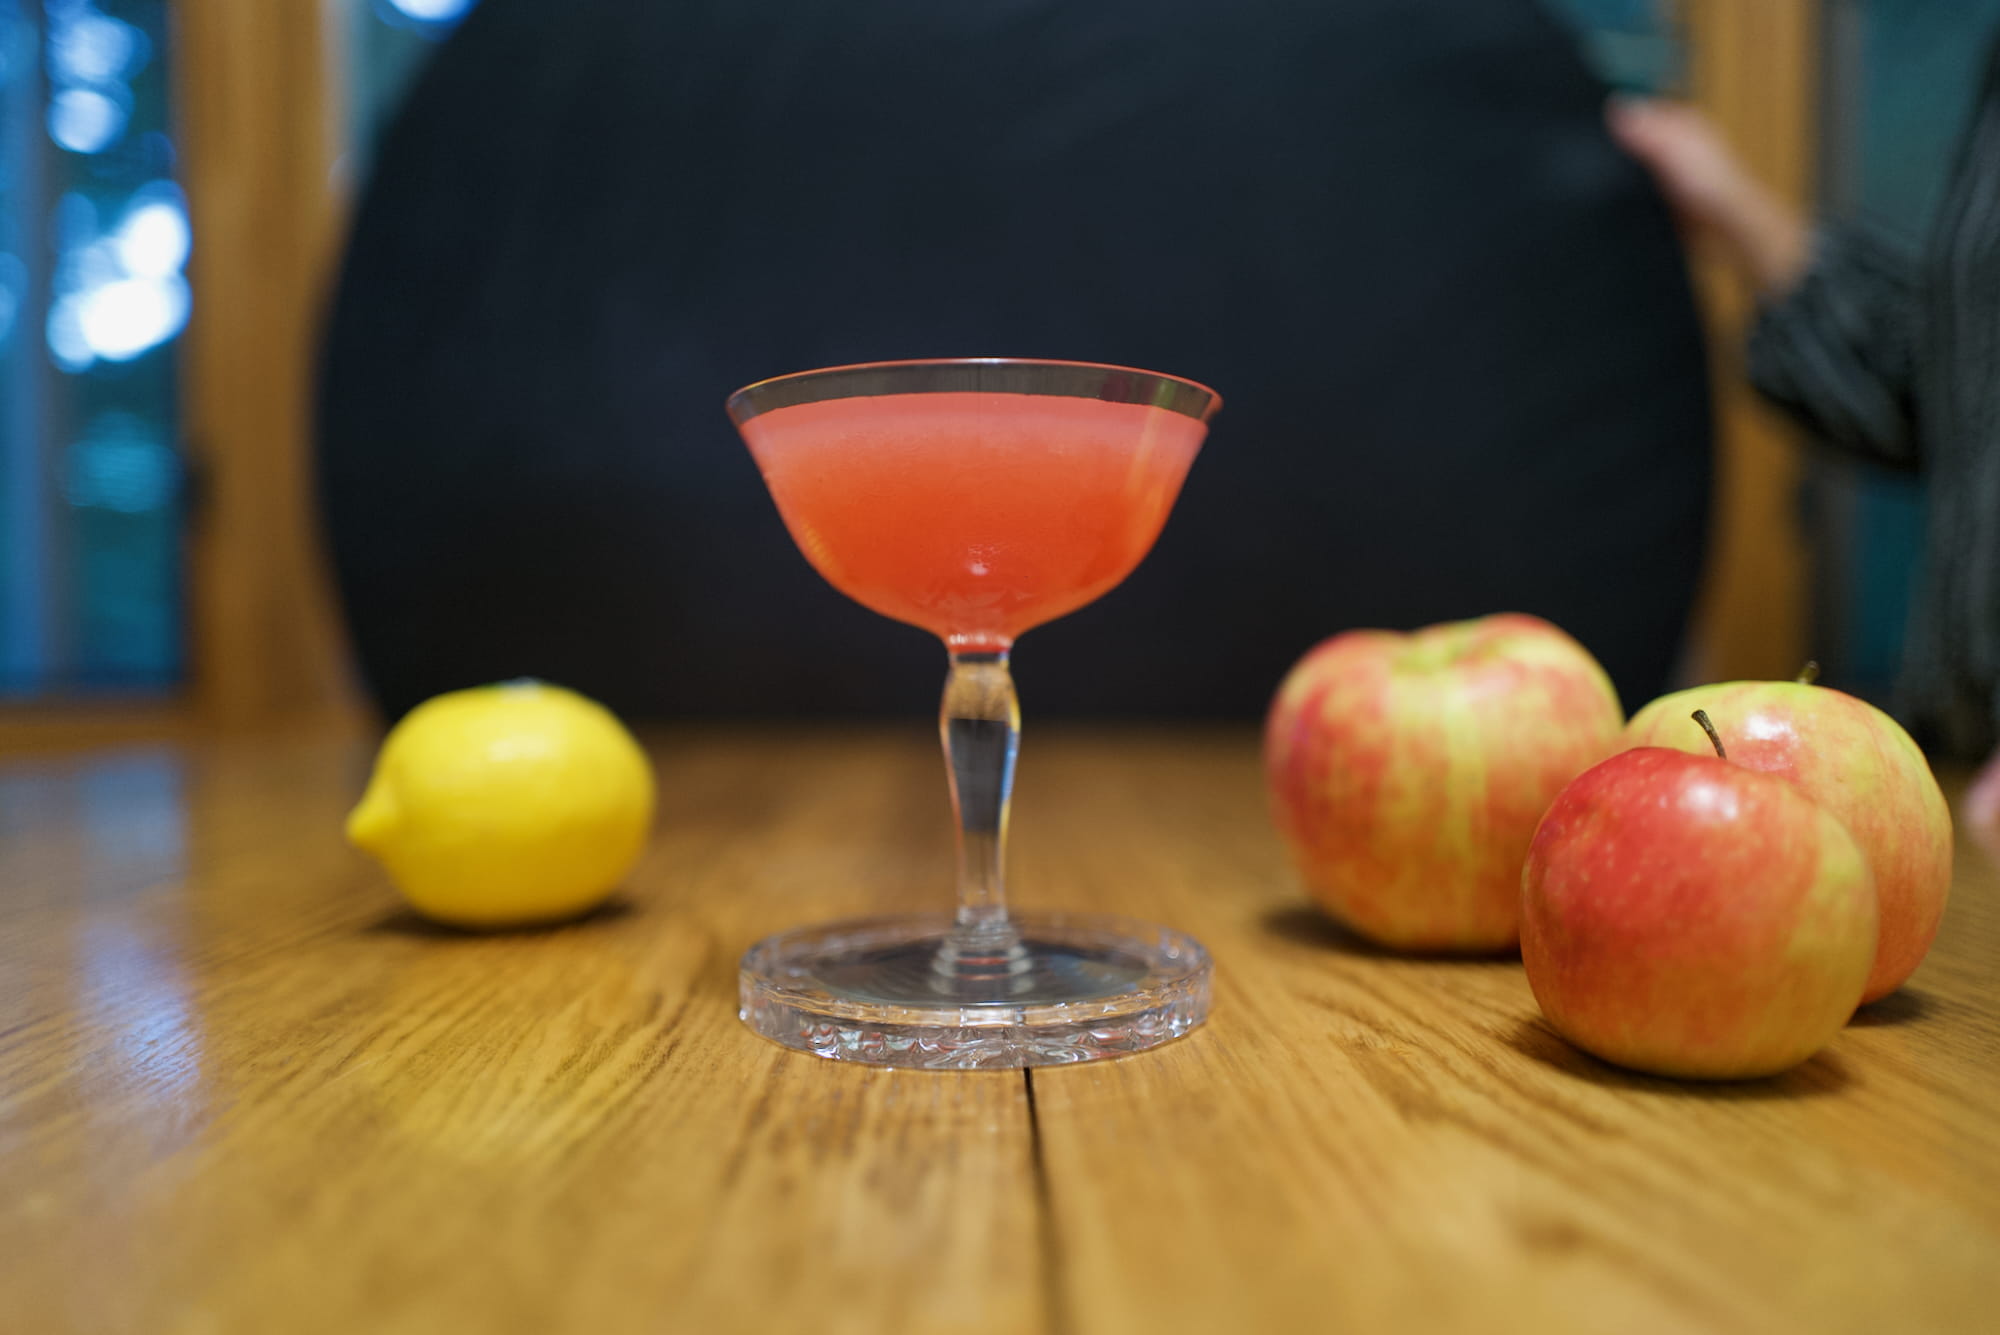
Here’s what the basic setup looked like. I’m going to briefly discuss the scene and lighting before we get into shots.

Basic setup w/ near placement. Attempt at dark backdrop added after a few shots.
Scene
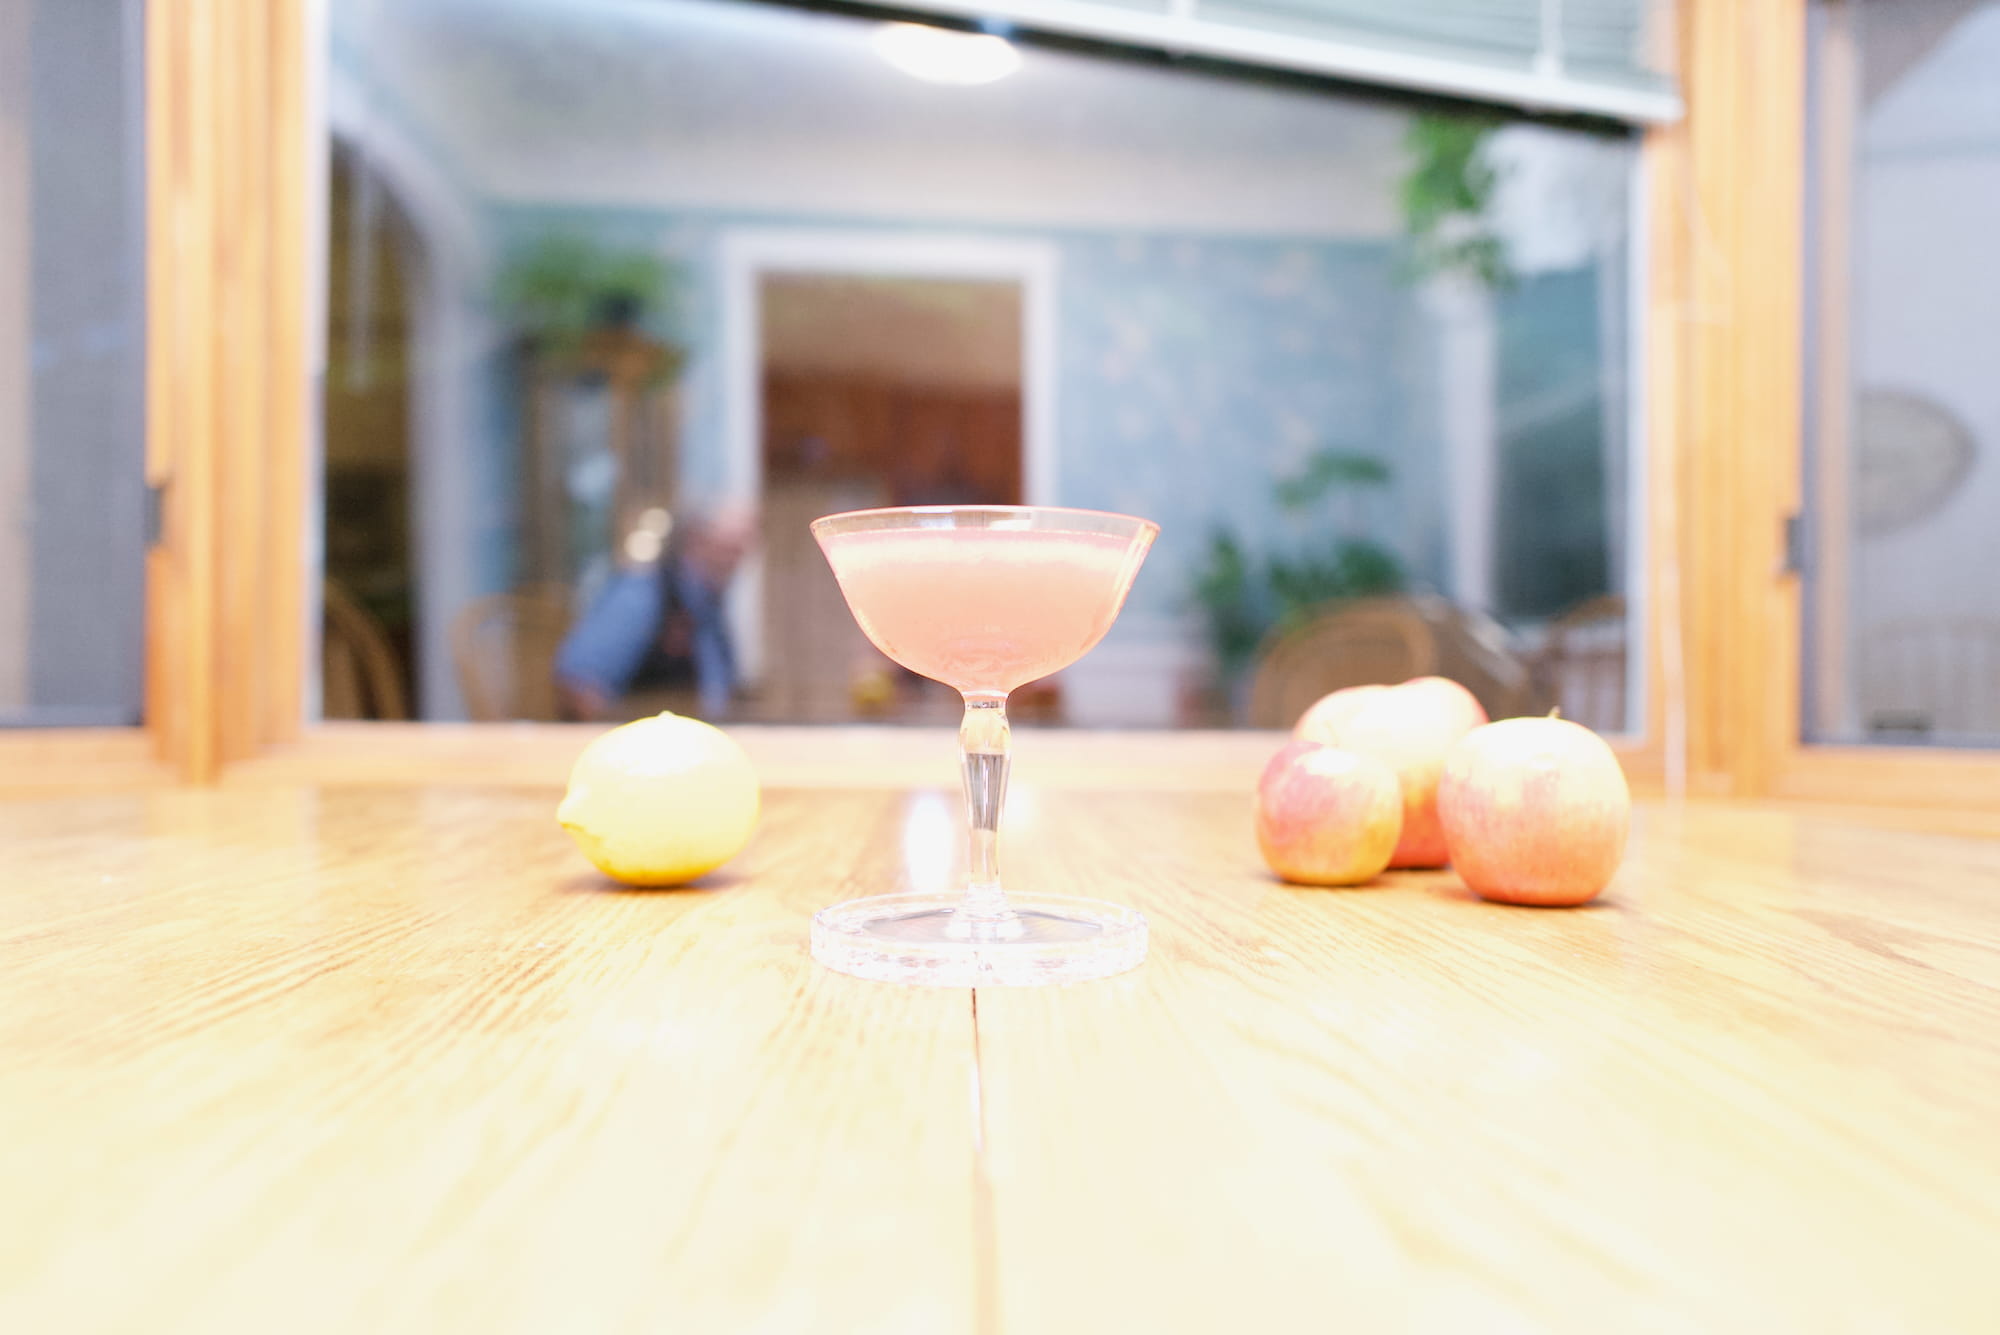
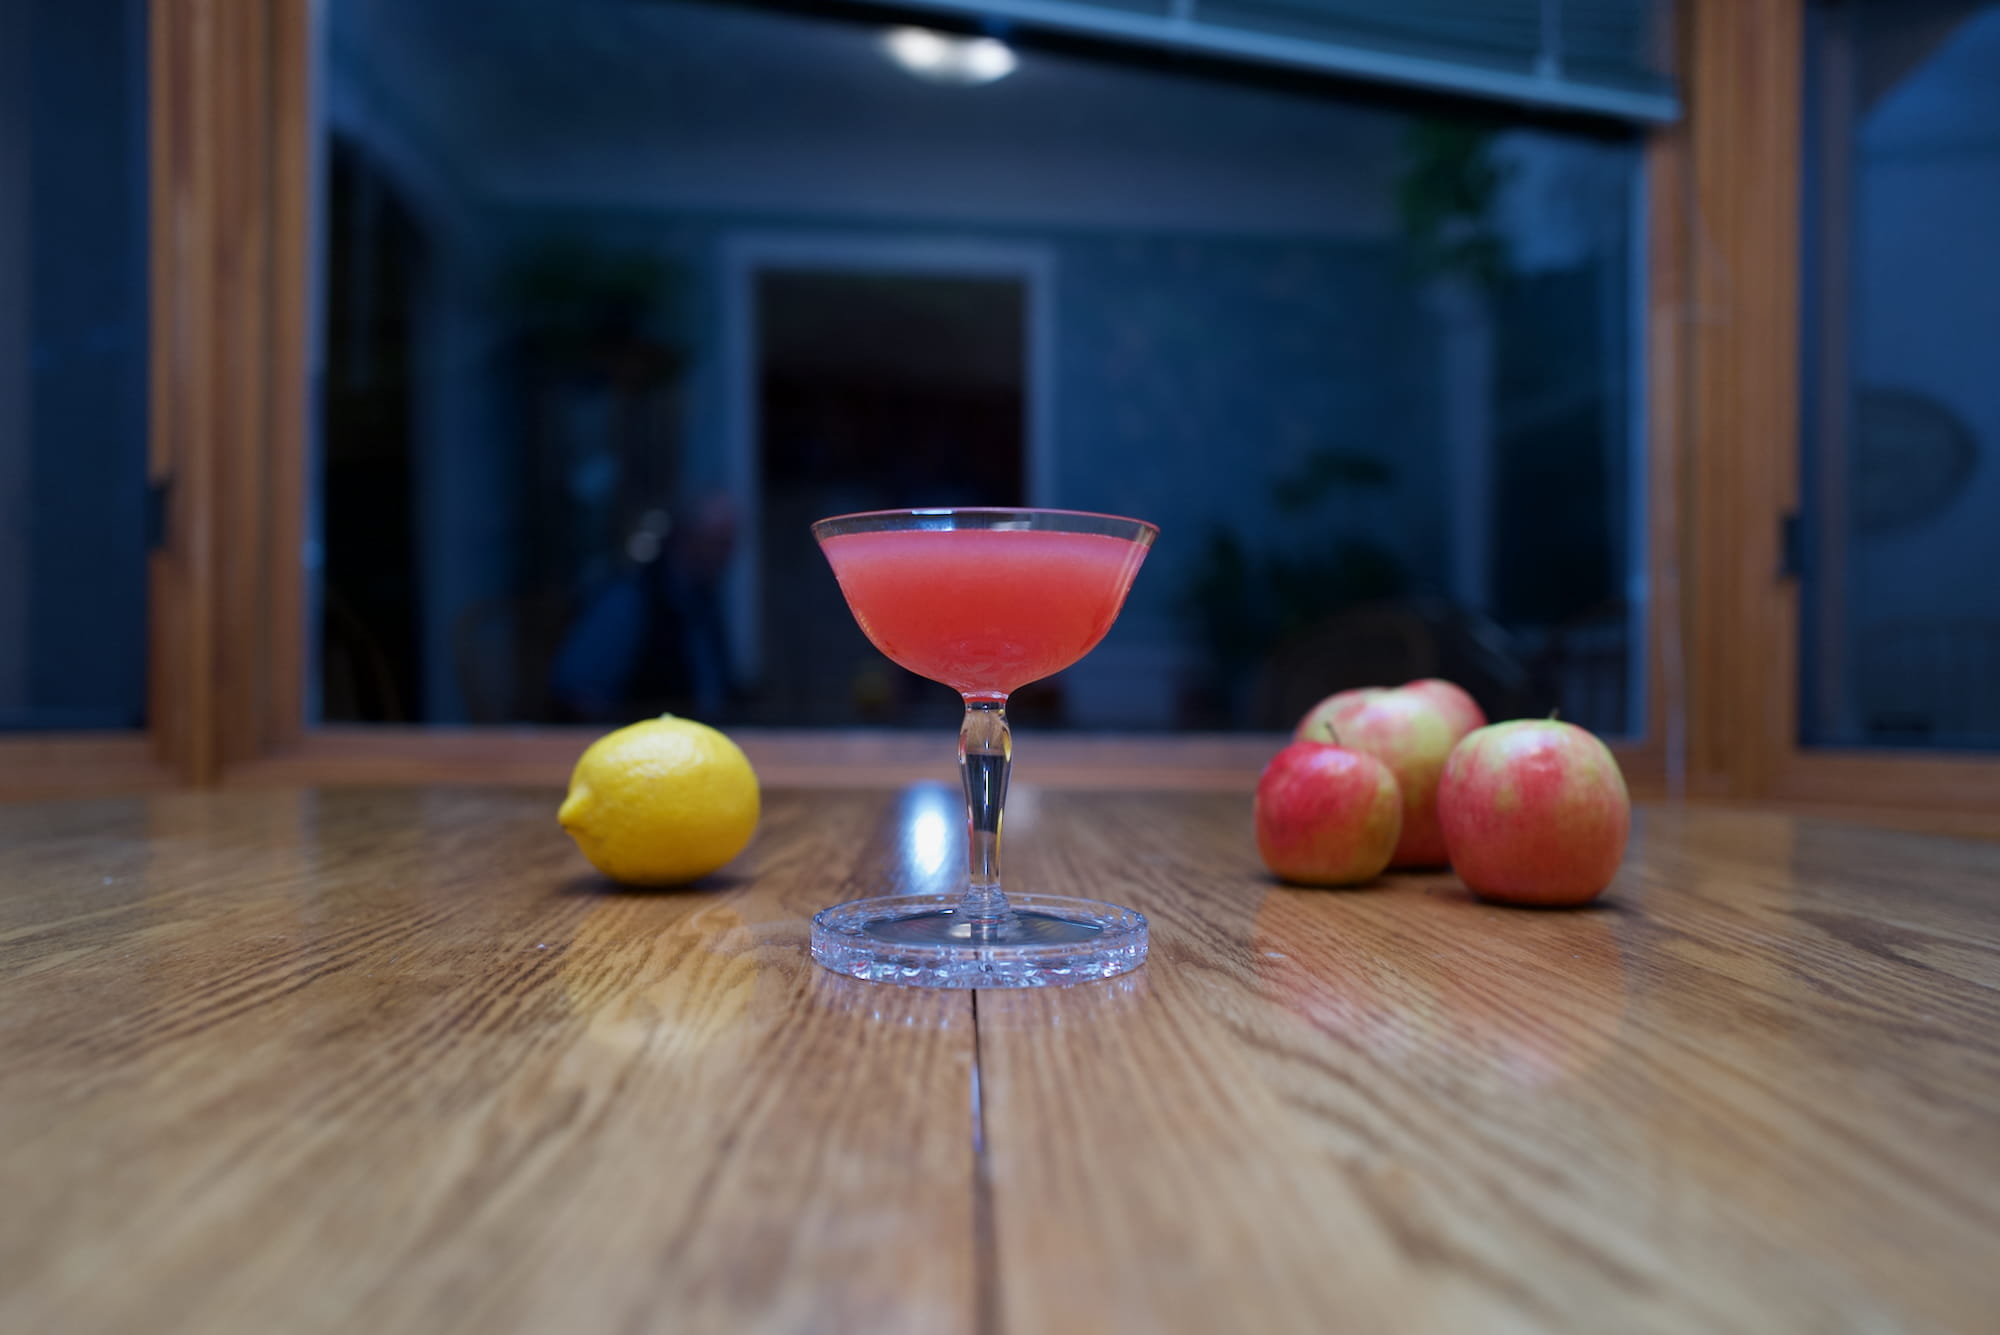
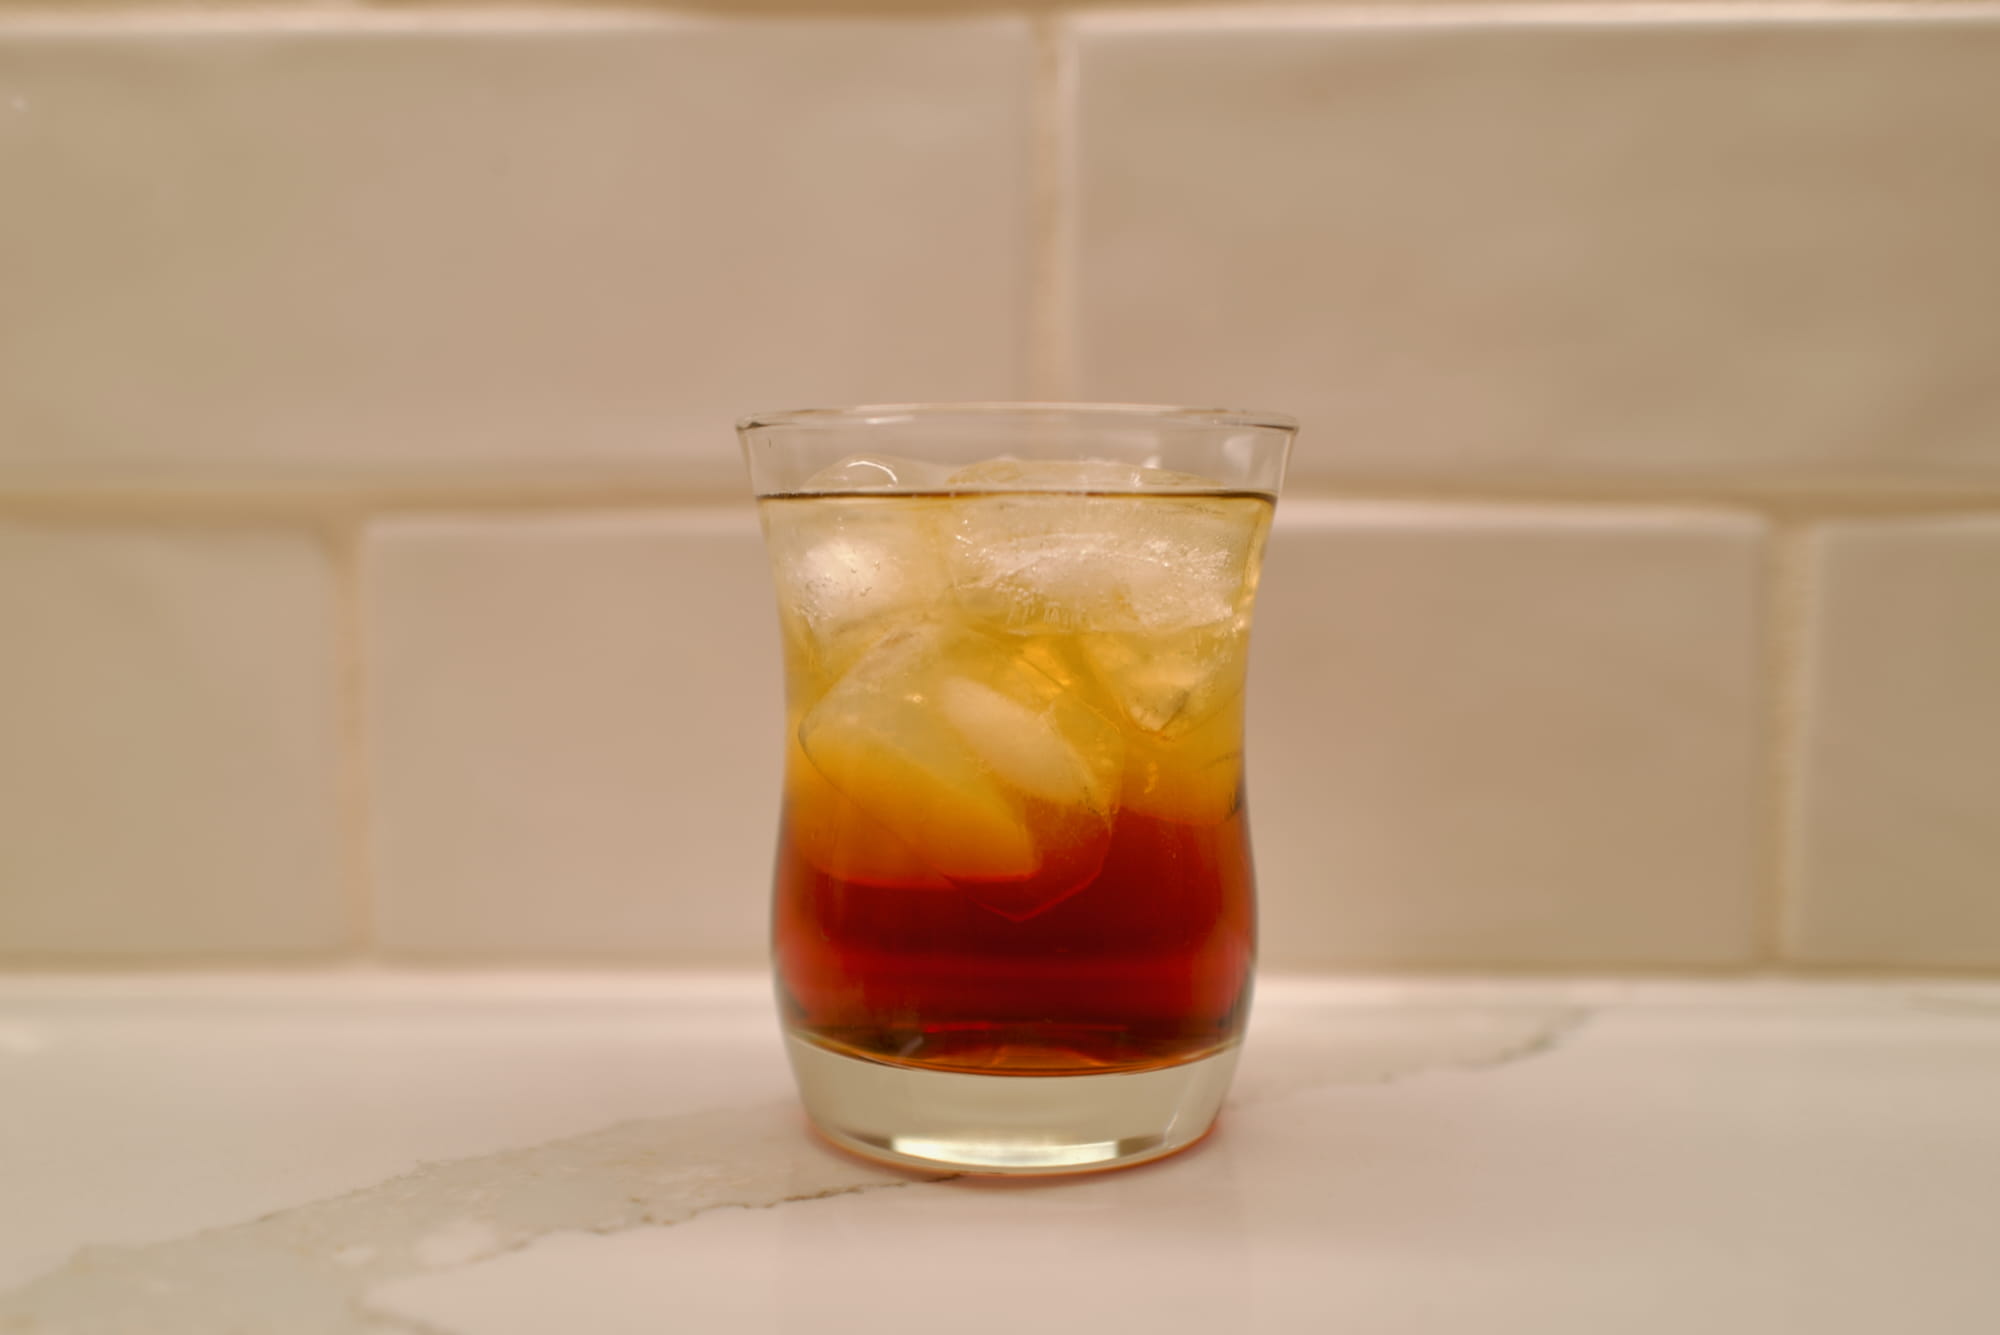
Fortunately, I found a cool glass and nicely colored drink, though I was resigned to the garnish (none) and props (lemon and three apples) being throwaway. I kept the bad props to have some record of depth of field and composition.
I think the biggest scene factors that detracted from the shots were the surface and backdrop.
Surface: Certain wood looks are in-style, and others look dated. Light-grained wood, especially with varnish on it, haven’t looked good for as long as I can remember. That’s what we had available, so that’s what we went with.
Takeaway: The surface is a huge element of the shot. If a nice texture isn’t naturally available in furniture, a mat (e.g., I think I’ve seen black reflective acrylic) seems like a great idea.
The backdrop wasn’t bad, in theory: a large window overlooking a Japanese maple tree. But several factors made it unideal:
- Framing: the window wasn’t big enough for the frame to be invisible. In practice, after cropping close-ups, the edges and top weren’t an issue, but the bottom was. This aspect could have been solved by elevating the stage.02
- Reflections: the window reflects light (think: flash).
- Lighting: the window was also the biggest source of natural light. More on that in a second.
Lighting
The lighting came from the window itself. Due to angle and time of day, there was no direct light coming in, so we only had ambient light.
I couldn’t figure out a good way to get this to work.
I’ve read that back-lighting is ideal for drinks. But if you’re shooting directly into the light, I think you’ll have trouble exposing the scene correctly.03 So I think in practice, this amounts to the light being as far back as possible, while not directly hitting the camera. In other words, back and right or back and left.
The problem is that since the window provides both the backdrop and the light, there’s no way to decouple light and background.
The bigger issue was just that there wasn’t enough light to get the drink bright and beautiful. I first added the only other light readily available: the overhead room light. This is how all the non-flash shots are lit. Now that I’m writing about this, I’m kicking myself because there’s an obvious solution I didn’t try: lamps!
Takeaway: Don’t forget about lamps!
Once we started adding flash, I closed the blinds on the window to cut reflections, which makes the backdrop boring.
I really wish I had been able to try shots with some nice direct sunlight.
Takeaway: Direct sunlight is huge. Replacing it entirely with artificial lights requires substantial equipment and work.
Distance
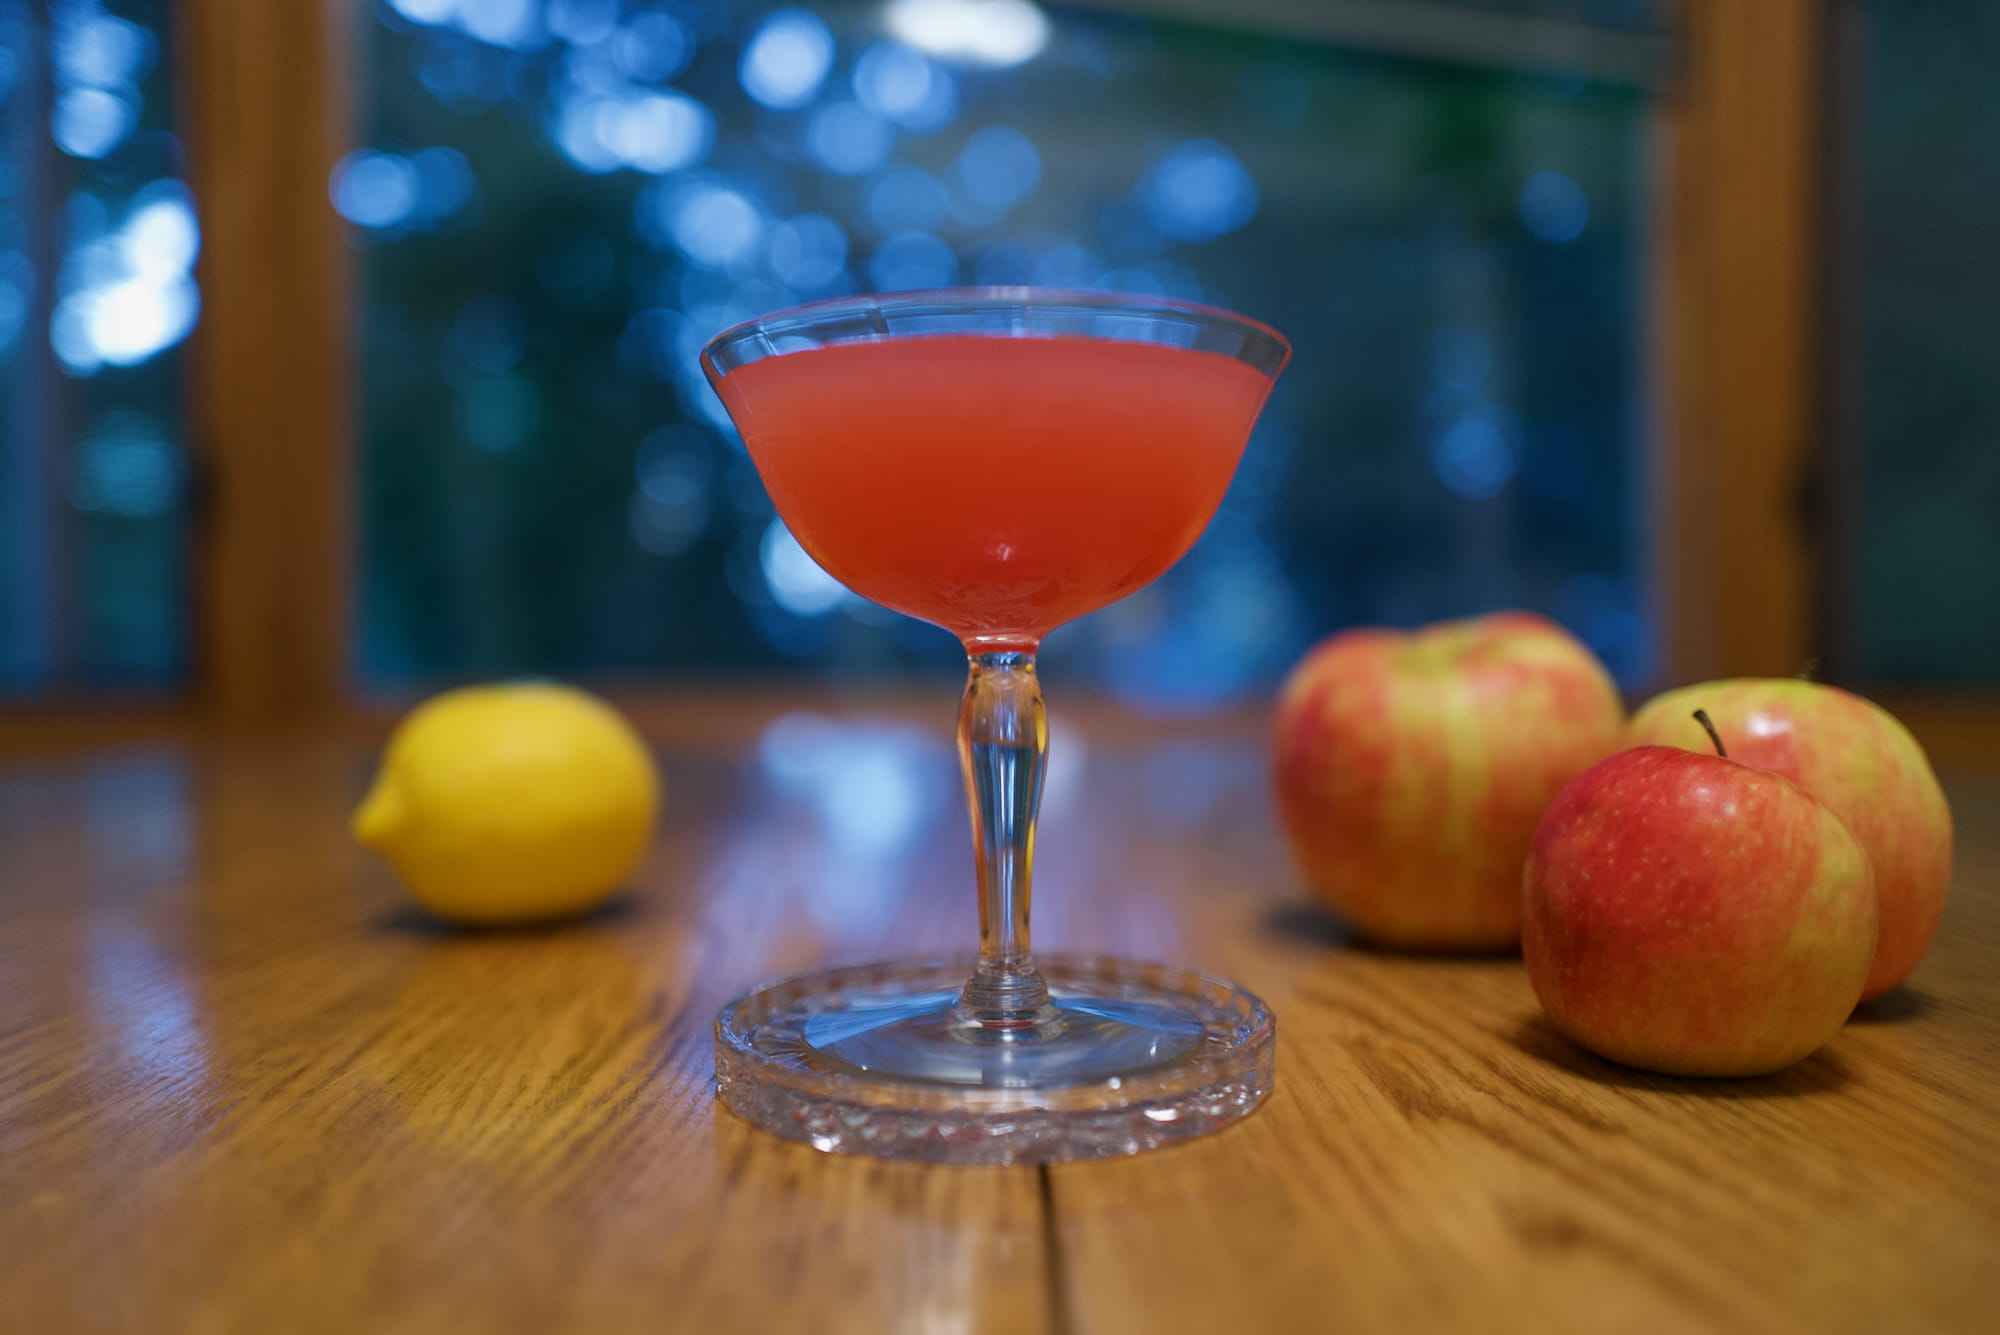
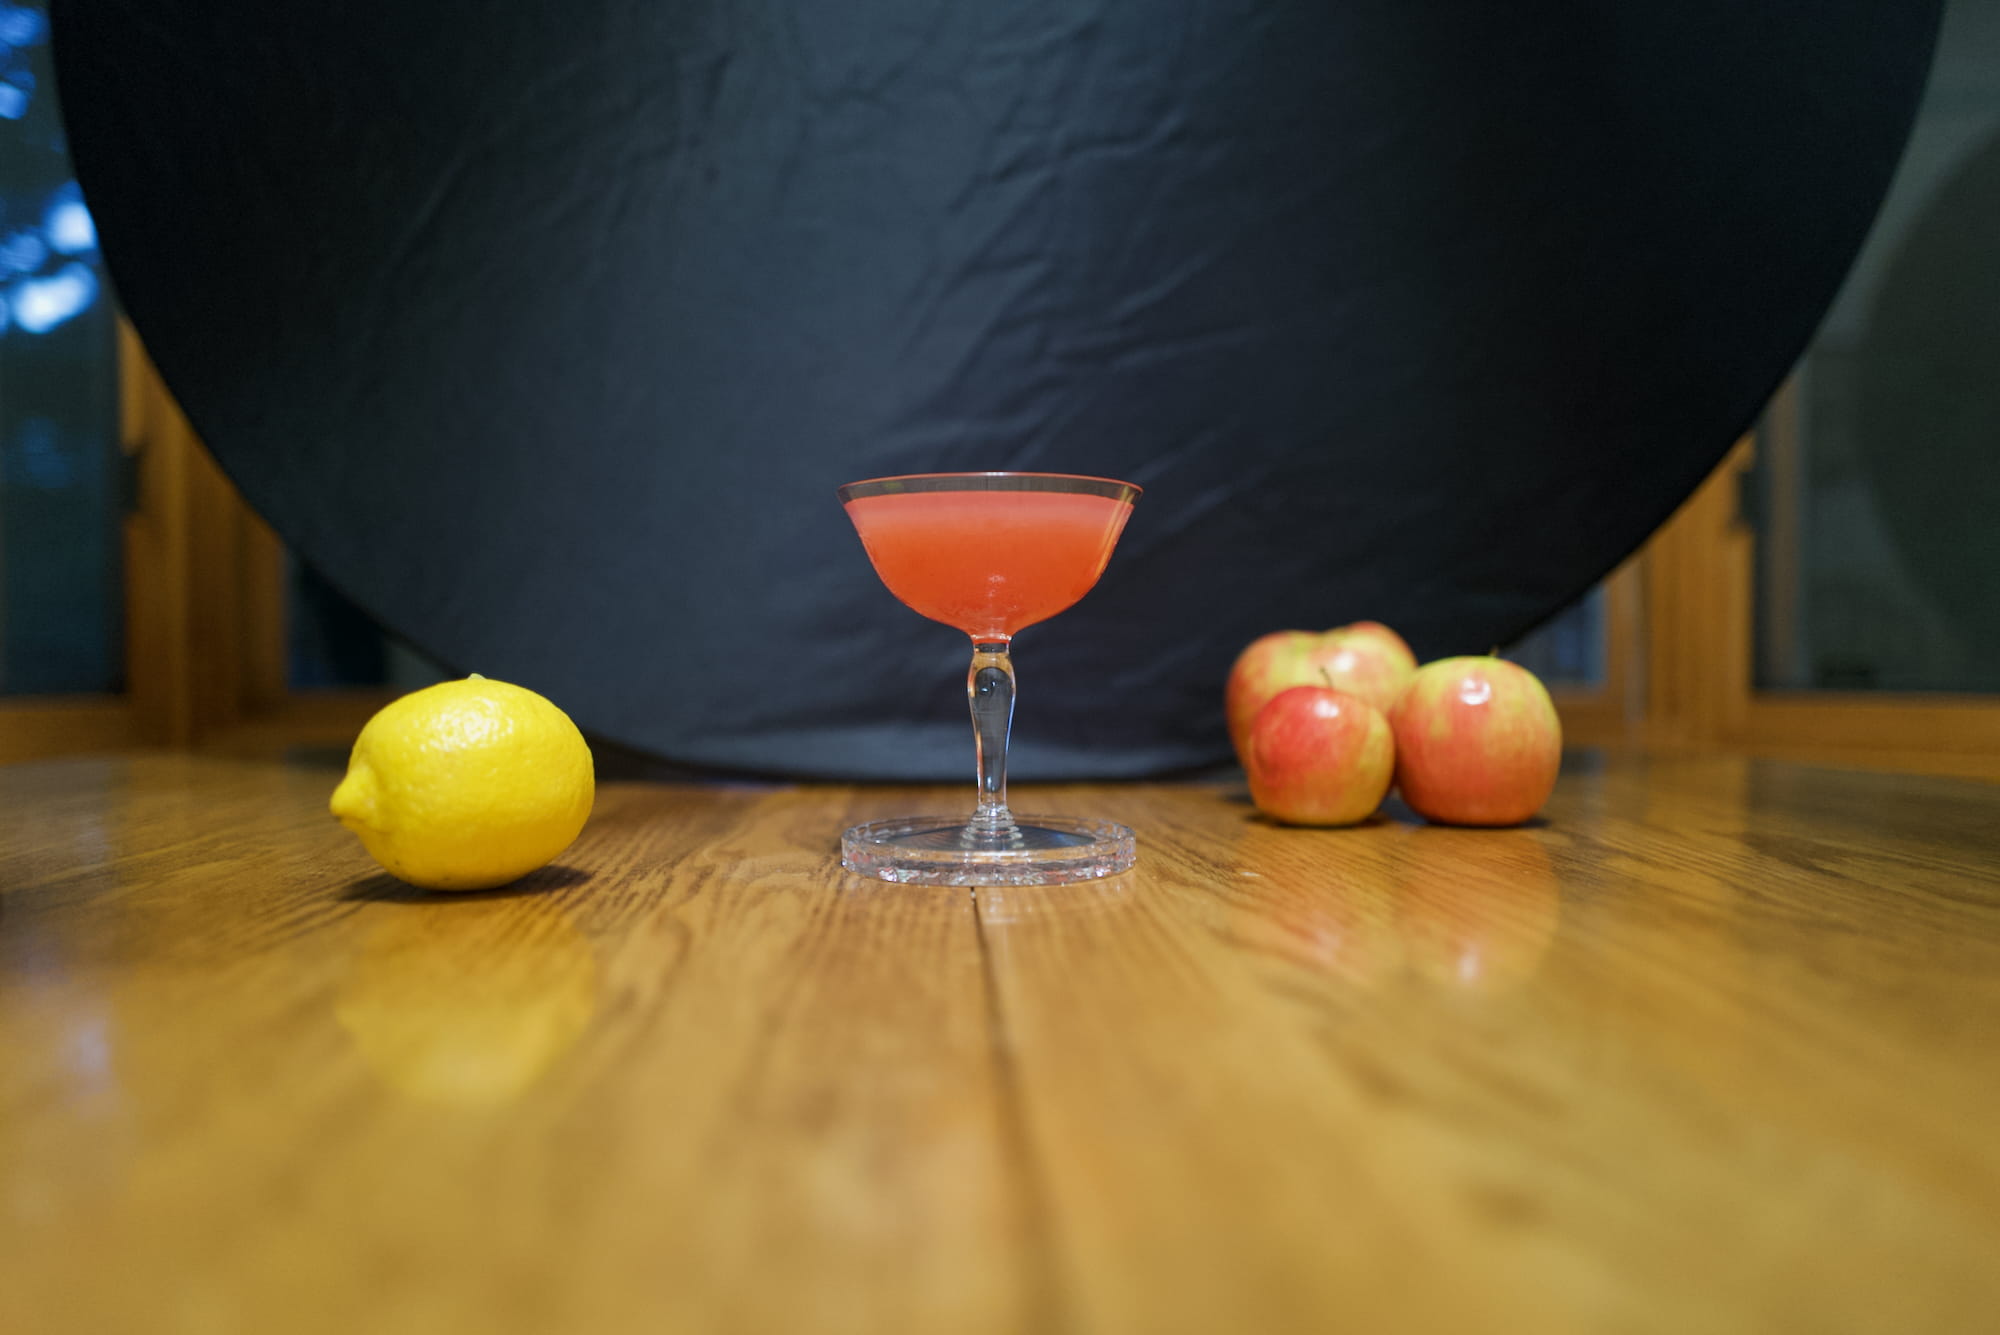
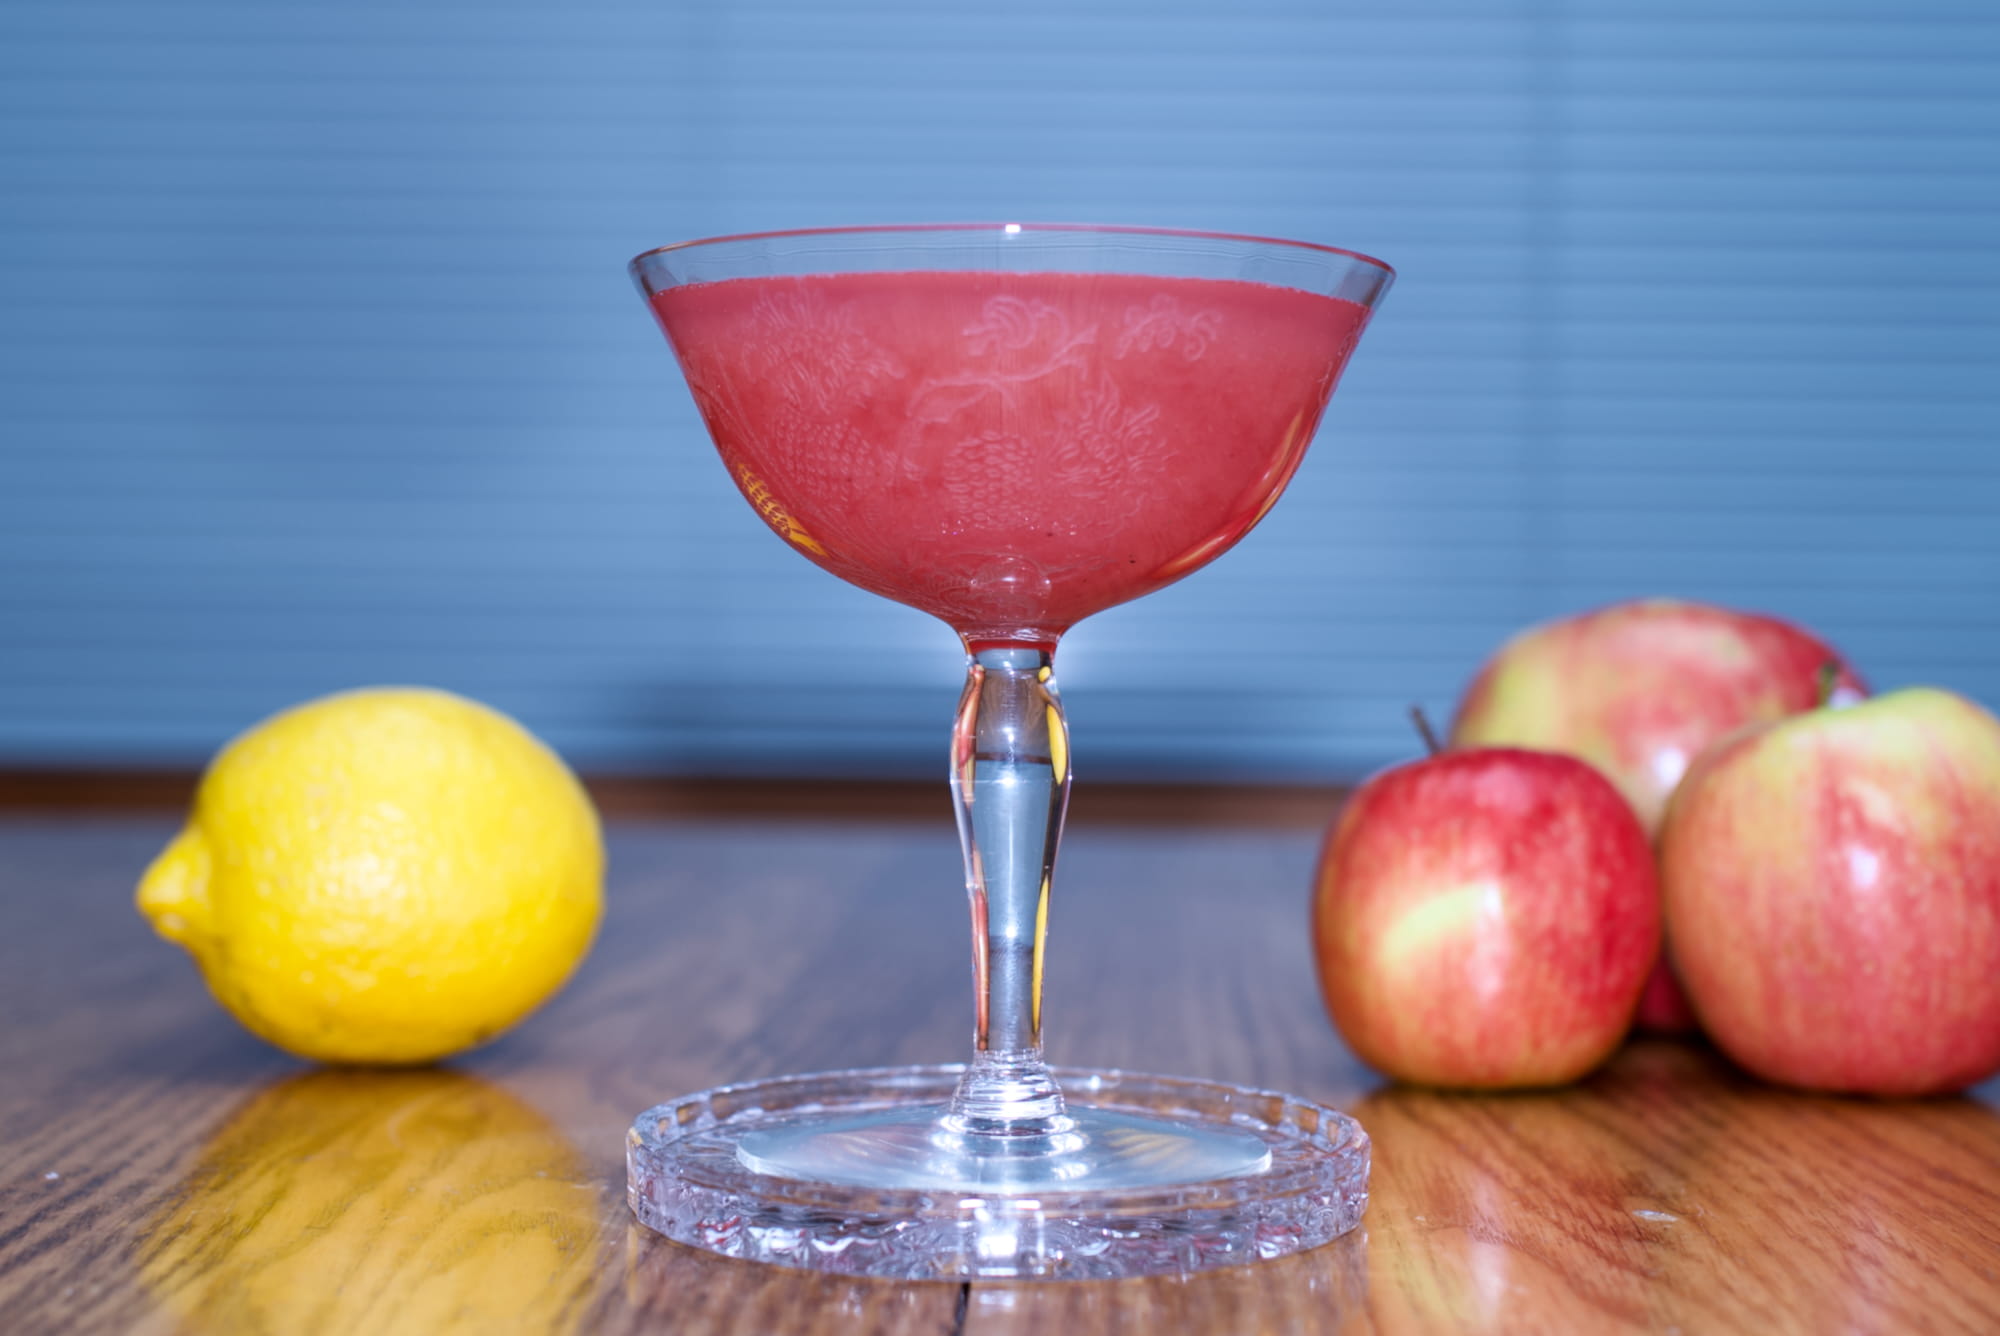
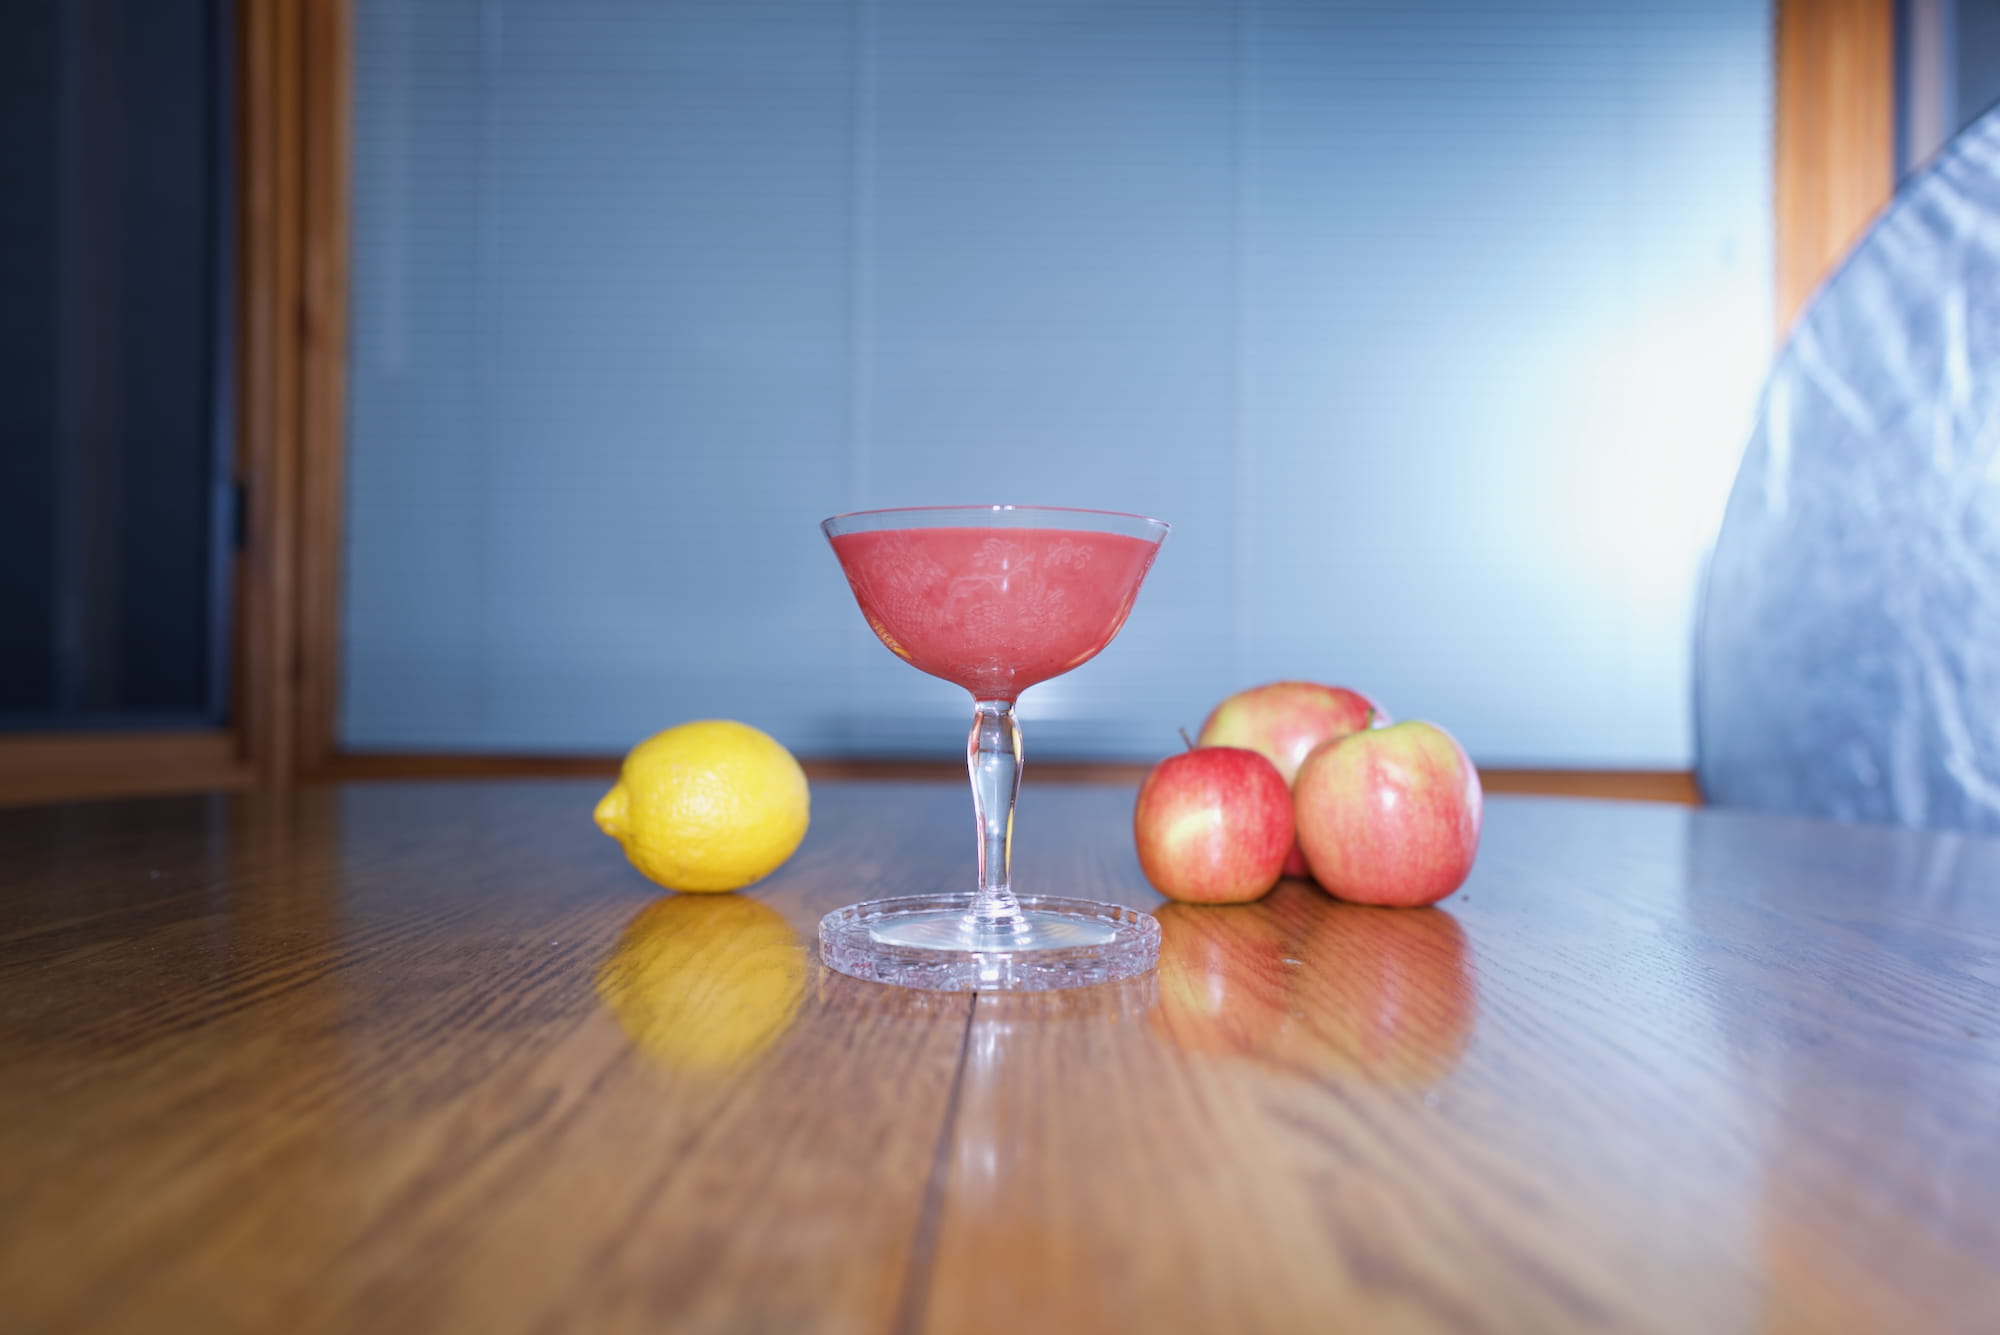
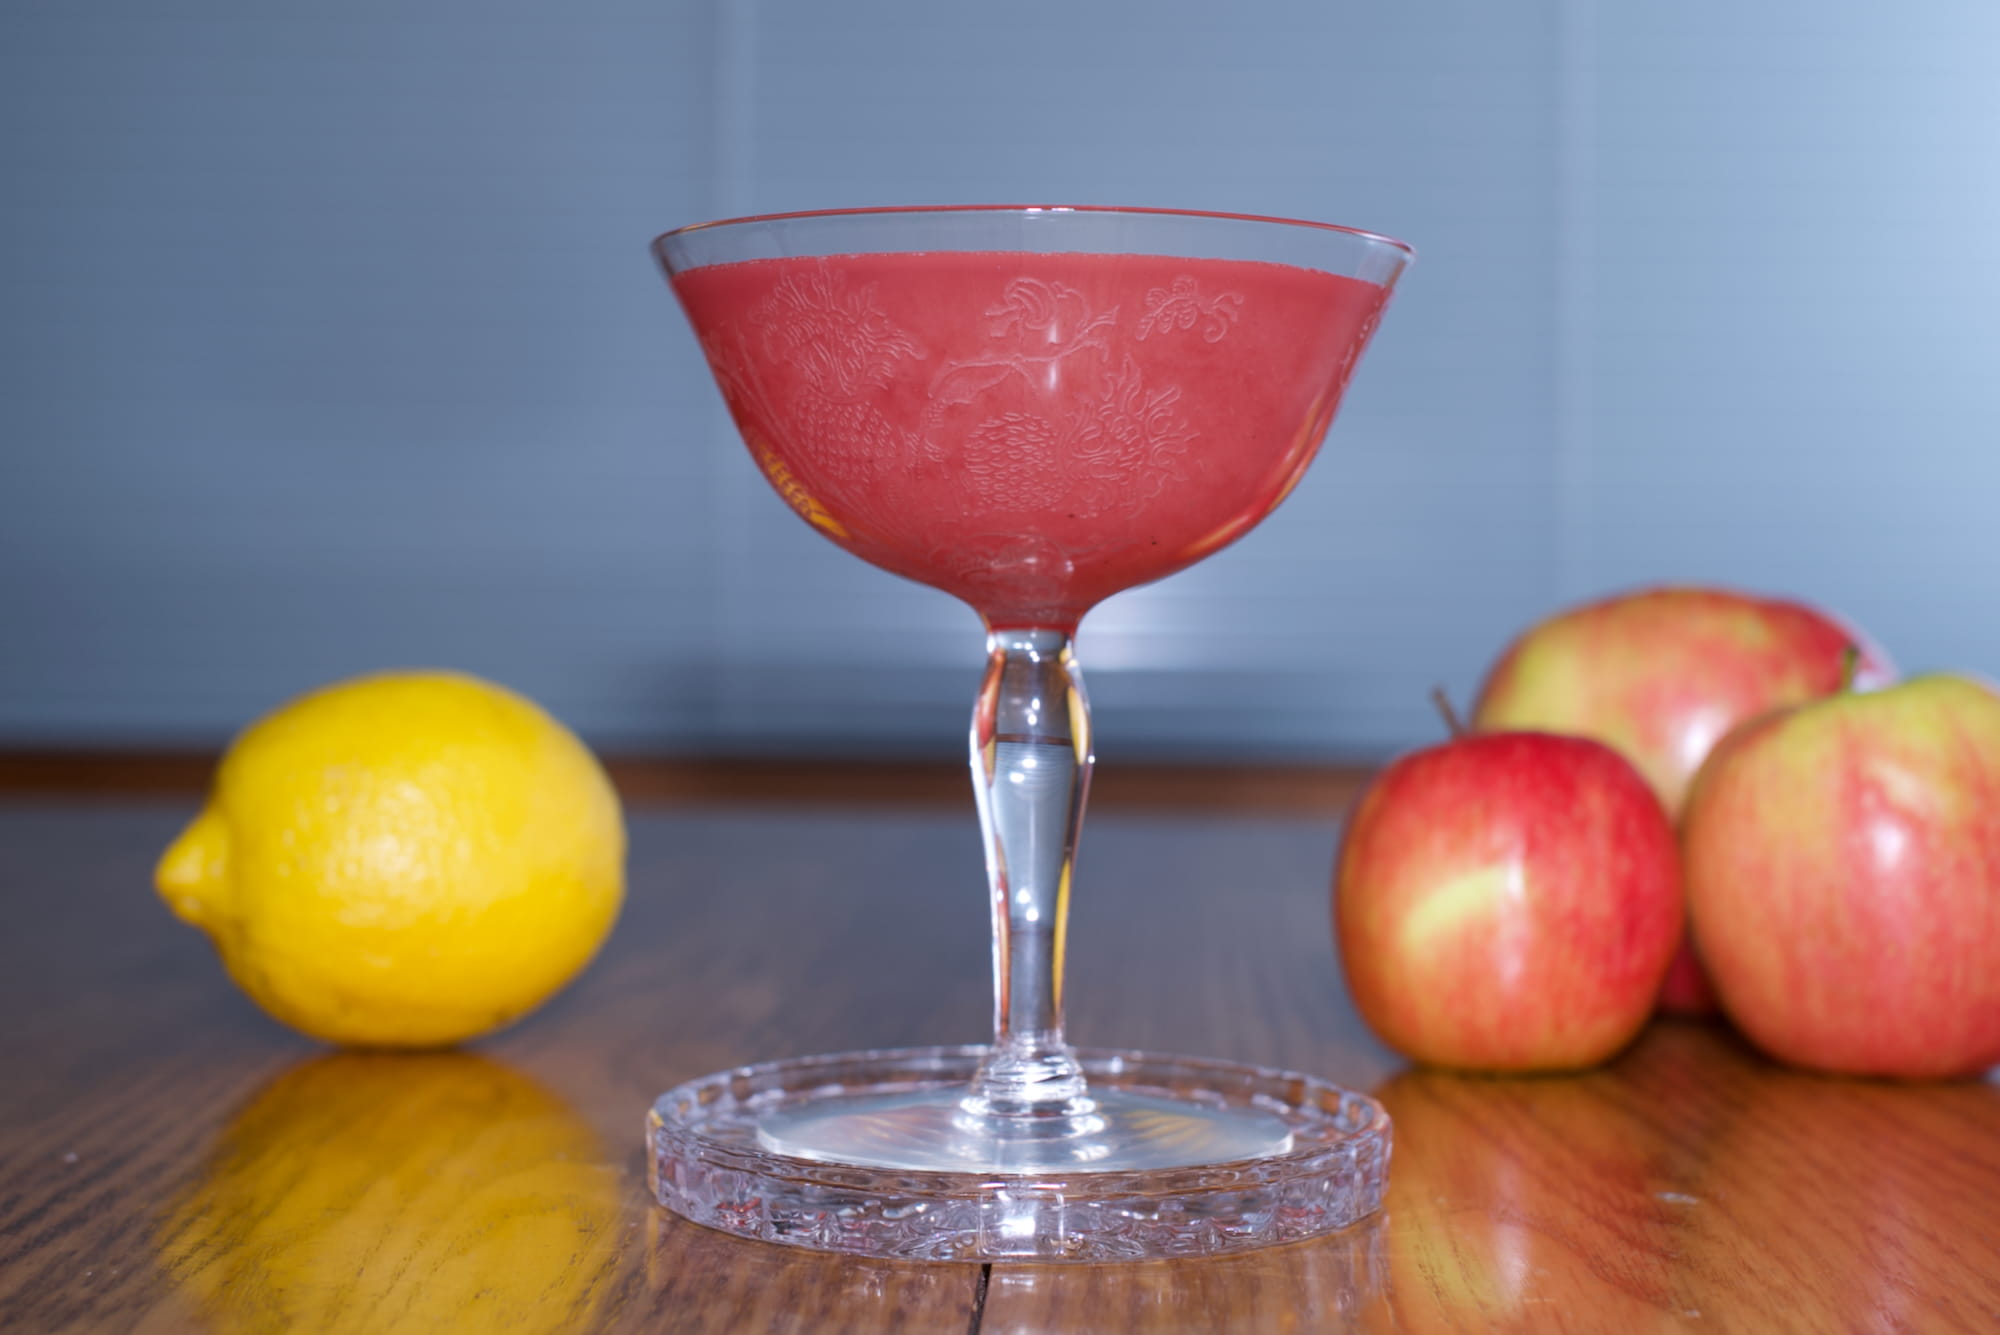
Because the Q2 has a wide focal length (28mm), I knew I wanted to experiment with placing the drink closer or further away. Closer placement makes the drink bigger in the photo, but creates the optical distortion effect where the center bulges out. Further placement mitigates this, though has two side effects: (1) cropping is necessary (fine), (2) depth of field will be widened (also probably fine).04 One additional side effect I didn’t anticipate was (3) close-up placement goes into the macro range. This is fine, though it does narrow the widest aperture from f1.7 (normal) up to f2.8 (macro).05
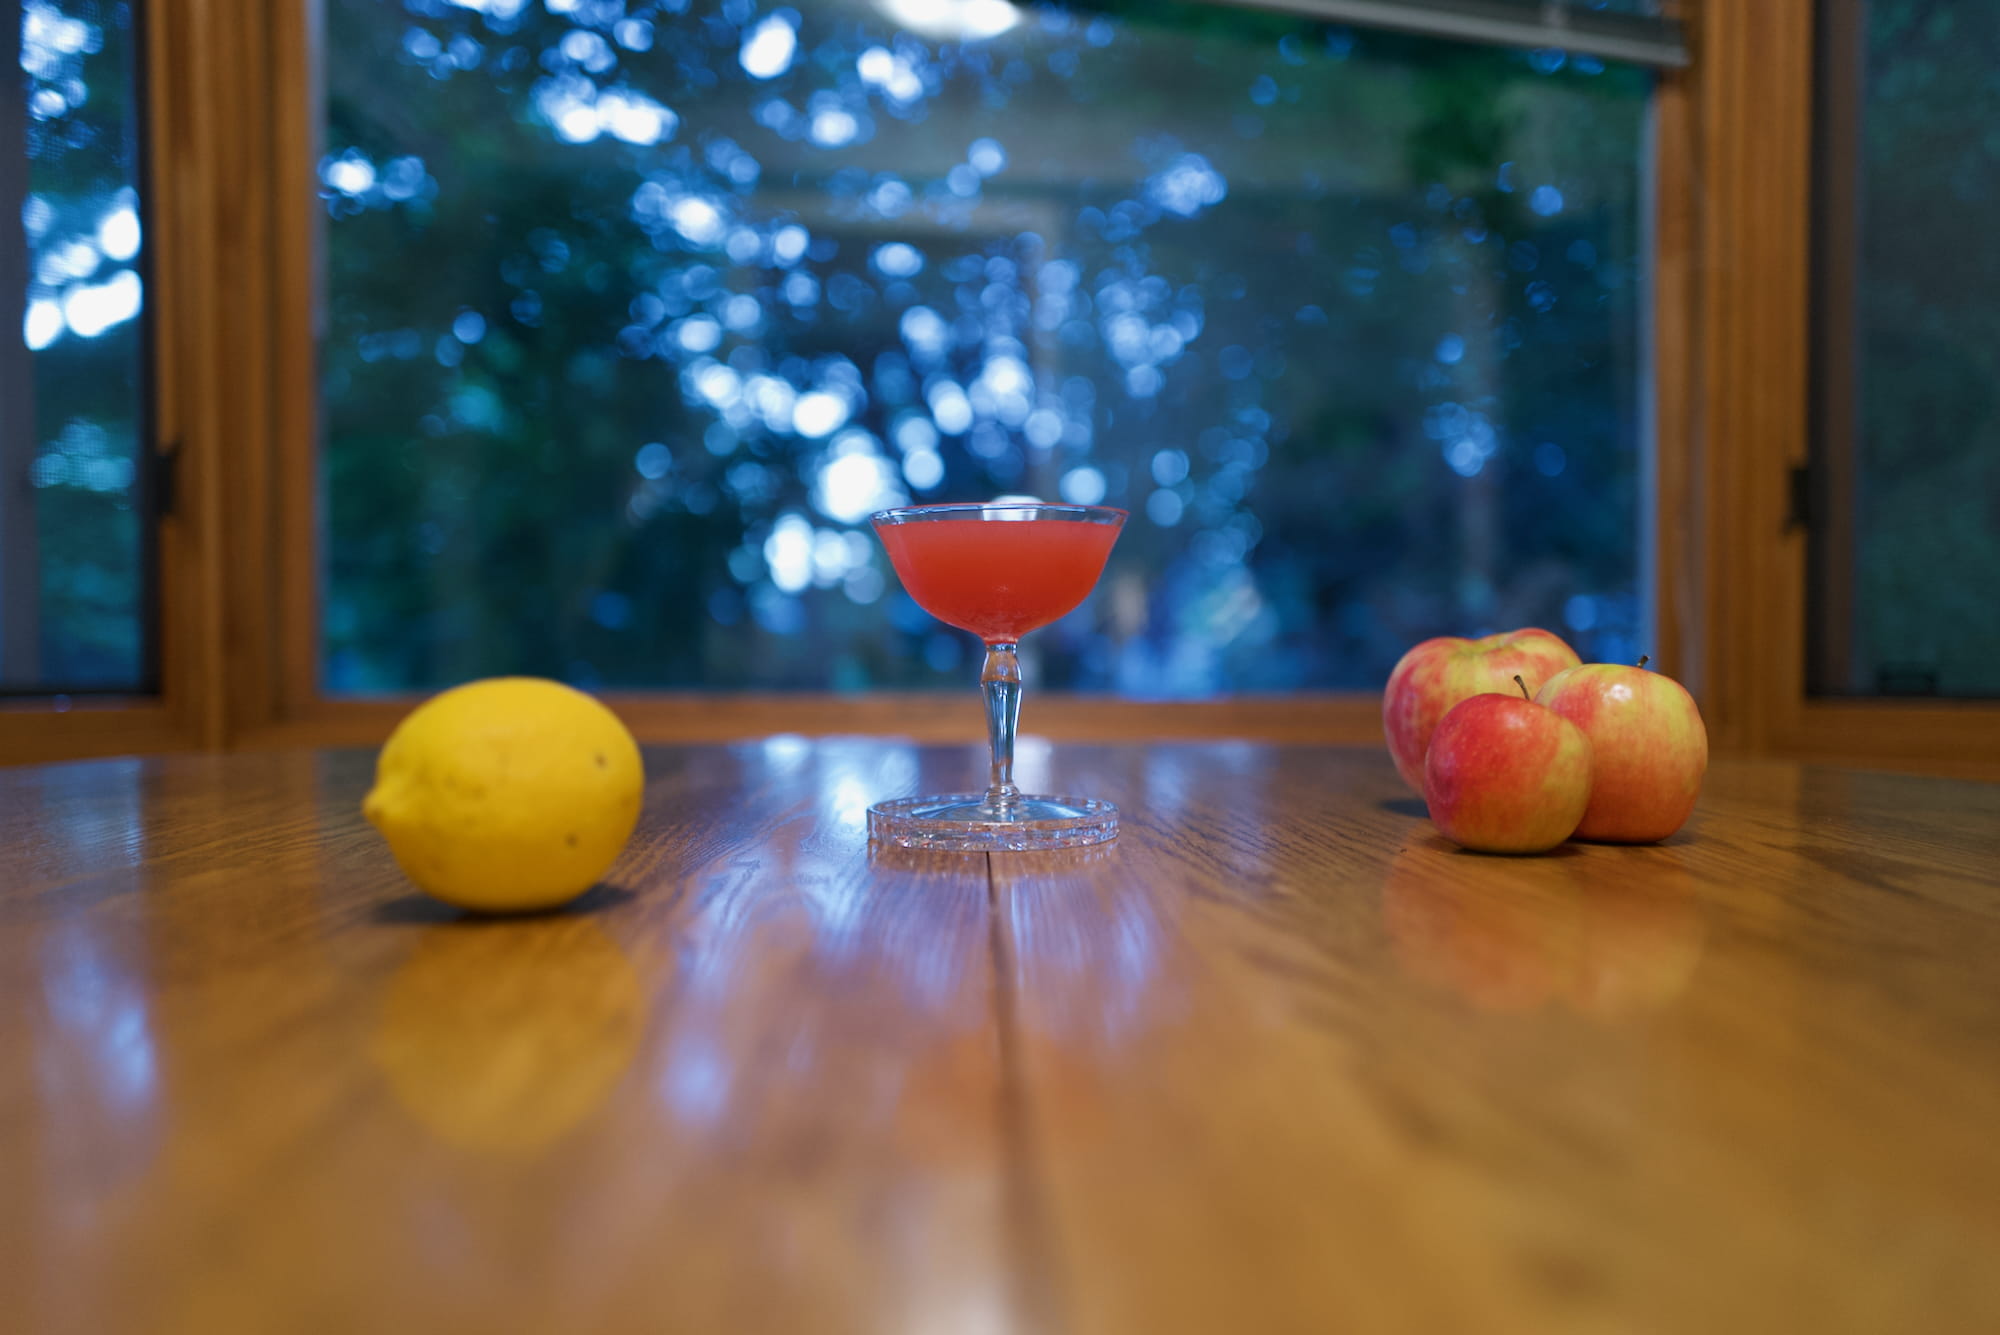
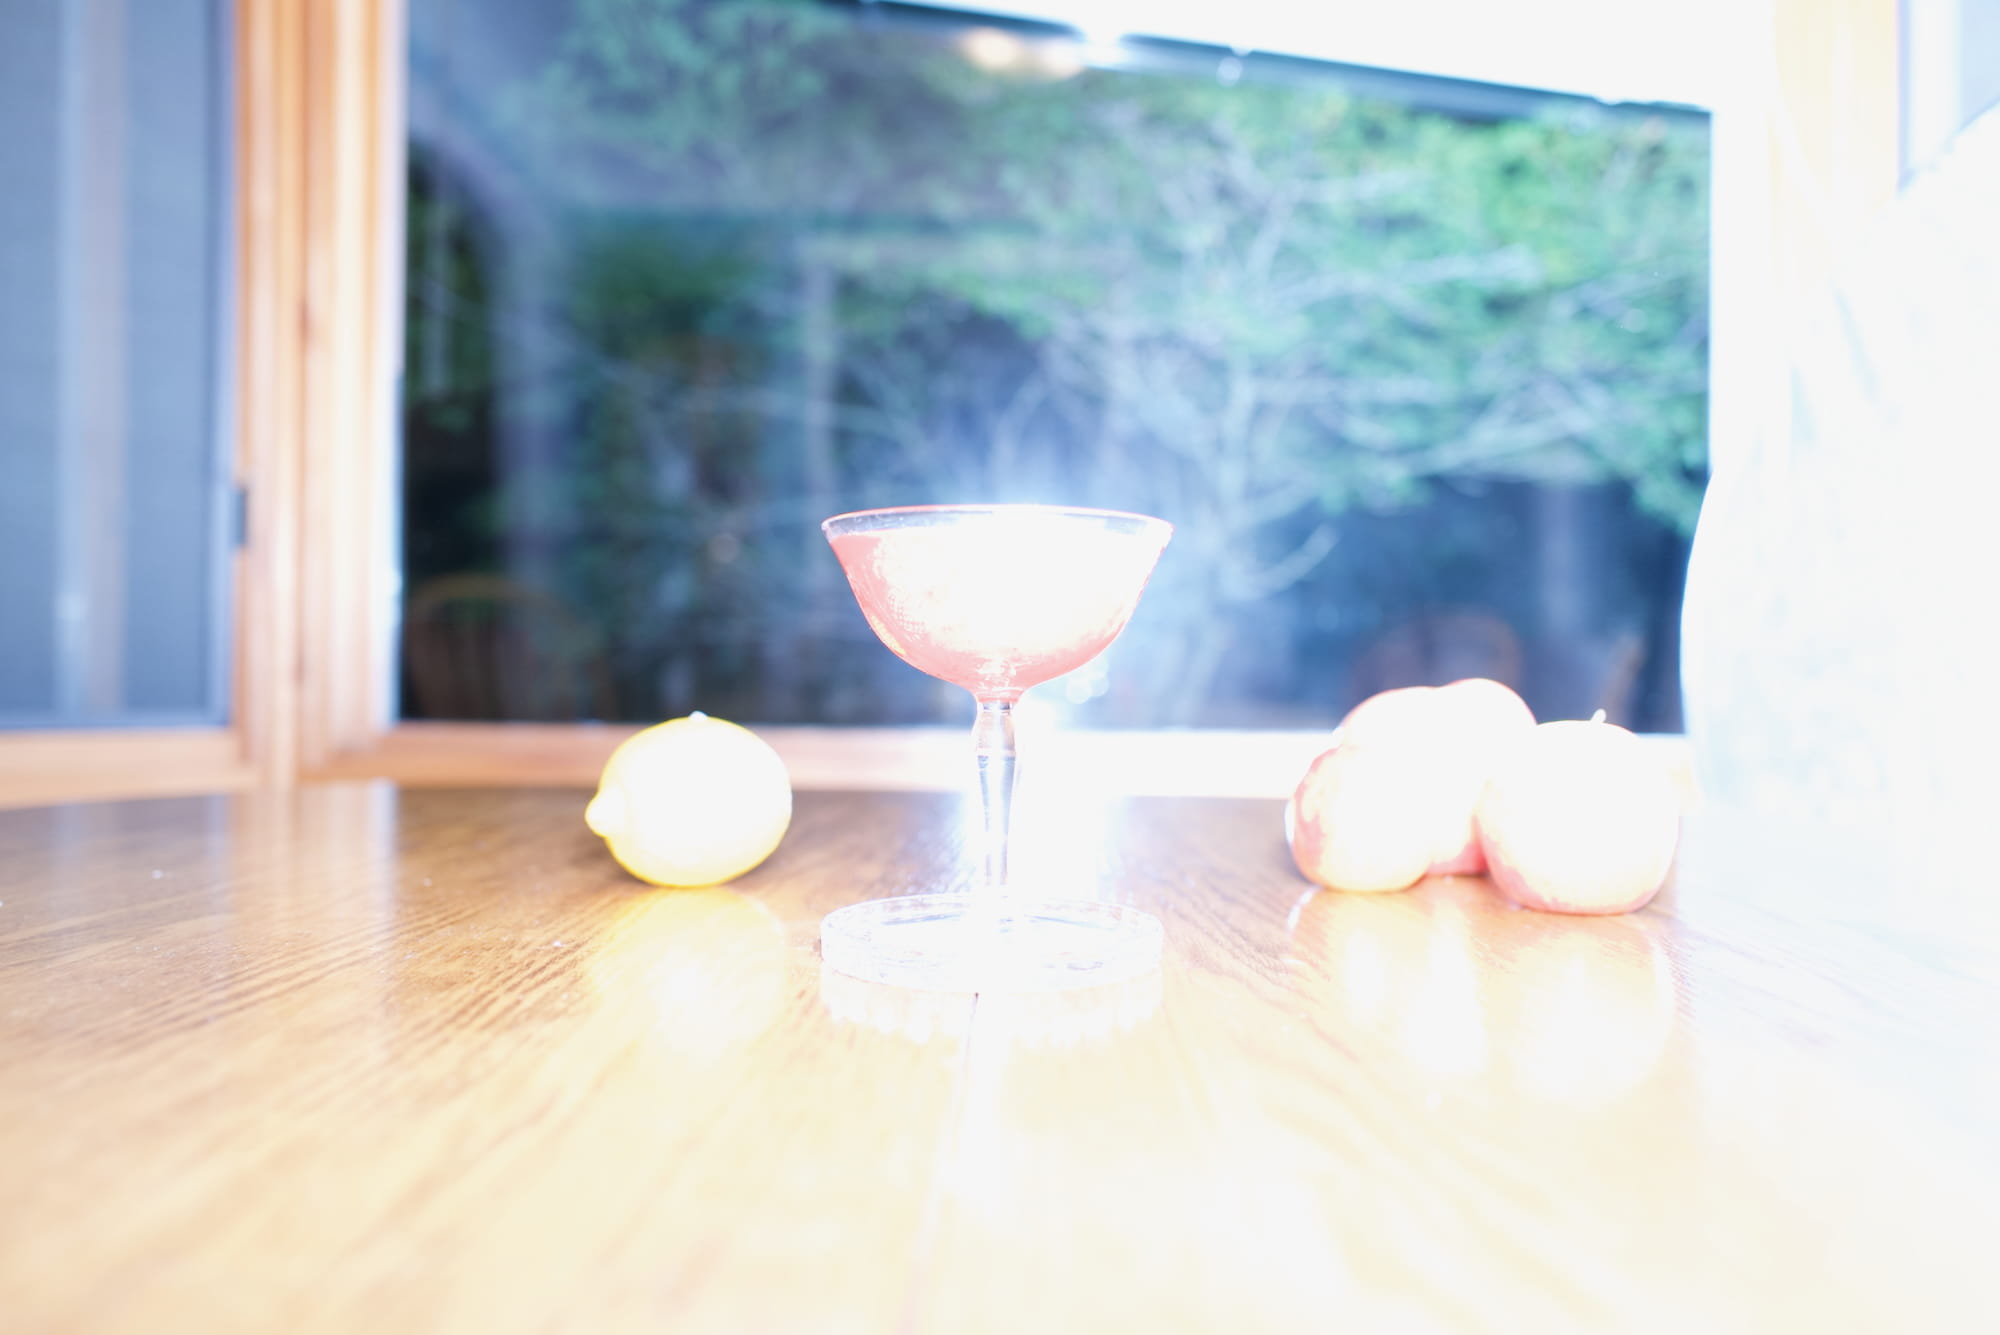
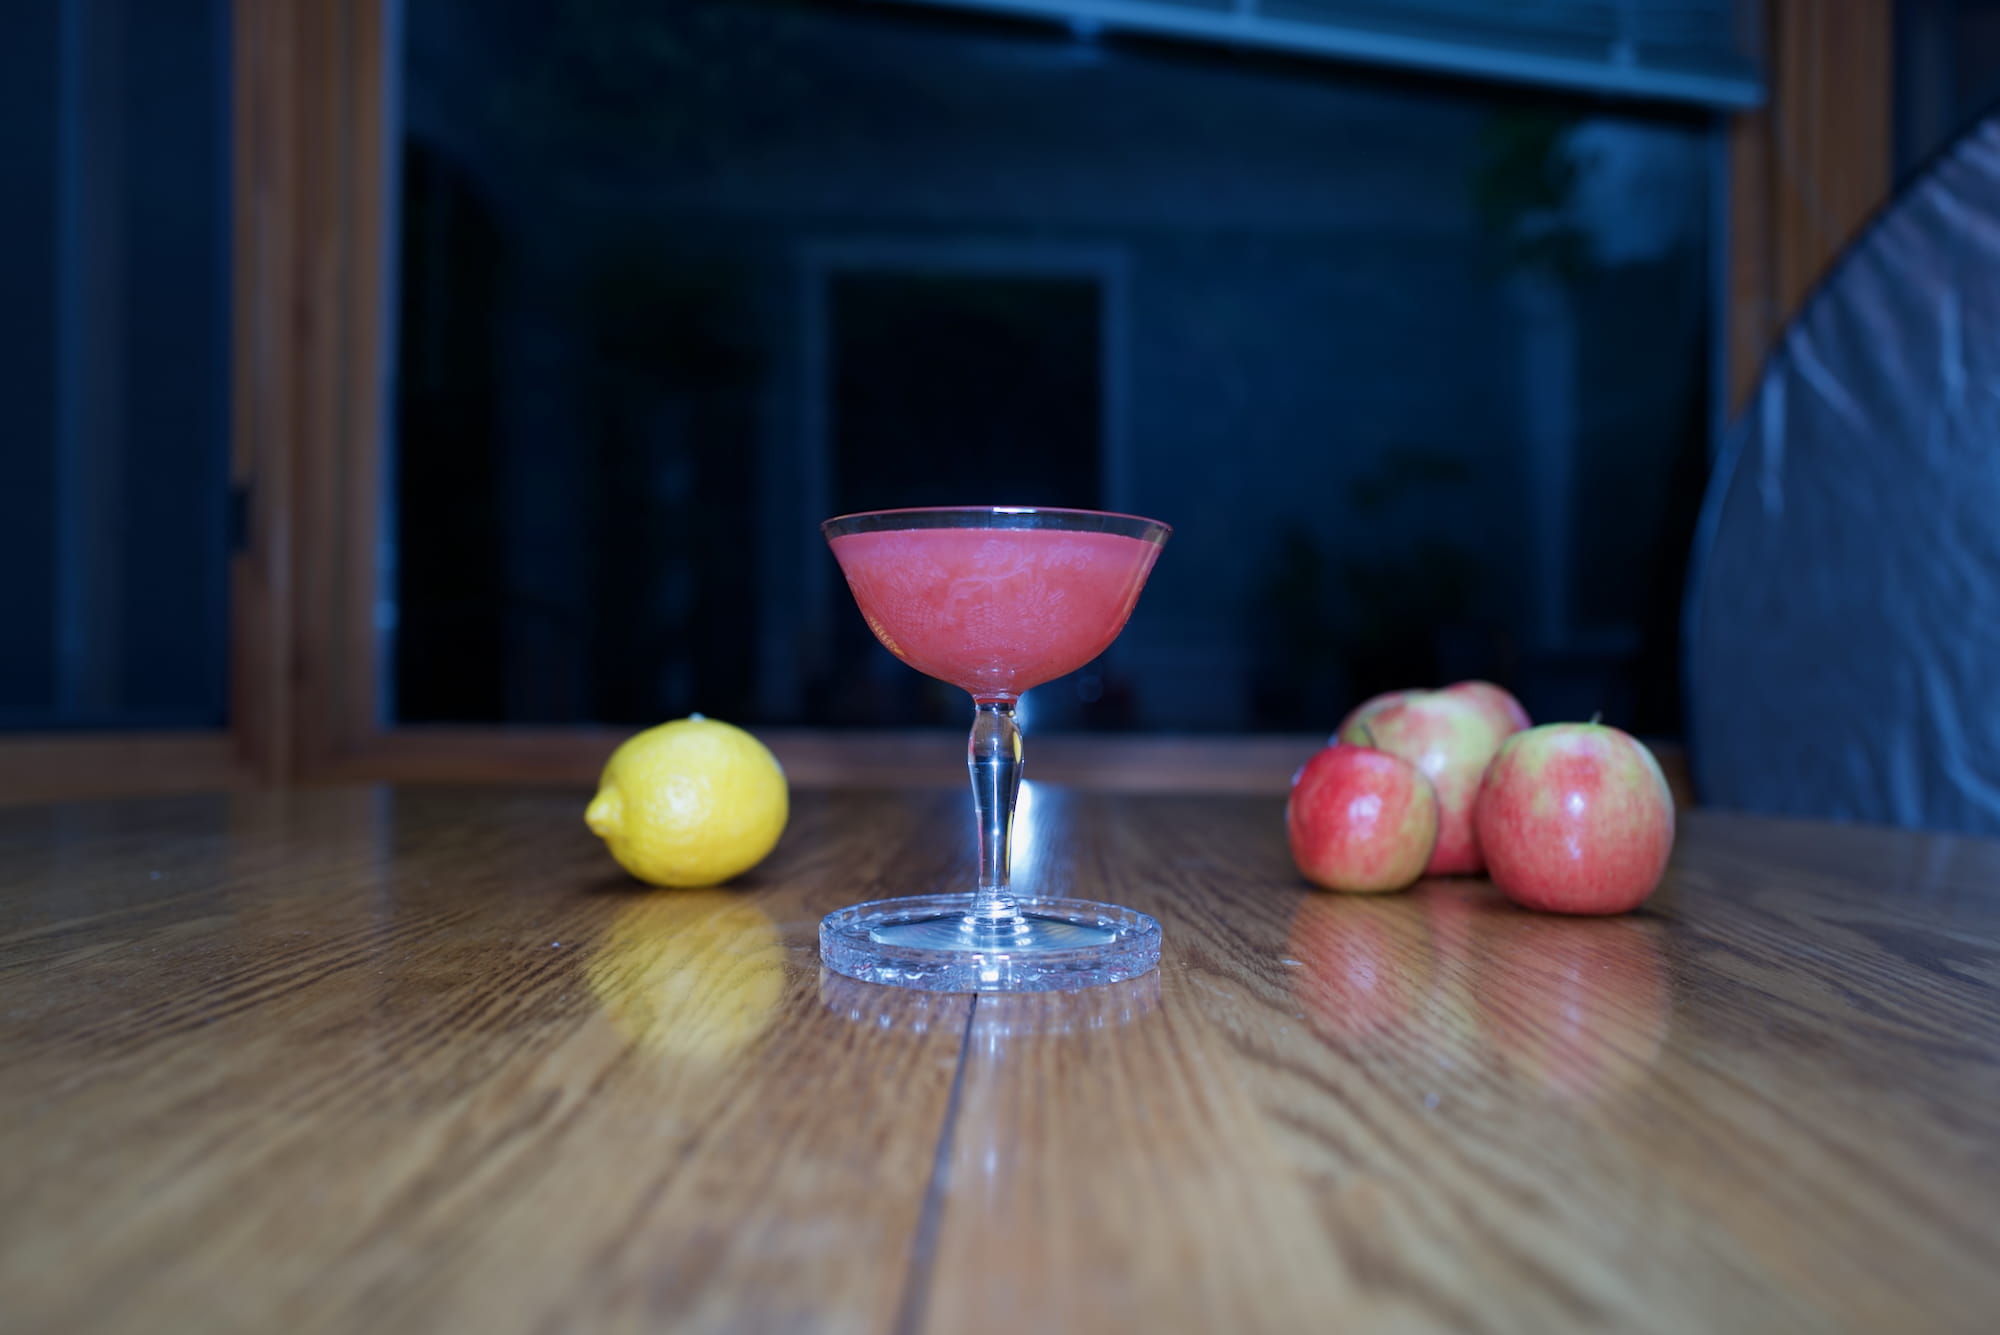
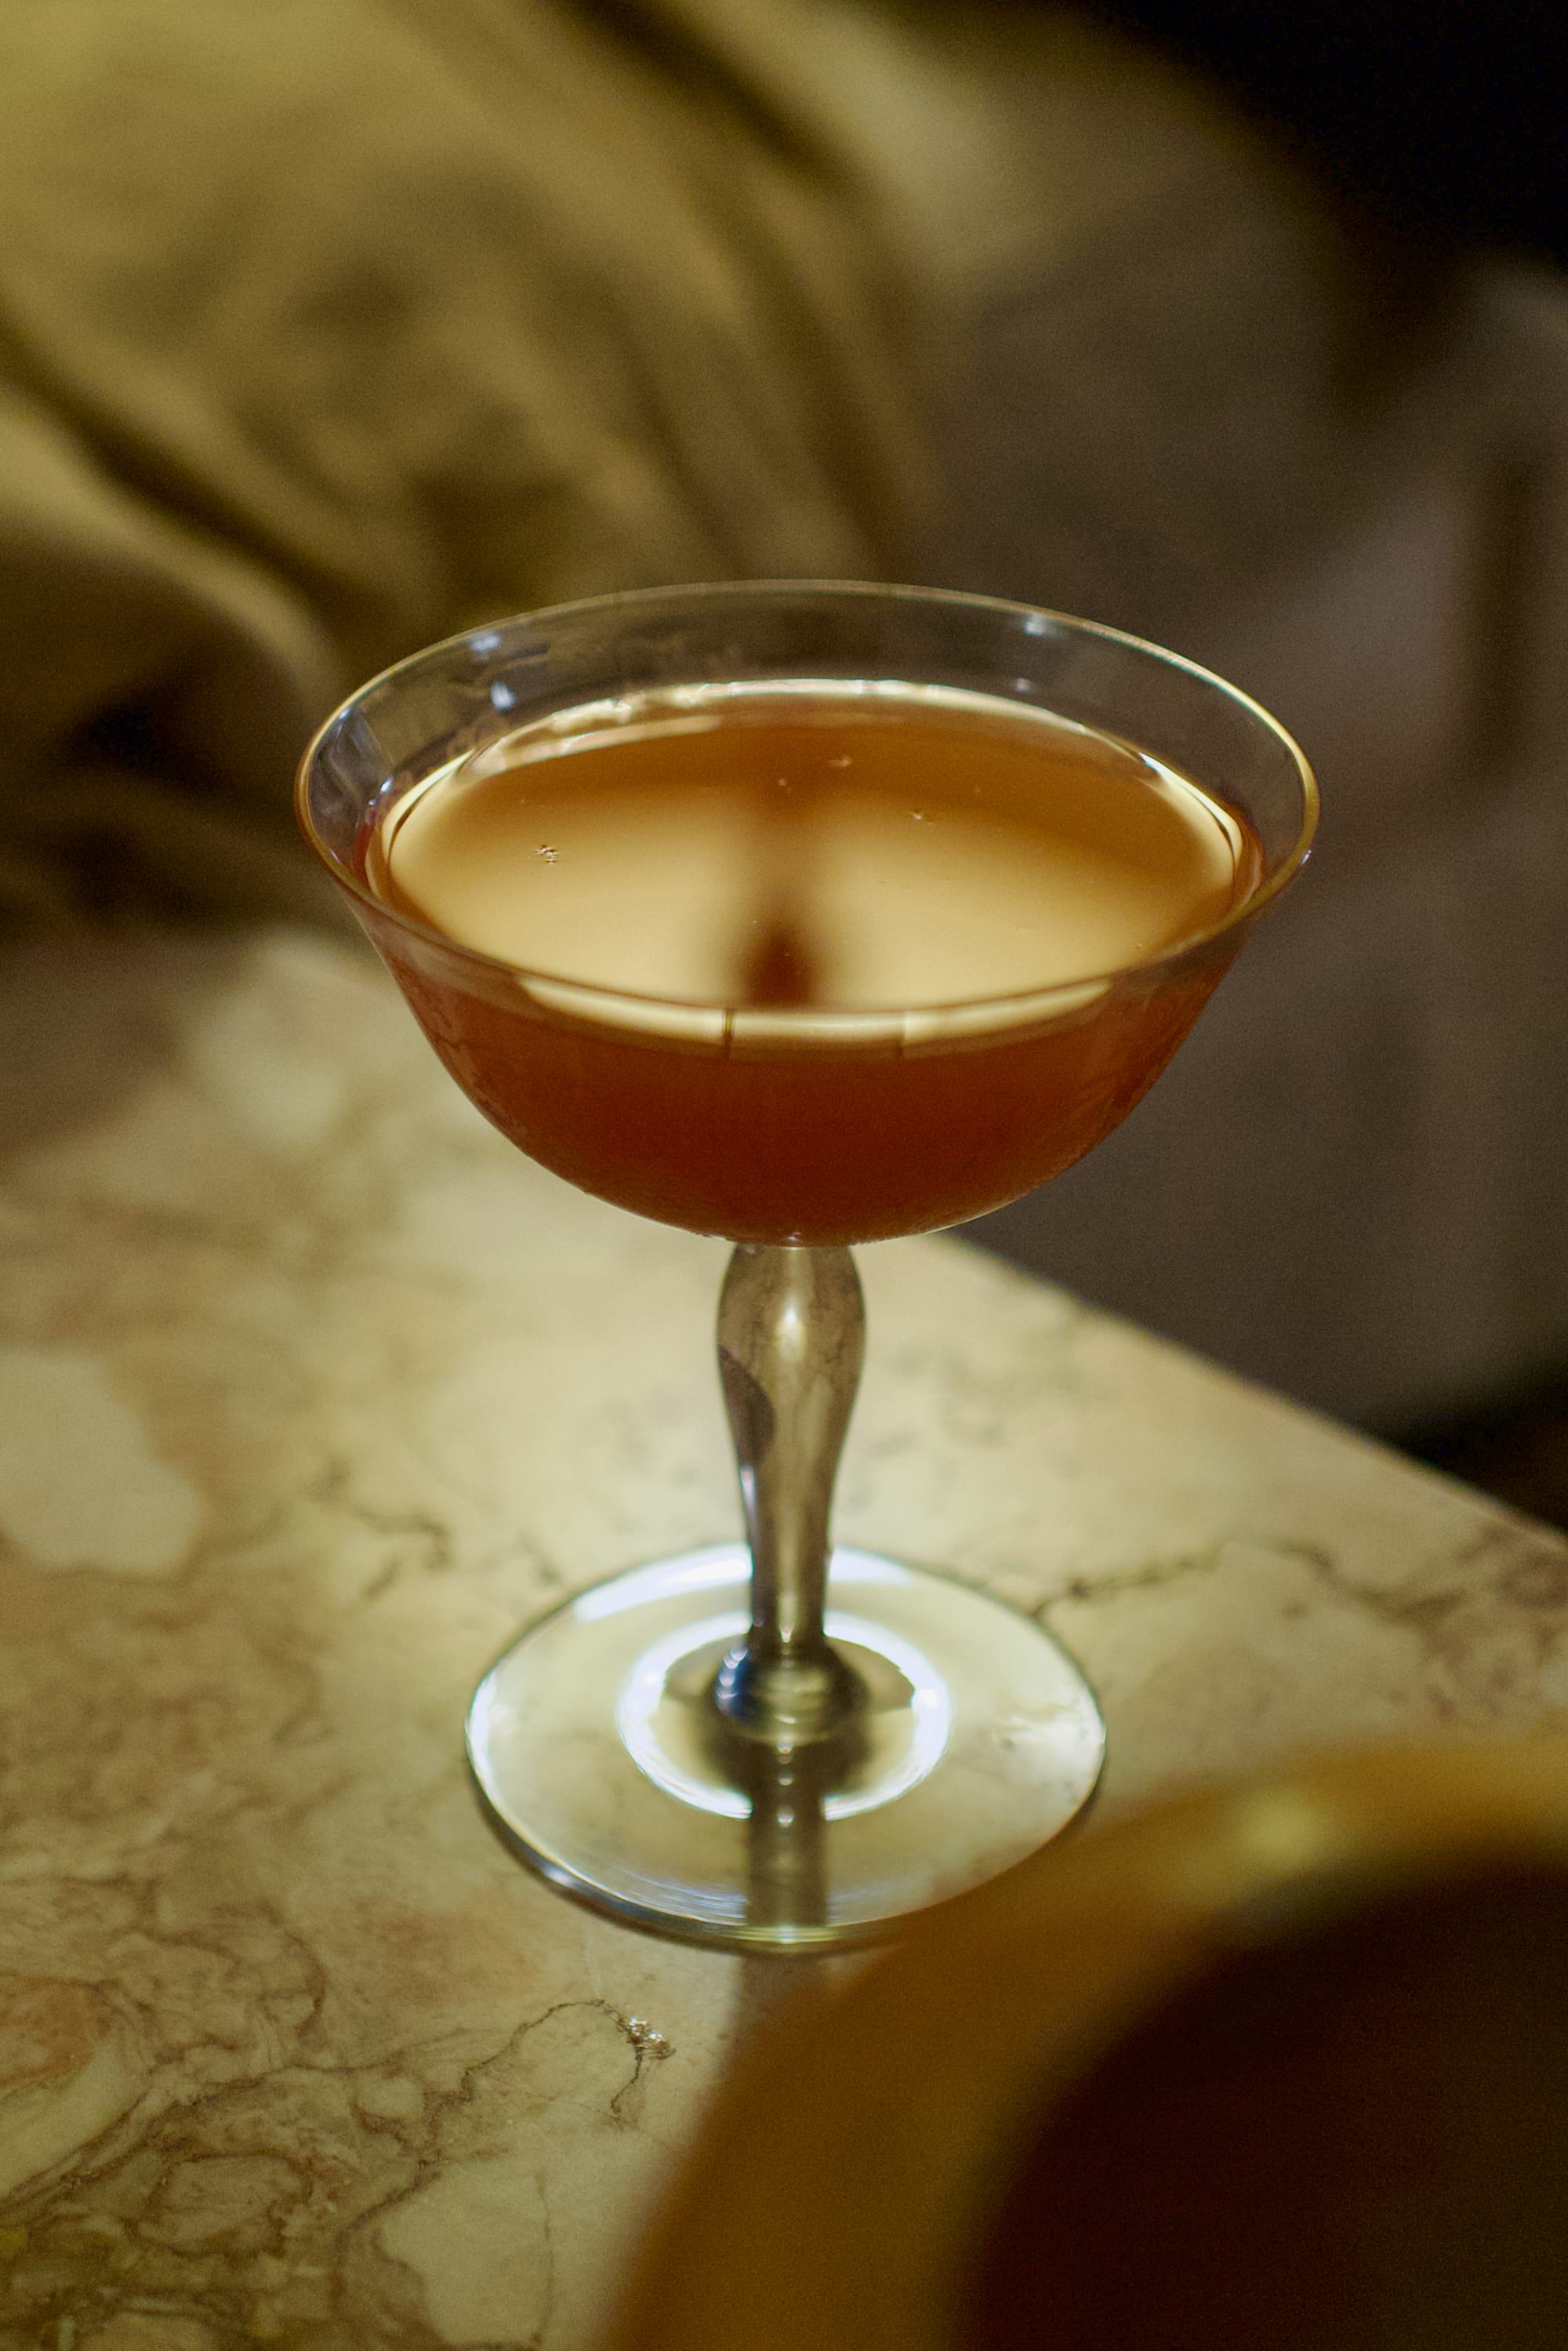
Left: Further placement. Note the glass’s upper lip is relatively straight. [f1.7, 1/250s, ISO 1250]
Right: Close placement. Note that now the glass’s upper lip arcs higher. [f1.7, 1/250s, ISO 1250]

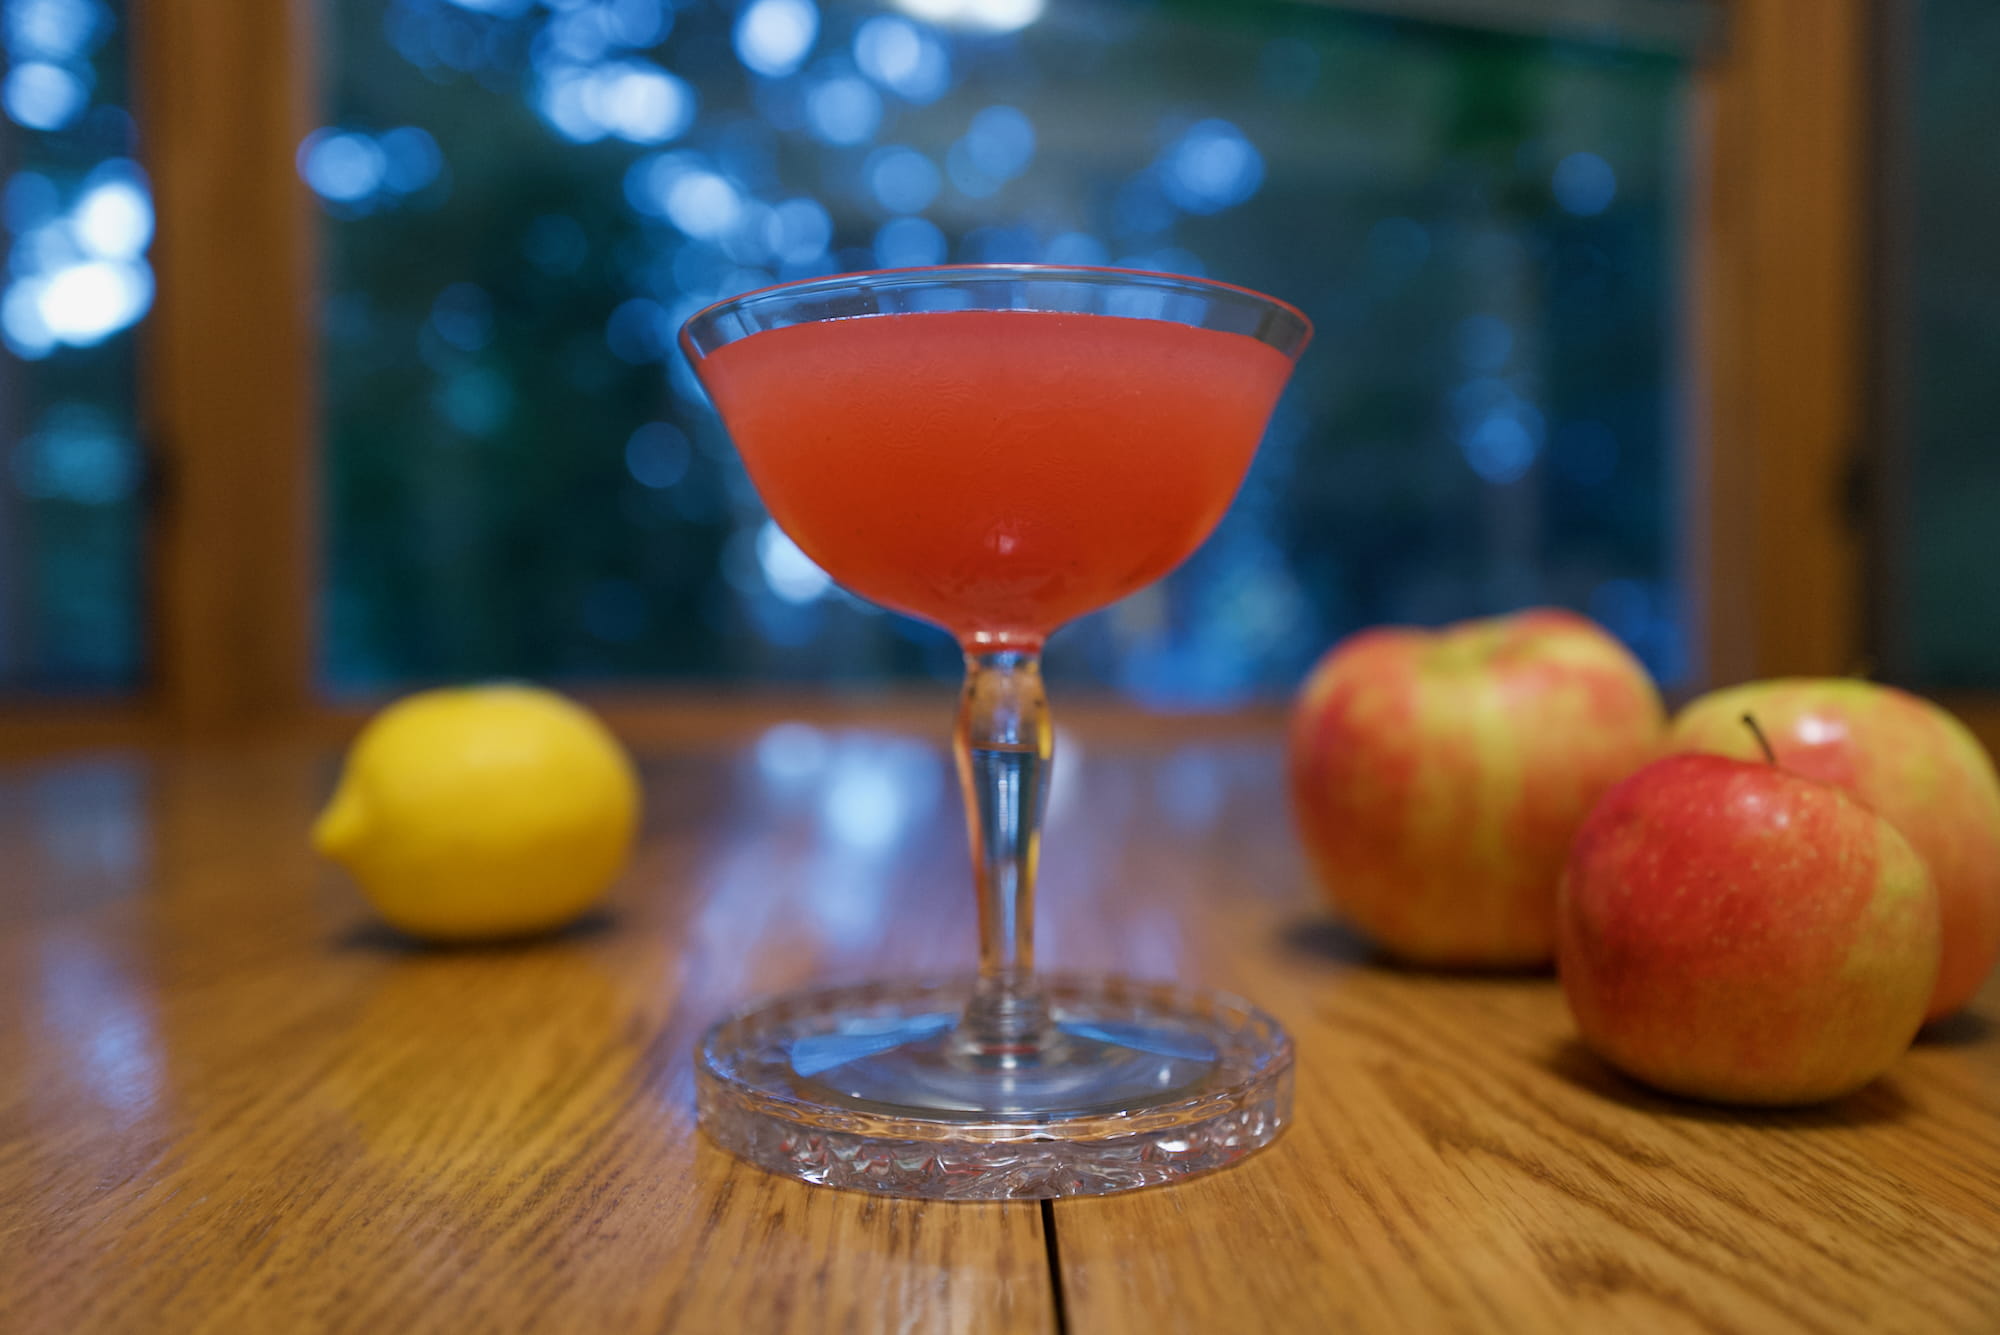
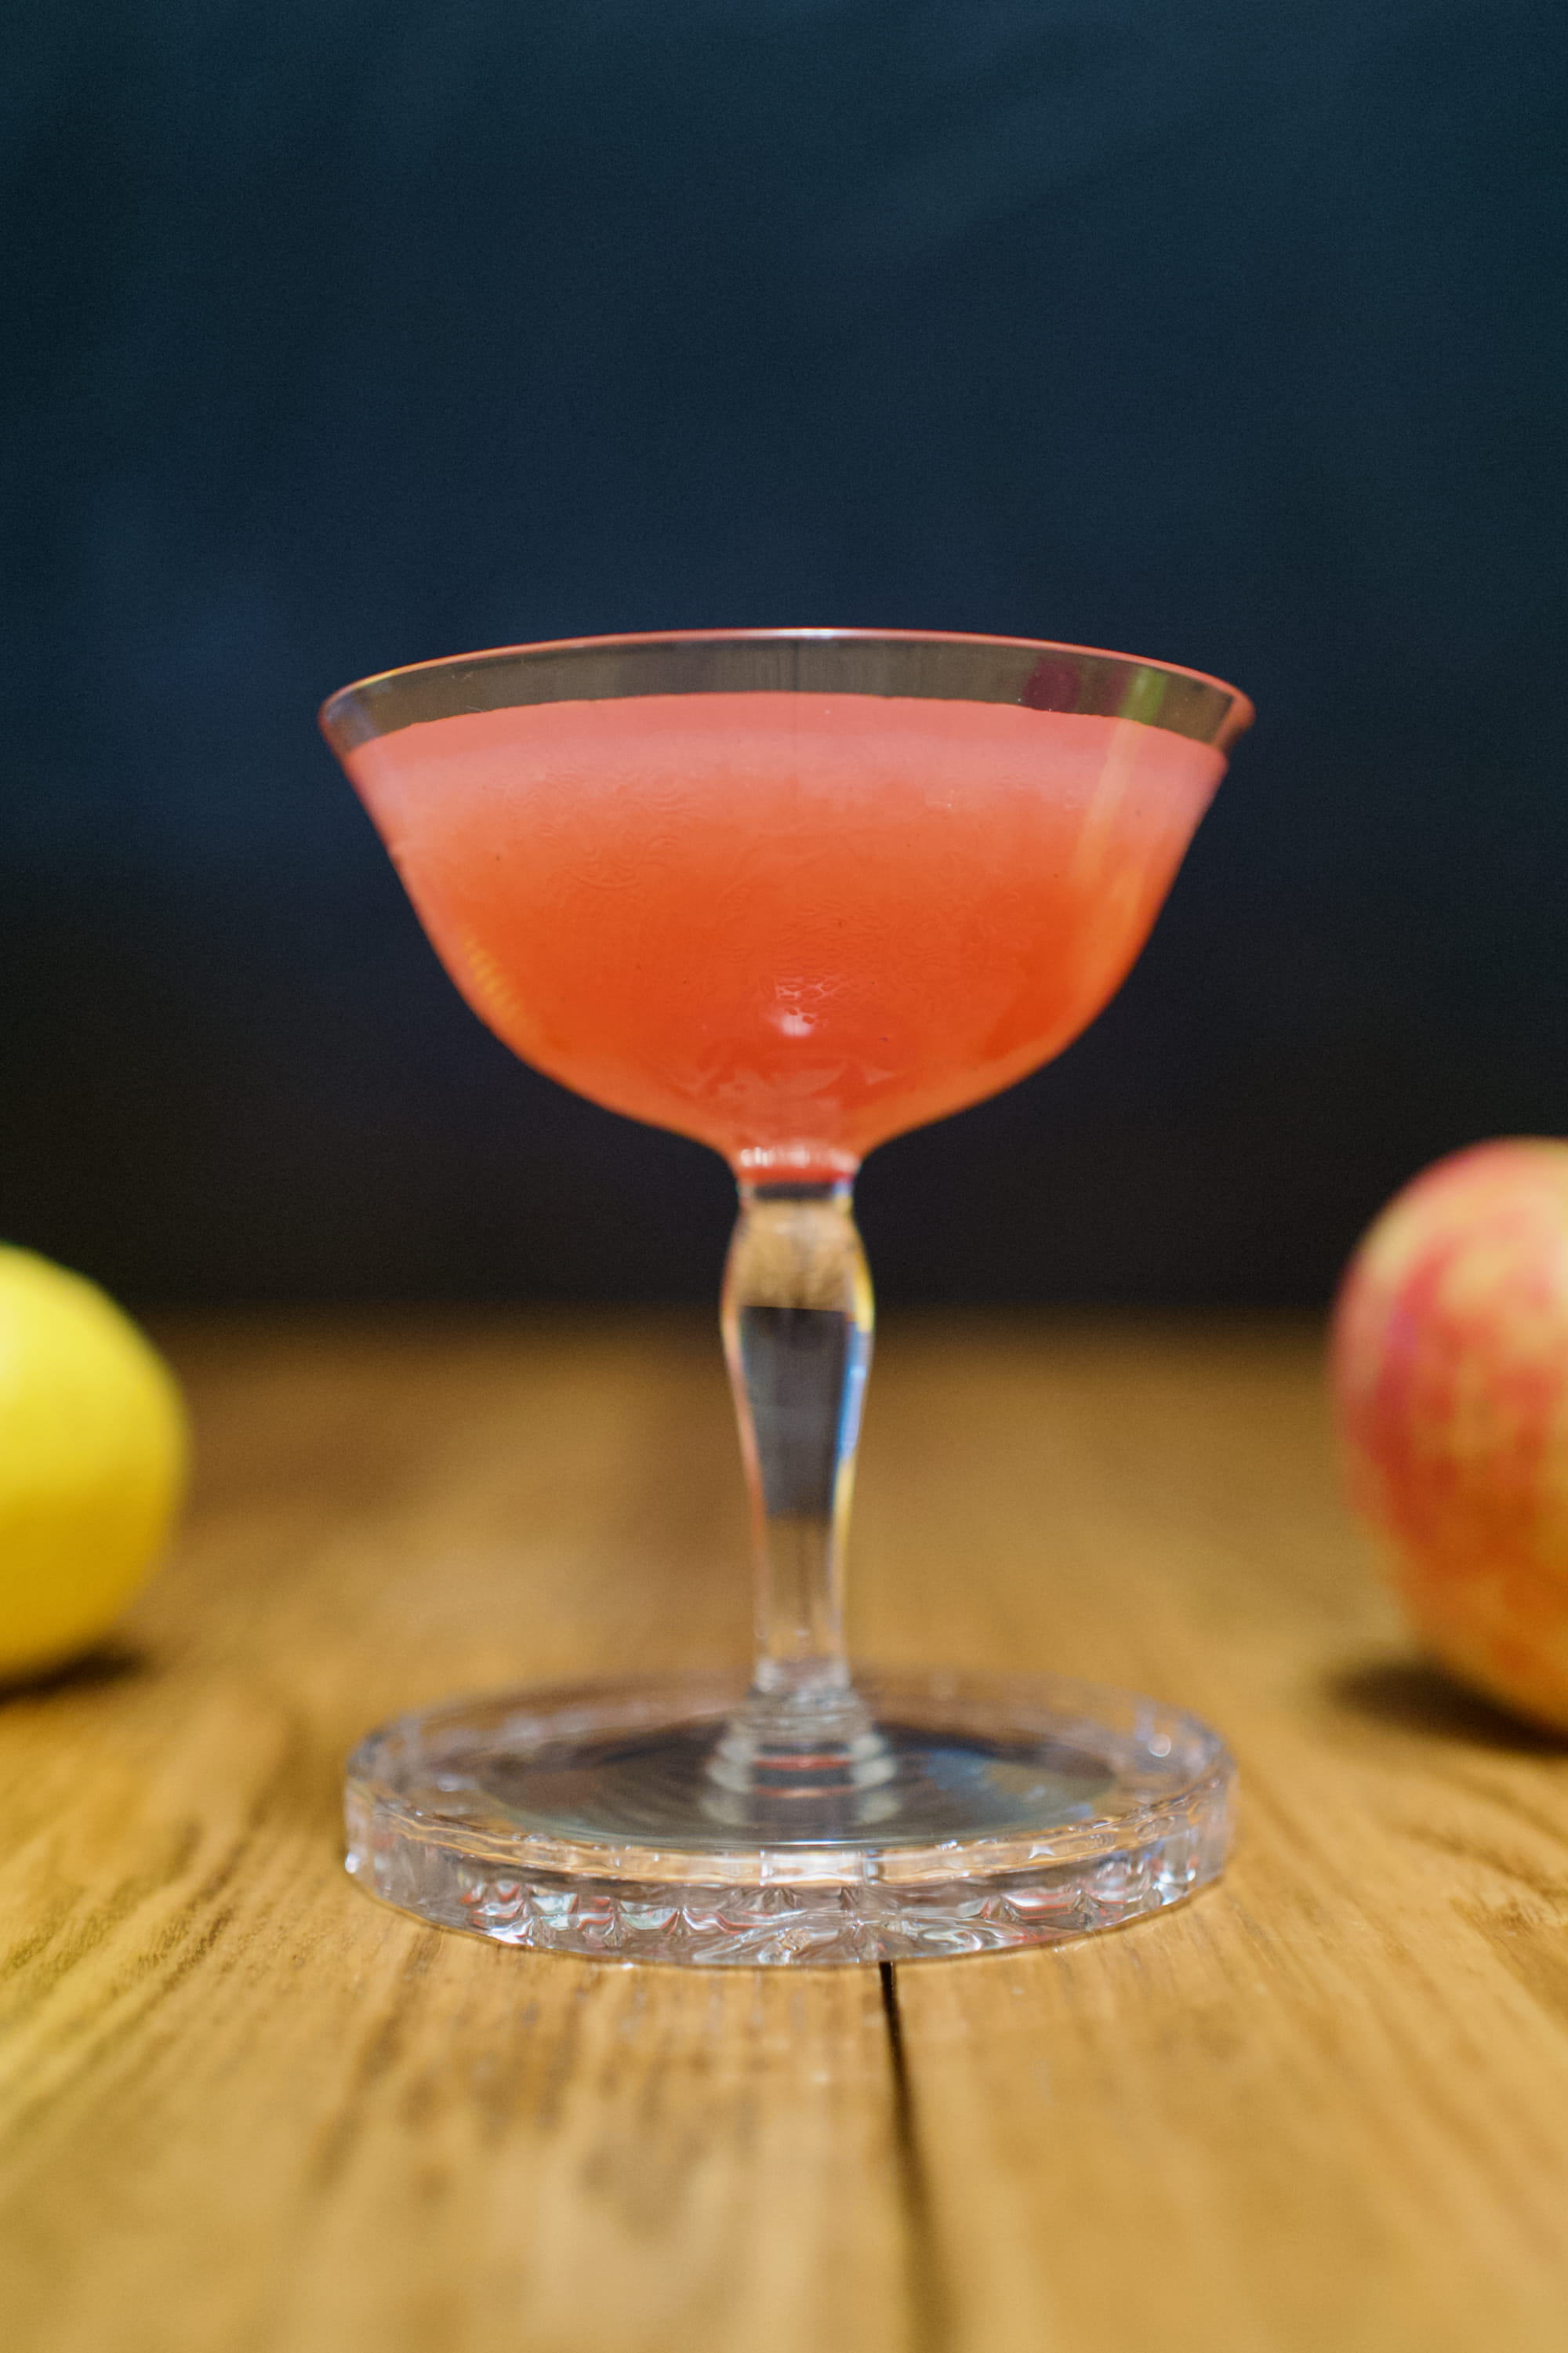
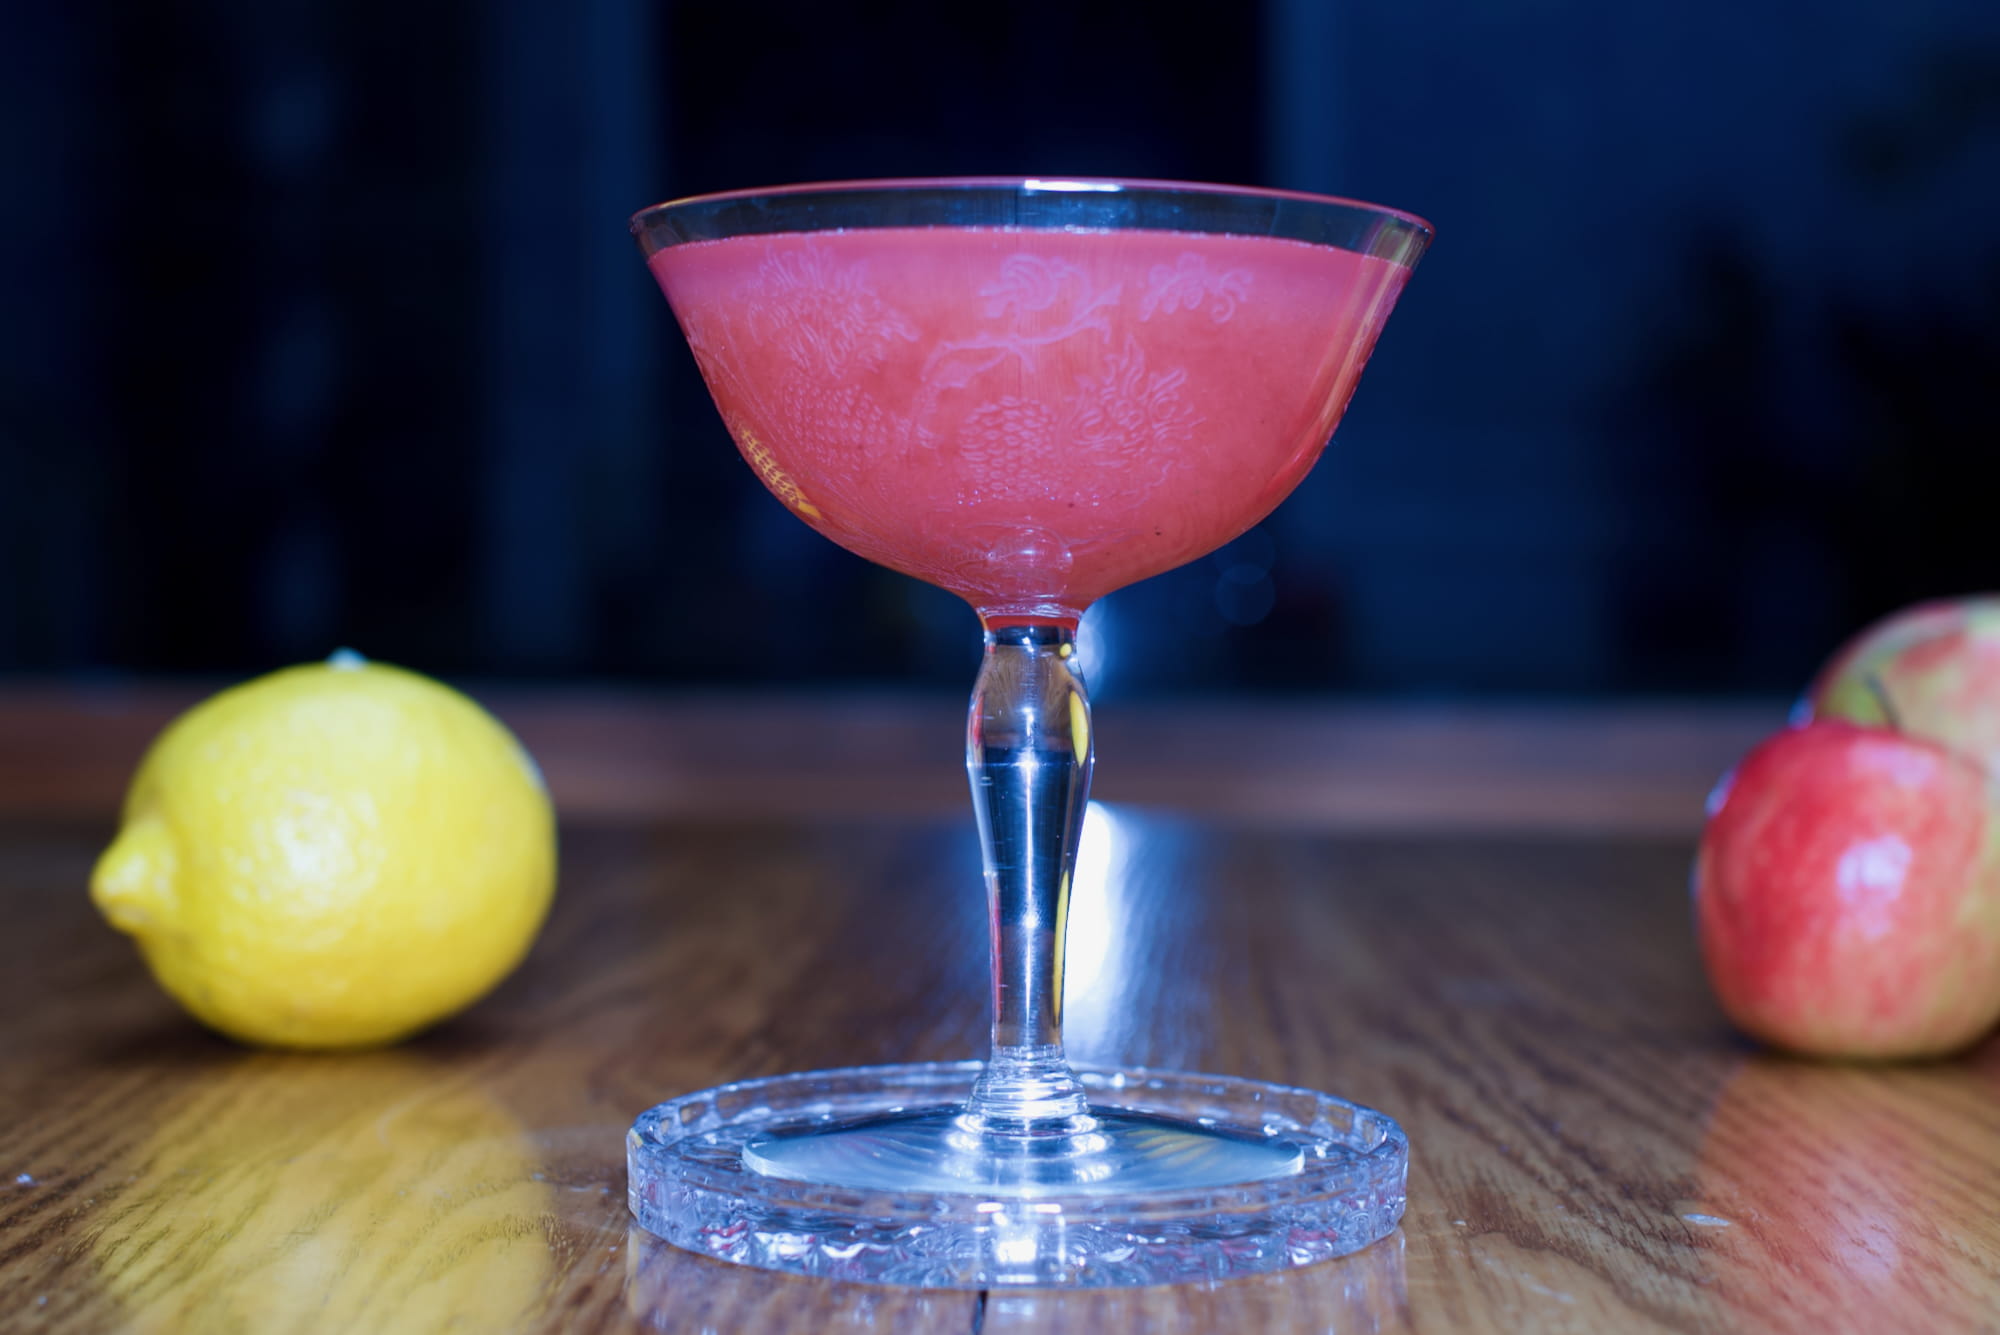
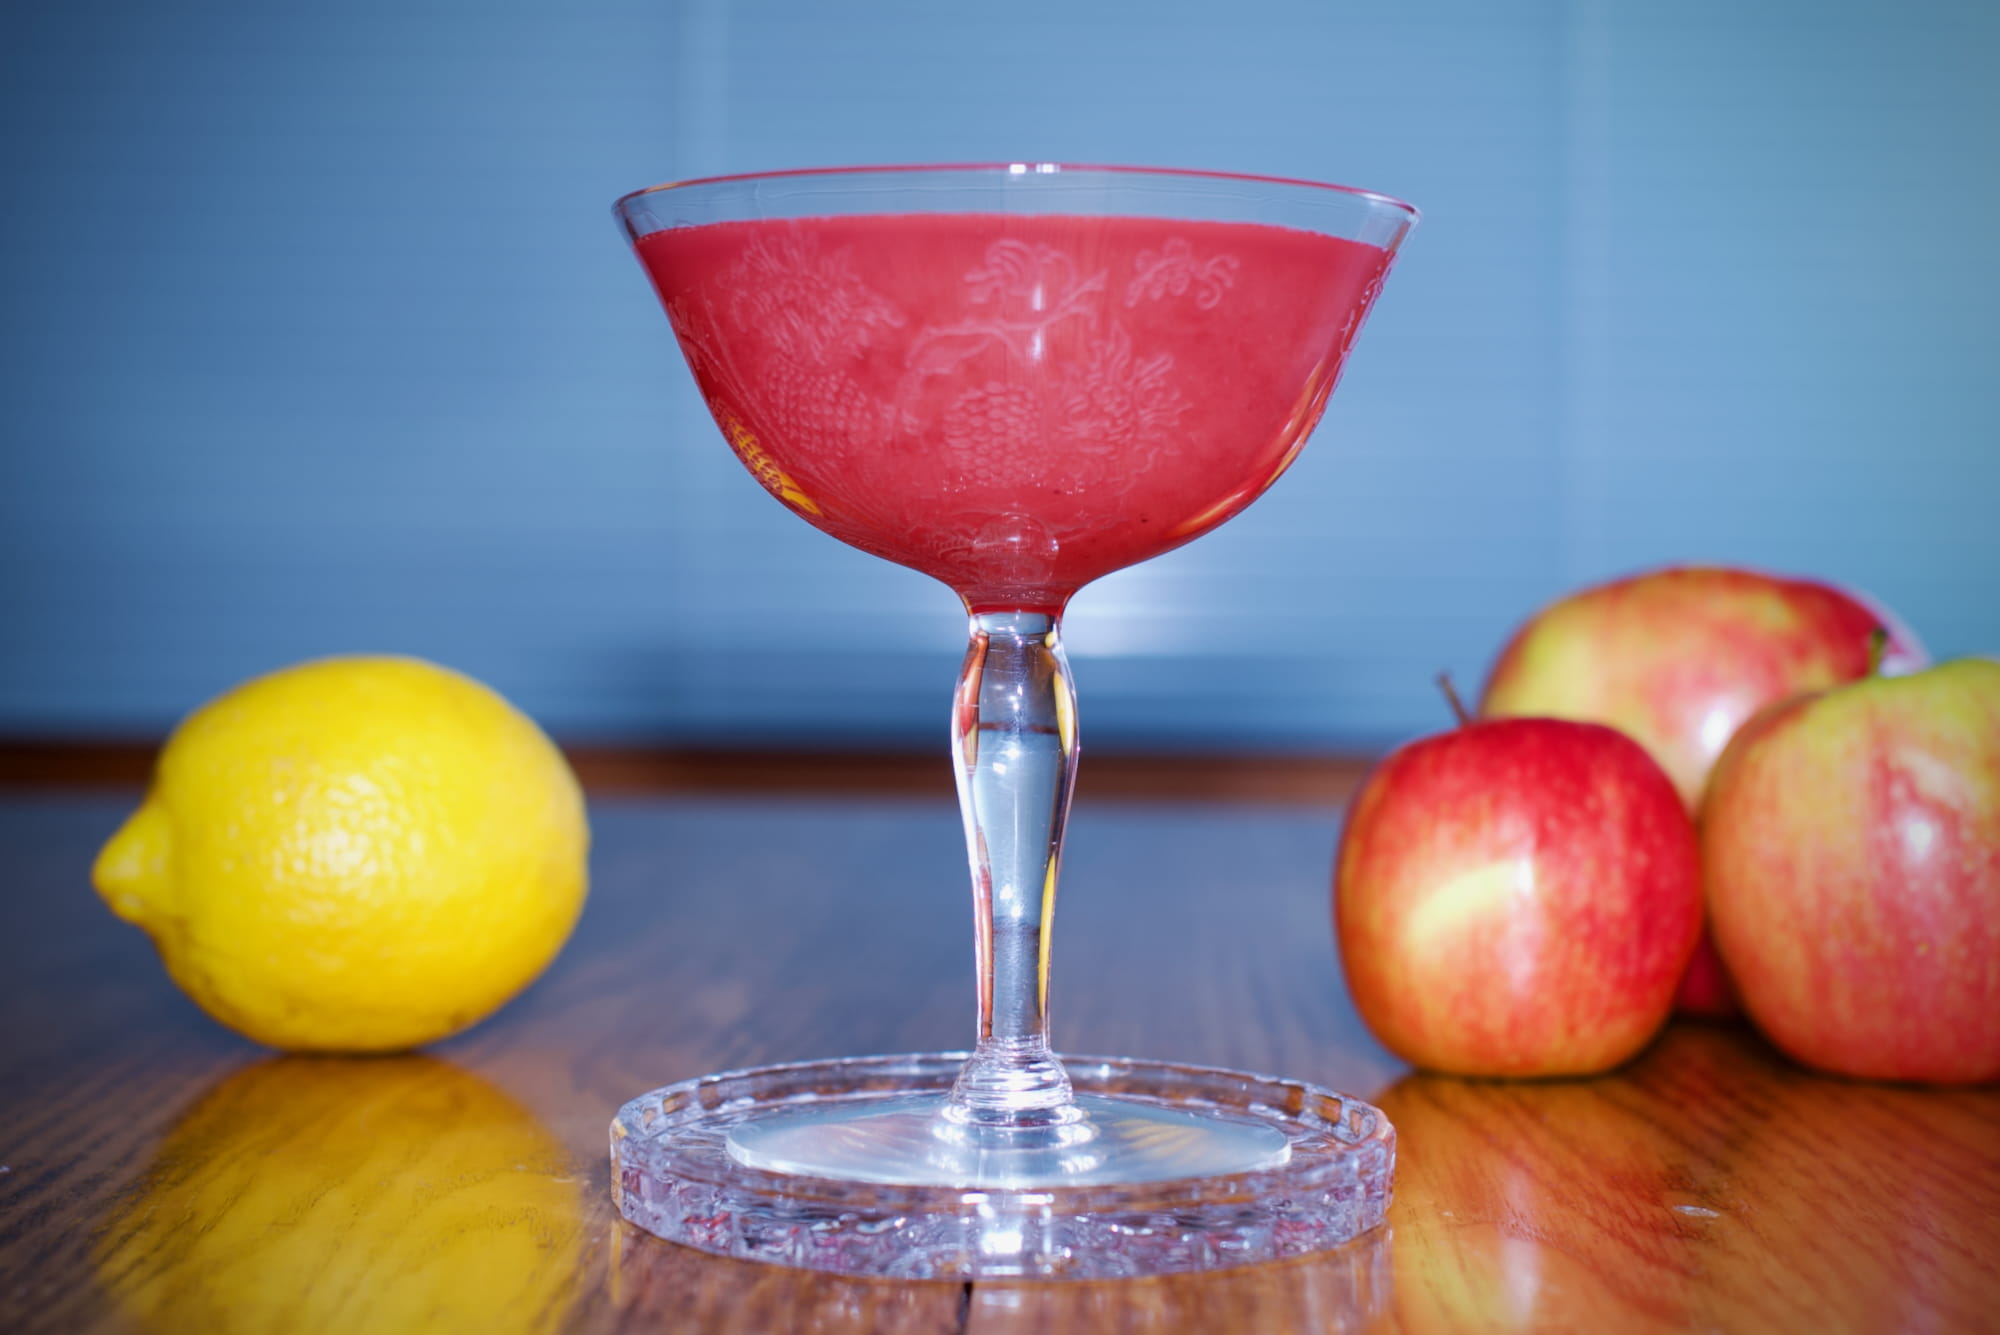
Edited version of further placement. [f1.7, 1/250s, ISO 1250]
Diffusing light
Tried one pair of shots at a slightly narrower aperture (f2.8) both with and without a light diffuser. The difference is subtle, but the main differences I can see with adding the diffuser are:
- Turns the glass more white-colored (visible in area above liquid, stem, and coaster)
- Removers the highlights on the apples
- Softens shadows under props and glass
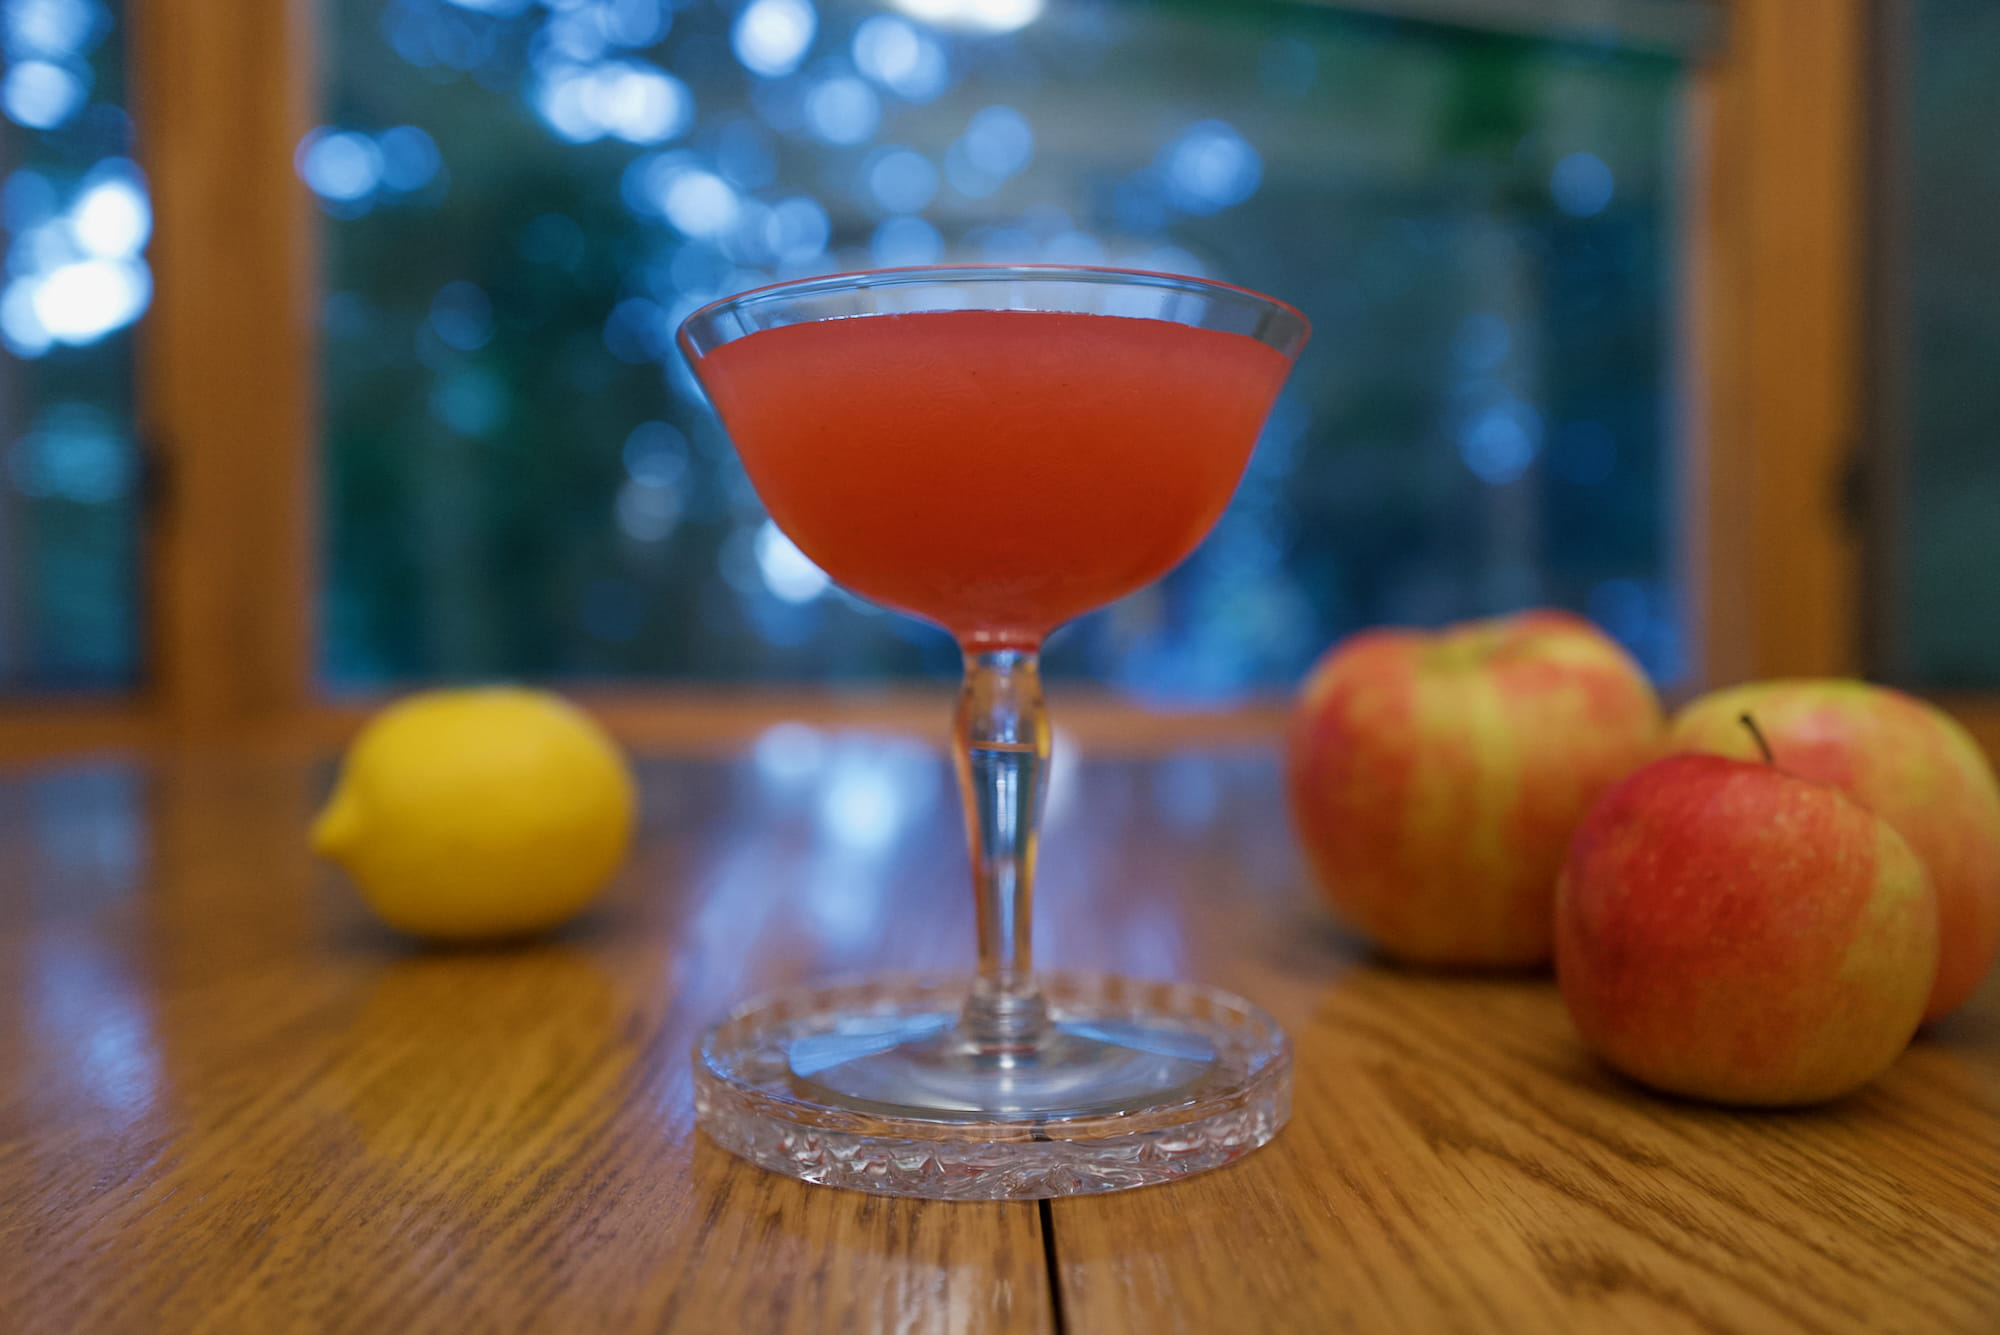
Top: no diffuser [f2.8, 1/250s, ISO 3200], Bottom: with diffuser [f2.8, 1/250s, ISO 4000]
Looking at these specs, I realized that I didn’t adjust my settings away from street shooting! I have my minimum shutter speed set to 1/250s, but here I’m using a tripod, so I could have unlimited exposure time 🤦♂️. The results aren’t bad because the Q2’s workable ISO is mercifully high (e.g., these are 3200 and 4000), but I could have been way down at ISO 100.
Takeaway: Don’t forget to turn down minimum shutter speed while on a tripod!
Manual focus
I didn’t anticipate this, but because our depth of field is so narrow, what part of the glass the camera automatically focus on can change. I manually focused many of the shots to try to make sure the front of the drink-containing part of the glass was in focus (and not, say, the stem).
Backdrop
I tried using the tool that I think is supposed to block light06 as a dark backdrop. Because I think it’s for controlling light, not for being directly photographed, it had more texture than I think you’d want for a background. Nevertheless, I gave it a shot.
Experiments with black backdrop. Left: below table [f1.7, 1/250s, ISO 2000]. Right: on table [f1.7, 1/250s, ISO 3200]
Backdrop below table, edited [f1.7, 1/250s, ISO 2000].
Takeaway: For a black backdrop, use something without texture (e.g., no folds) and as dark as possible. Ideas: foamboard, curtain. Also, maybe don’t shine light onto it.
Interlude: Getting Flash Working
Despite a fresh set of batteries, couldn’t get the flash to turn on. It turns out battery acid07 had leaked all over the contacts. Duracell guarantees 12 years of shelf life, and the unopened ones from 2021 were already corroding all over the place.
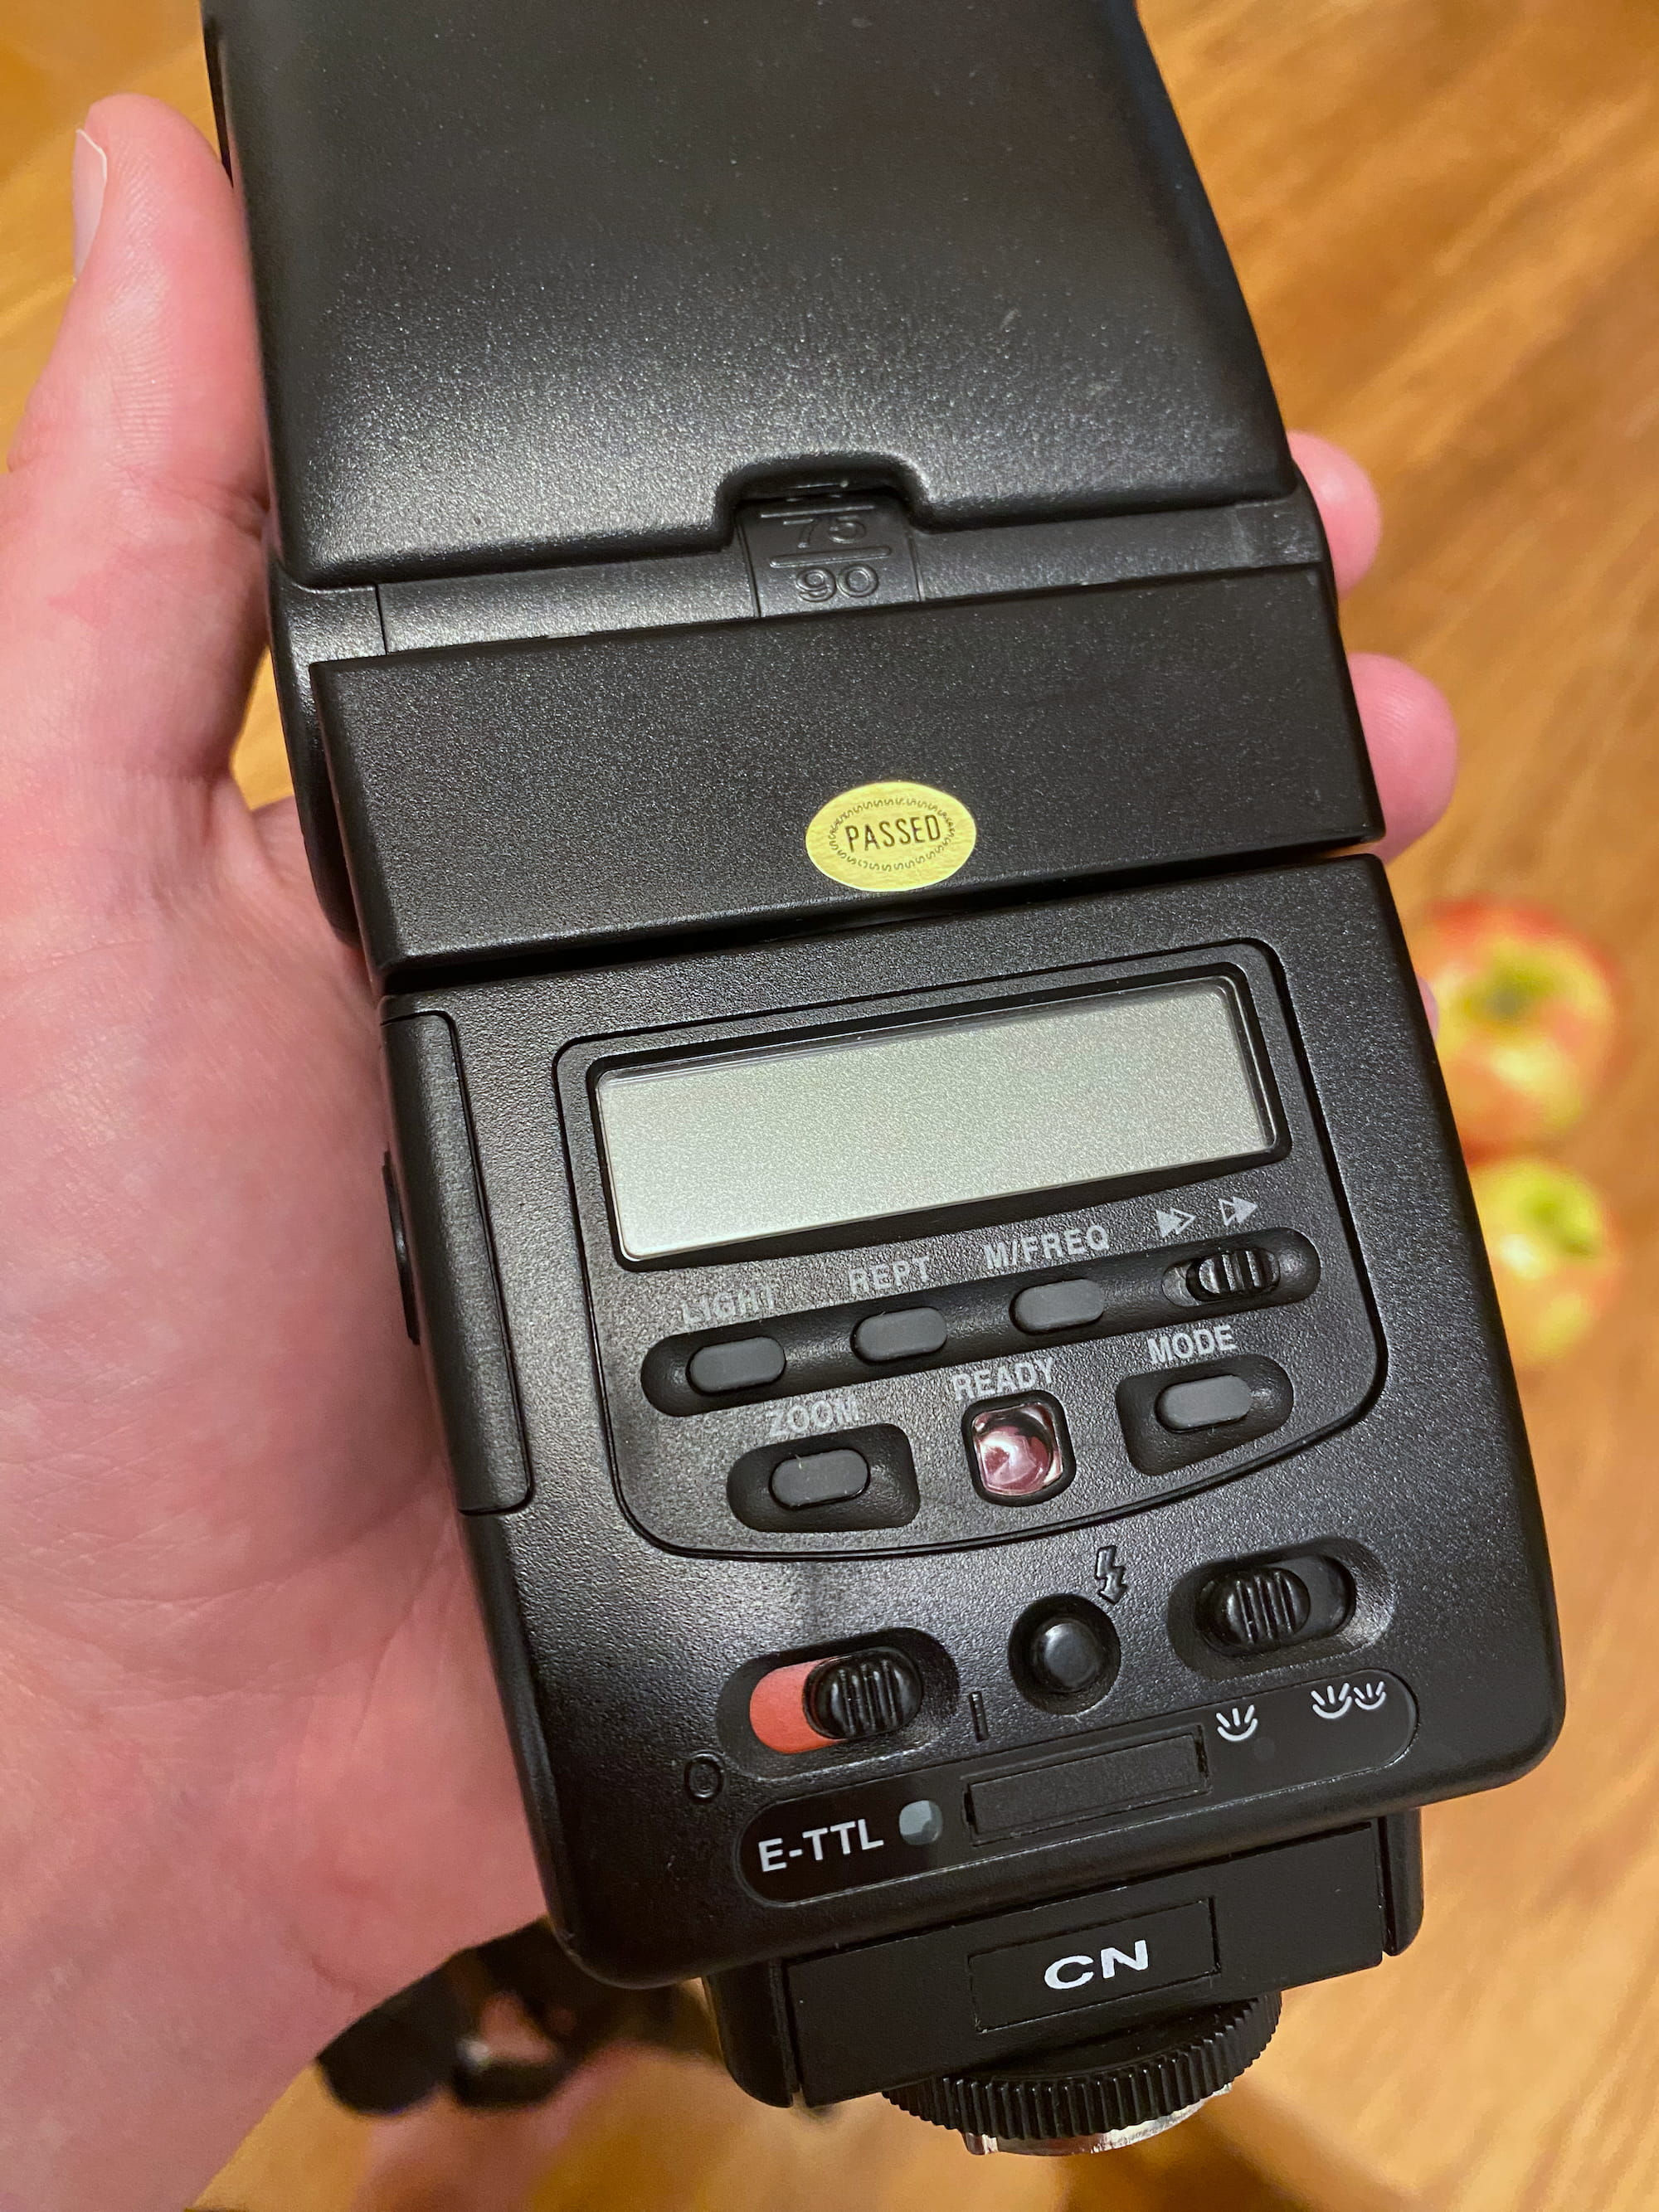
The flash. There are way more settings than I’d anticipated. More on that later.
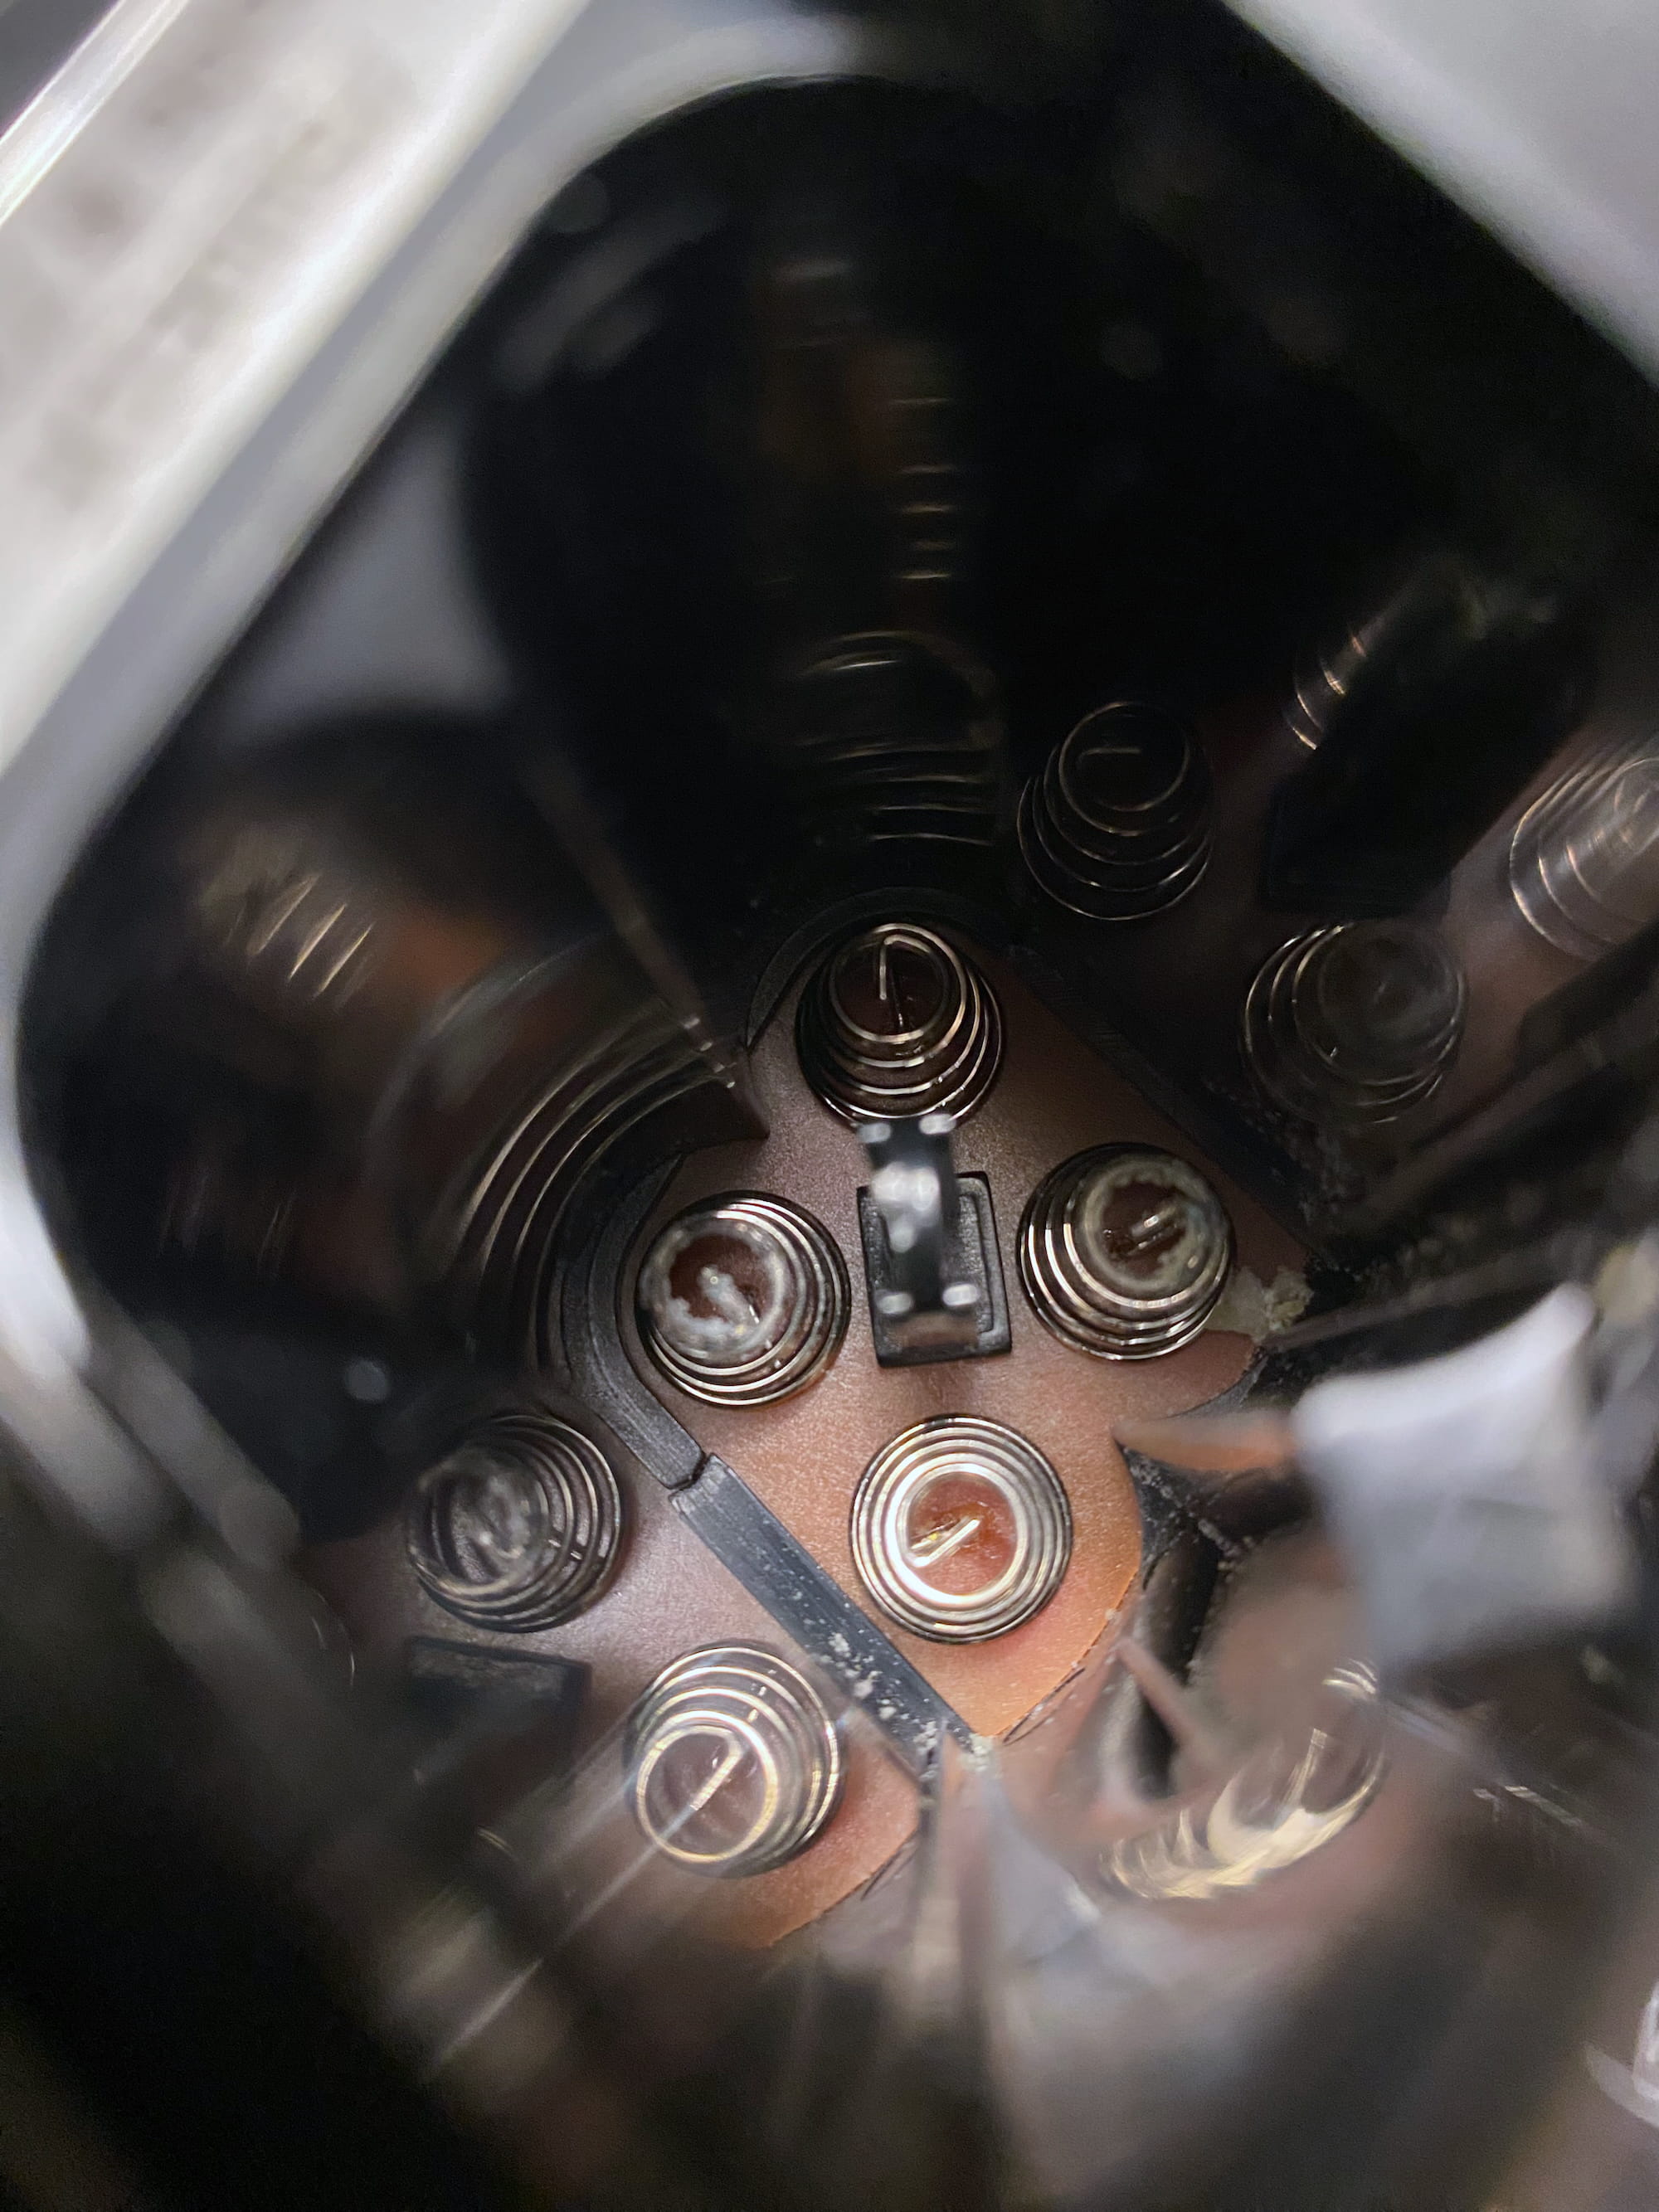
The battery acid was preventing the contacts from carrying current.
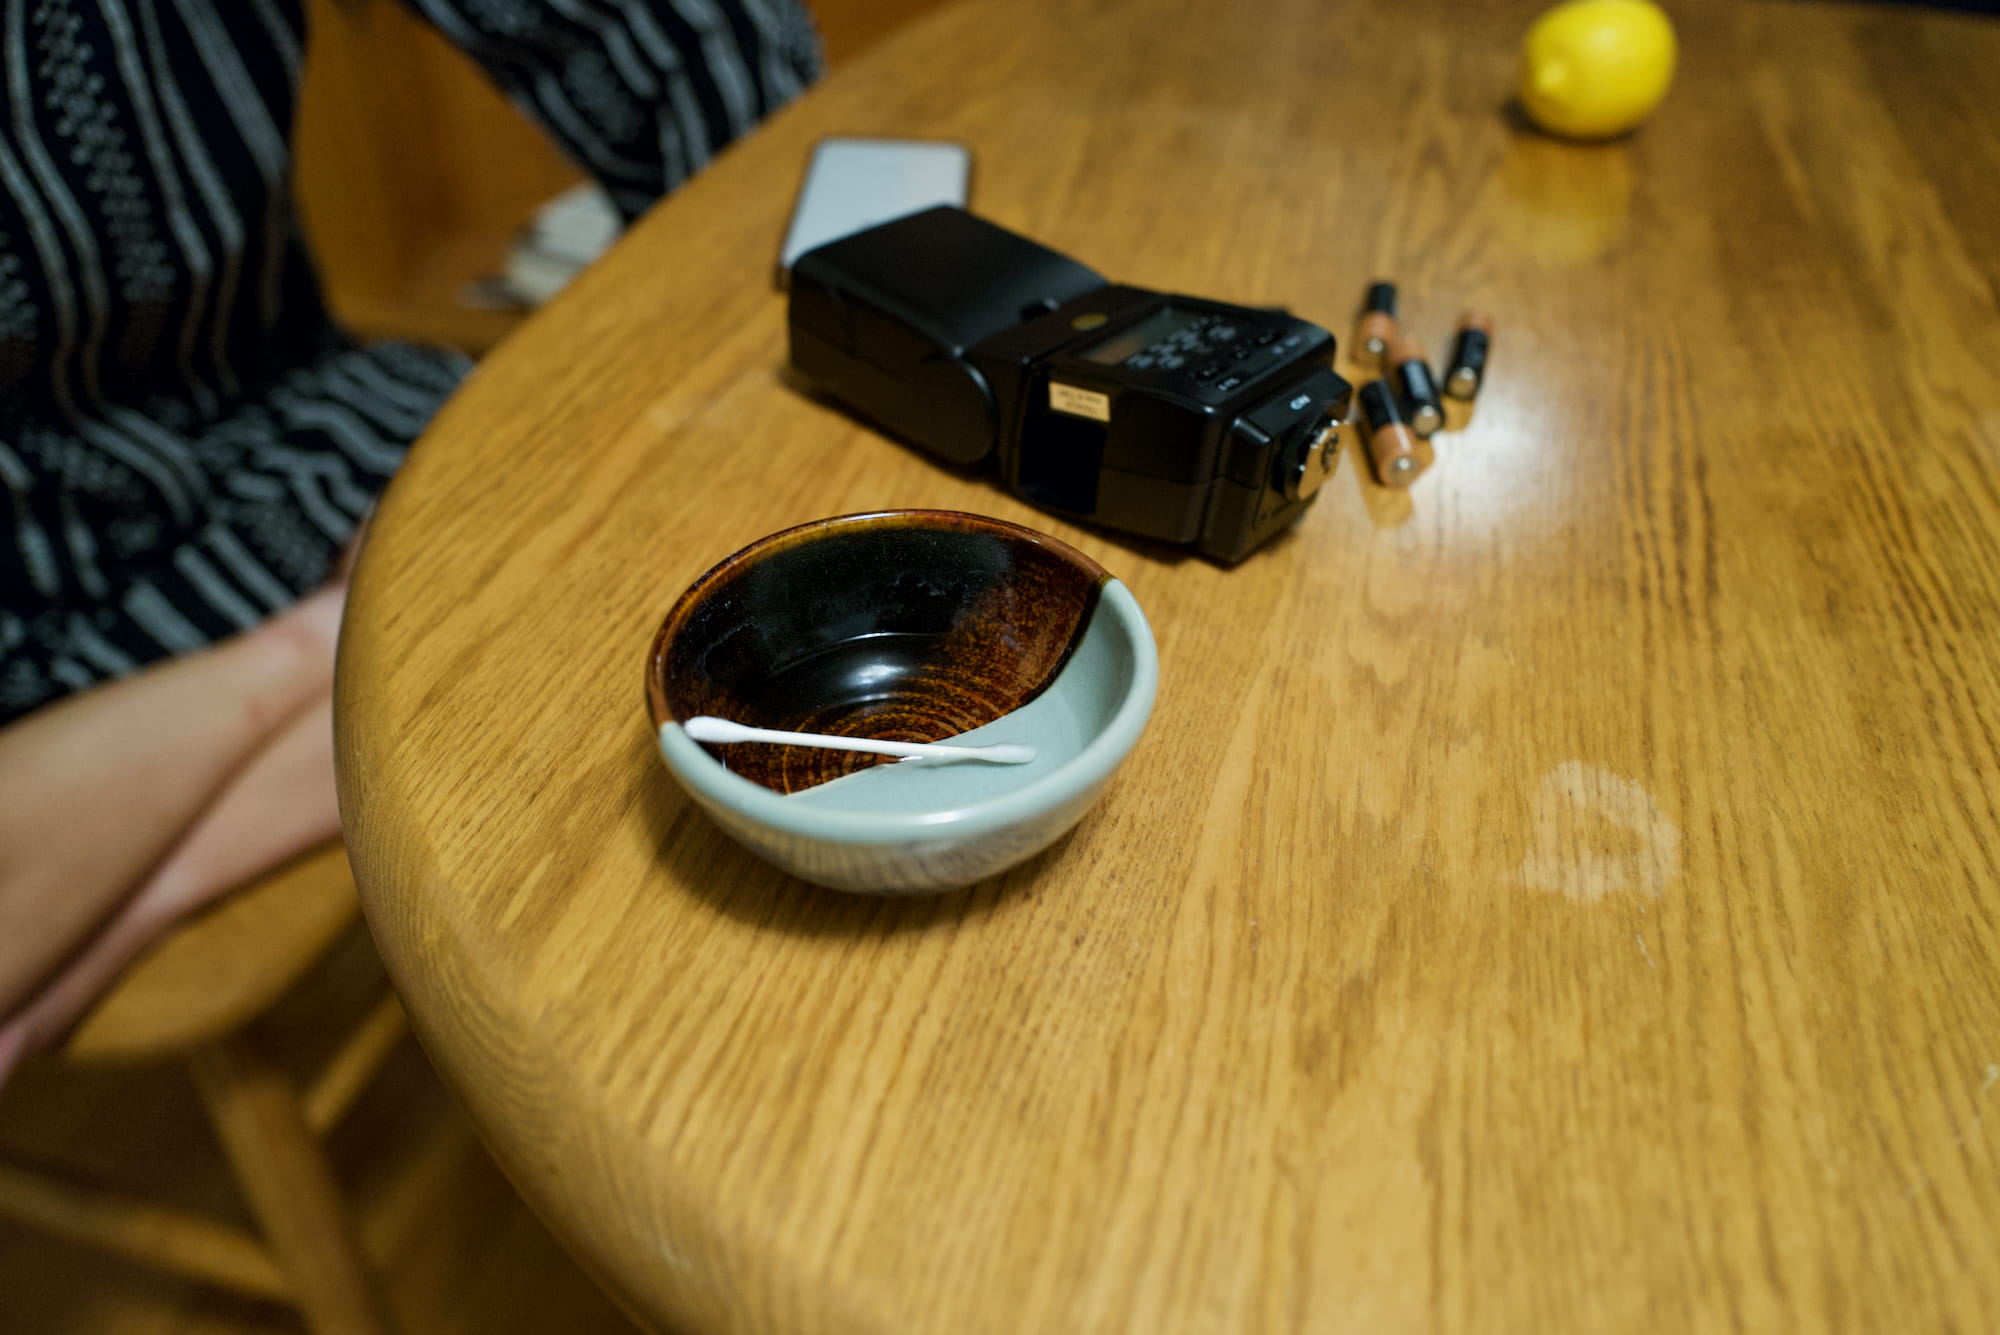
Cleaning using a basic solution. When you Google how to remove battery acid, different sources will tell you to use an acidic, basic, or both-at-once solution. I never understood the both-at-once. Seeing baking soda and vinegar fizz together is fun, but doesn’t one just end up neutralizing the other before it makes it onto what you’re trying to clean?
I’m glad I tested the equipment beforehand, both to get it working, and discover how well it didn’t work. More on that in the next section.
Experiment 2: Flash
Finally, the flash was operational. But boy howdy, there are a lot of settings on that thing!

Flash operational but confusing.
I tried pressing all the buttons and knobs at various points, but I wasn’t willing to spend the time to deep-dive on it because there was a more fundamental issue.
Yep. [f2.8, 1/200s, ISO 6400]
The Q2 wasn’t compensating for the brightness of the flash. Not only could it not work adaptively with E-TTL,08 but the setting on the camera to adjust EV when using flash never did anything—EV always stayed the same.
The only other flash setting on the Q2—whether to flash at the beginning or end of exposure—had no perceptible effect.
Thus began a series of experiments to try to get workable images out of the Q2 while using a flash that had to be compensated for manually.
Pointing flash up at ceiling rather than directly forward [f2.8, 1/250s, ISO 6400].
Cranking the exposure waaay down to try to compensate for the flash. [-3ev; f2.8, 1/25s, ISO 800]
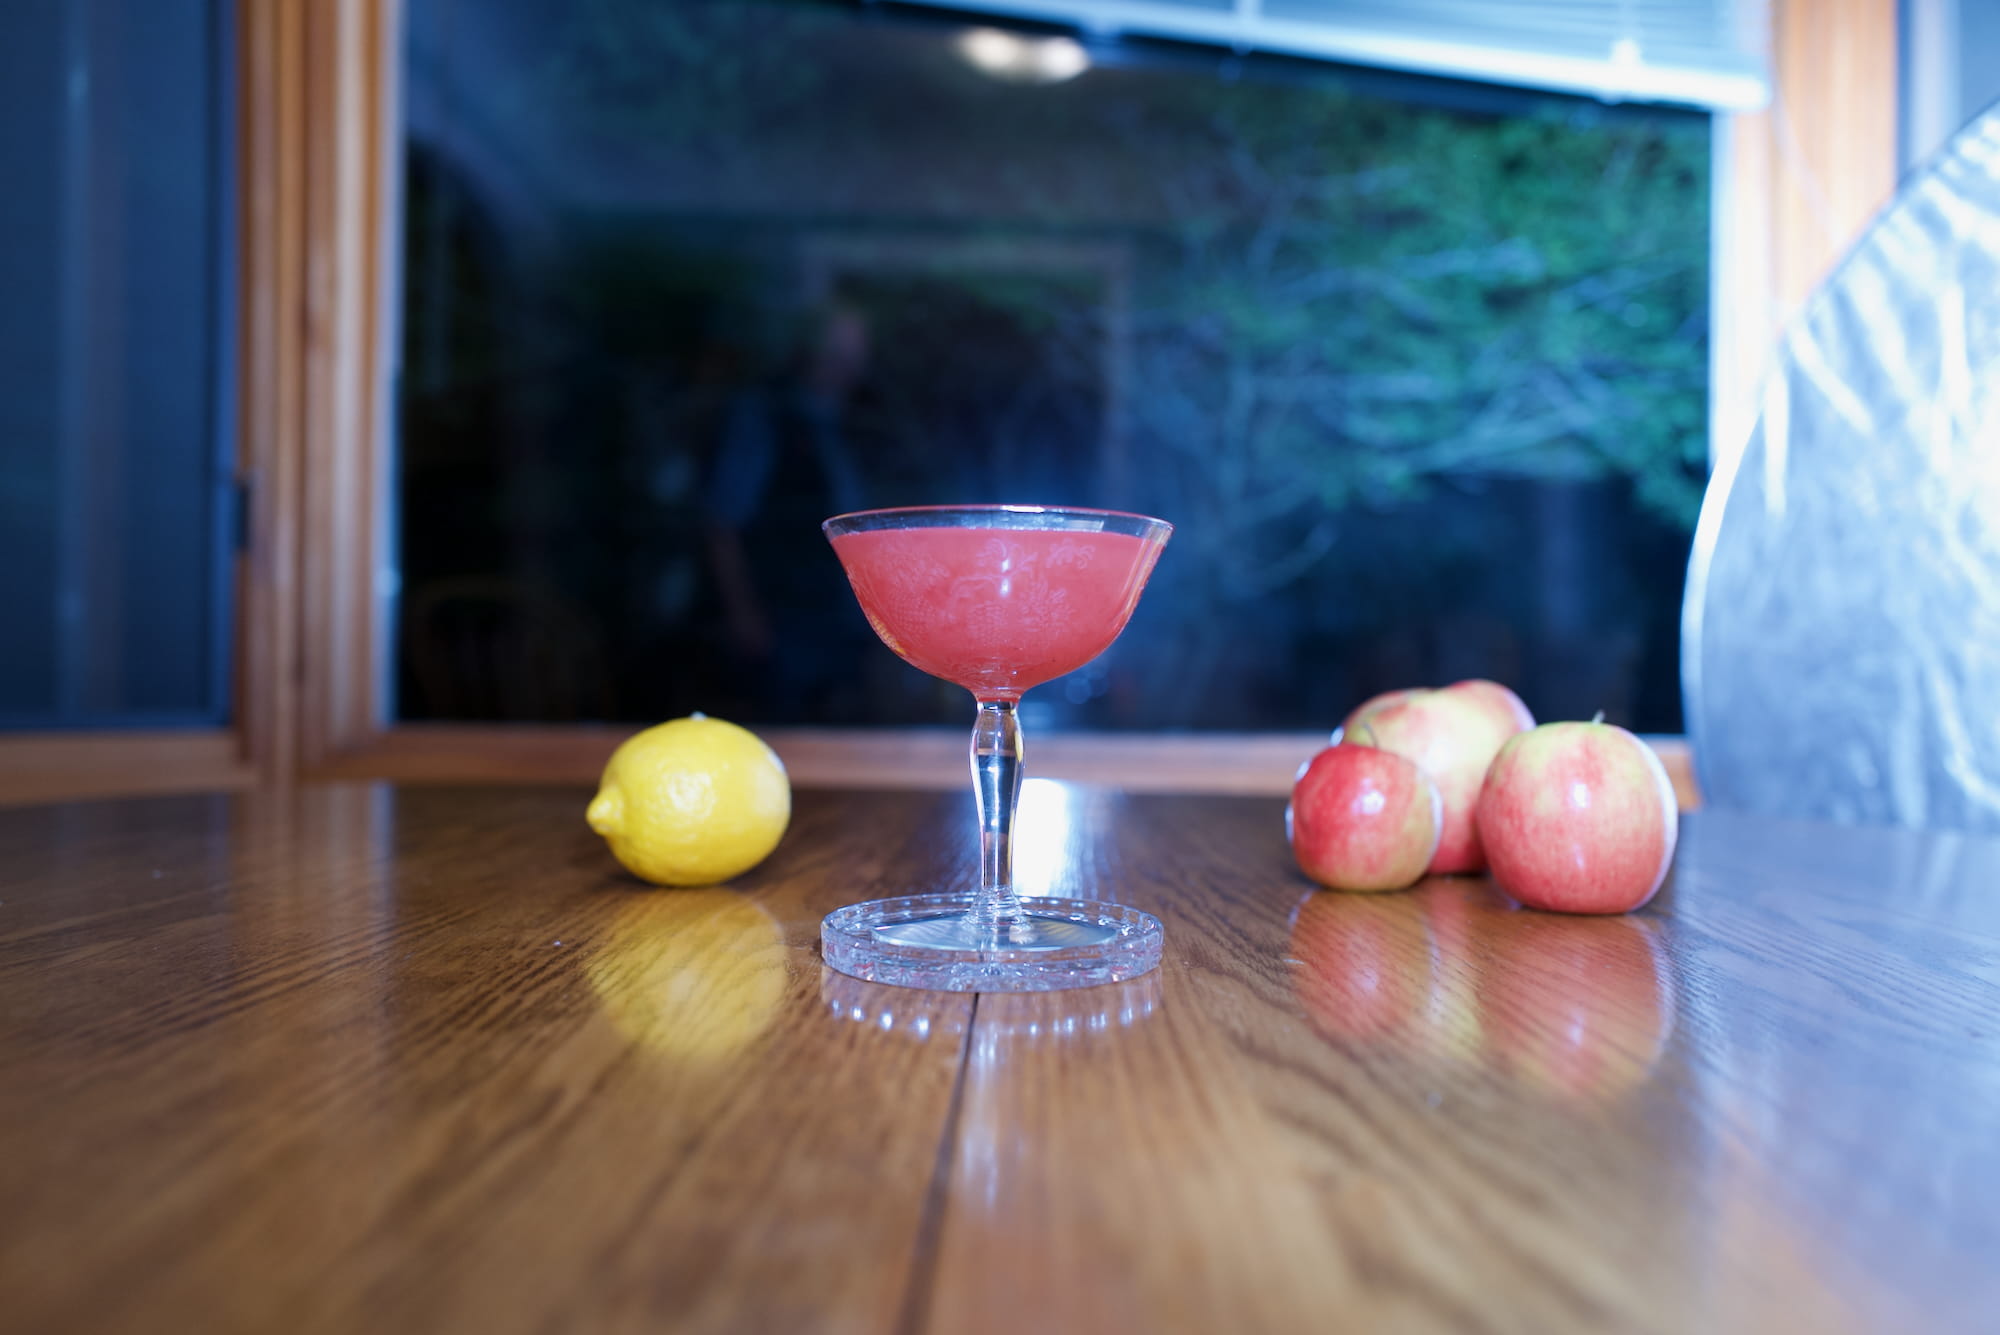
I believe that for this photo I angled the flash to the right (notice right side of image more exposed than left) and introduced a reflector (notice white round protrusion on right edge of center window). I brought it back down to no exposure compensation, so it is too bright again. [f2.8, 1/250s, ISO 6400]
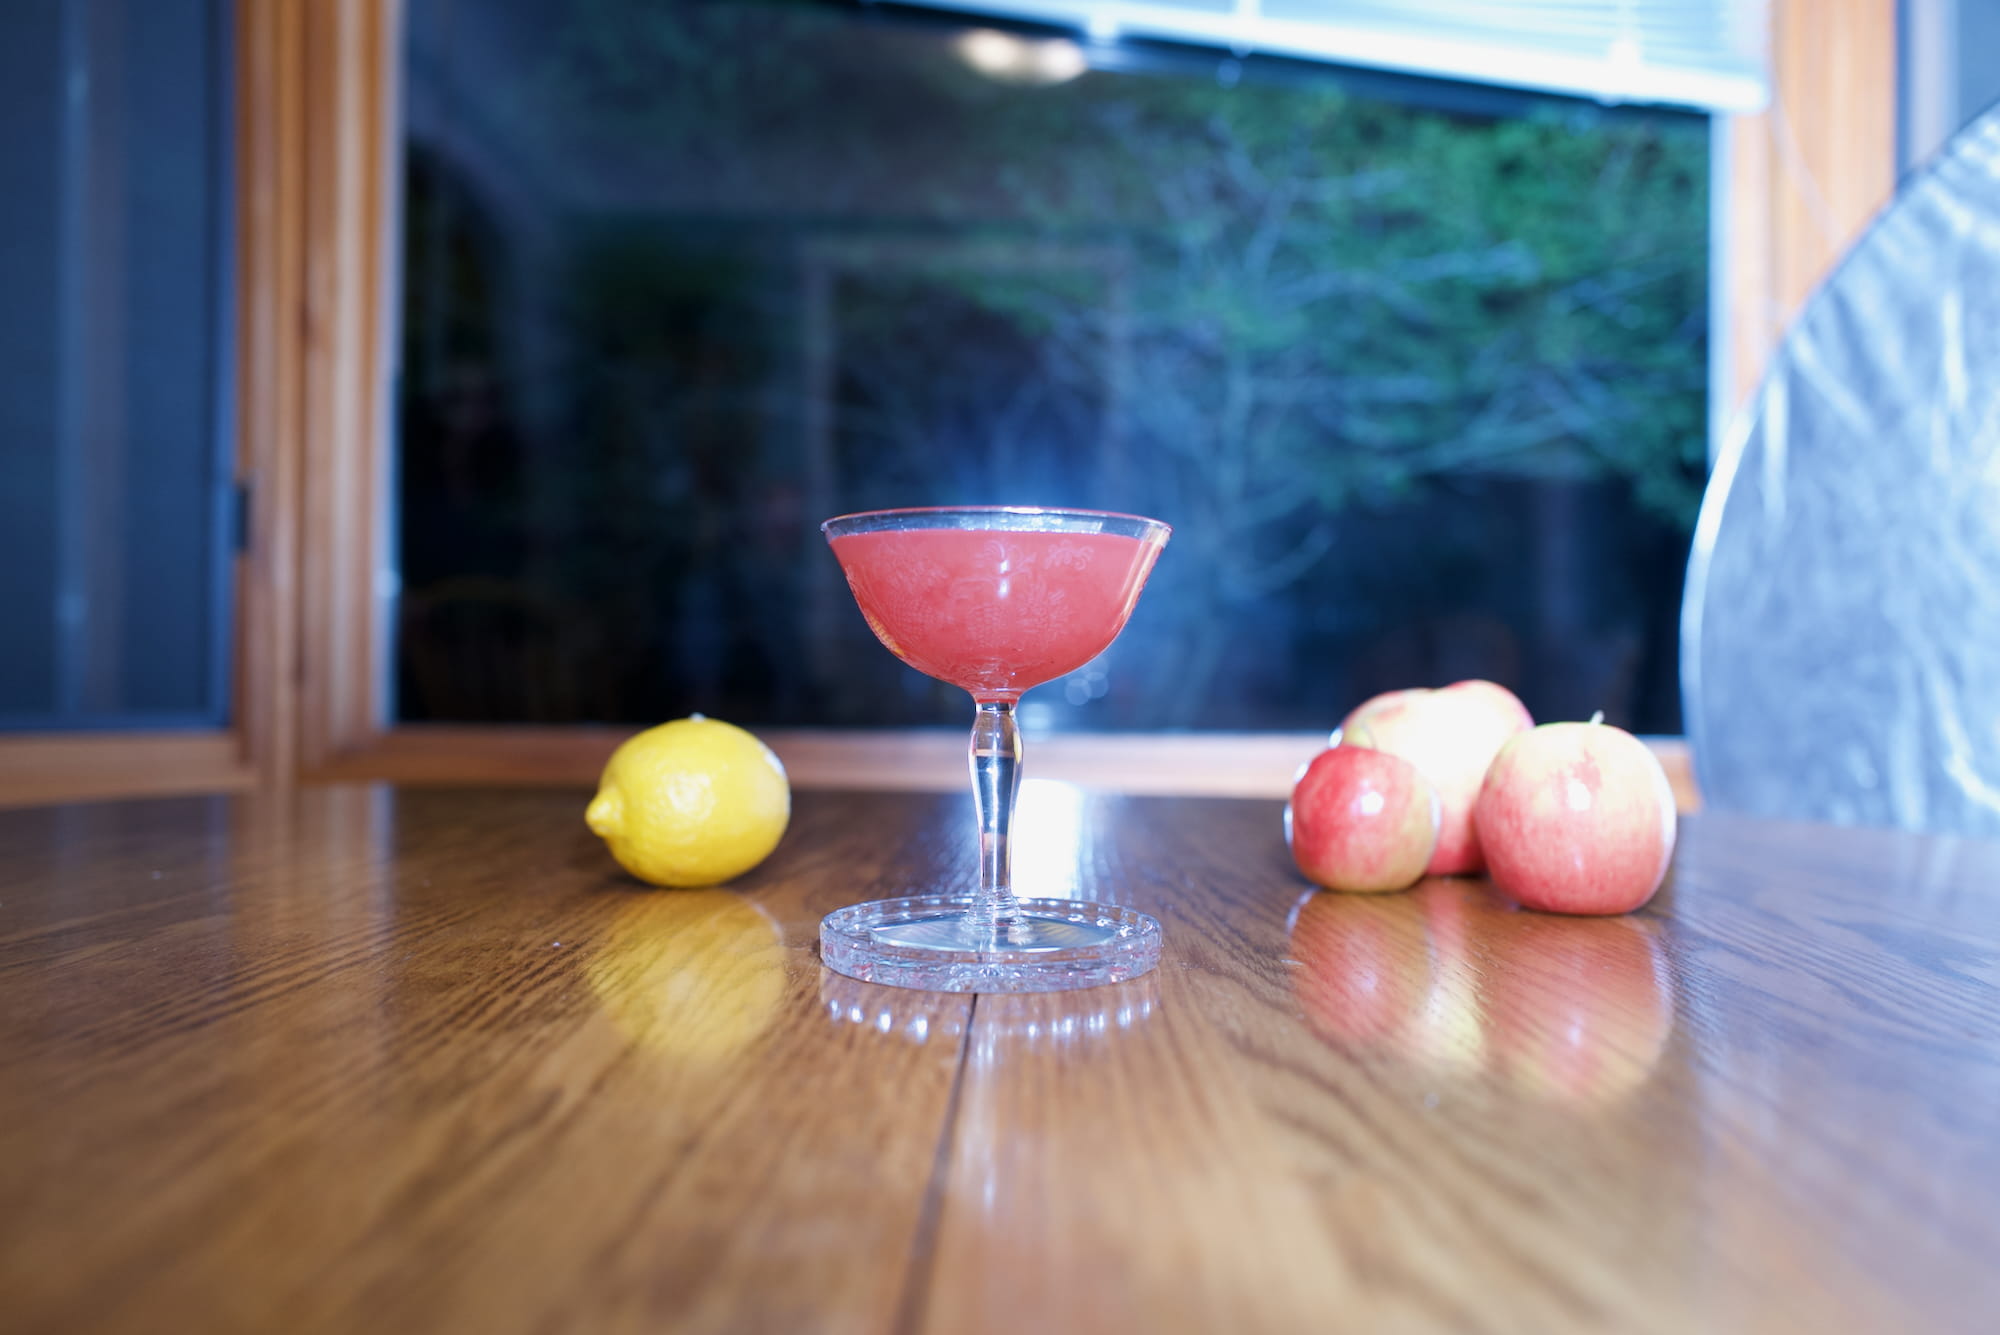
Flash angled to right, reflector, now with exposure turned down. Flash size: 35mm (wide). [-3ev; f2.8, 1/250s, ISO 800]
Let’s pop out briefly to show what this current experiment setup looks like.

Experiment setup with flash angled towards reflector, still set to wide (“35mm”) flash.
Now, I tried narrowing the flash area. This is a setting on the flash unit itself.
Same setup as previous photo (flash angled to right, reflector, -3ev), but with a narrower flash size: I believe ~‘105mm.’ Overall, this isn’t terrible; the drink itself is lit nicely. Some highlights on the glass and props are unfortunate. But it’s the super bright highlight on the table that makes it unusable, even if cropped.[-3ev; f2.8, 1/250s, ISO 800]
I believe I then tried several shots where I lowered the flash vertical angle down closer to straight on, while keeping the horizontal angle twisted right towards the reflector. Even with -3ev, they were all very over-exposed. Here’s one of them.
Flash probably angled straight (vertical) and right (horizontal). [-3ev; f2.8, 1/250s, ISO 800]
You might have noticed that regarding the flash settings, I’m writing I think or I believe.
One disappointing thing about the flash is that no information about it shoes up in the photo file’s metadata. A photo file contains comprehensive info about the camera—make and model, lens, focal length, f-stop, shutter sped, ISO, white balance setting, GPS tag, and even the program you were shooting on (e.g., aperture-priority). But for flash? The only thing I see in a file where flash fired is: Flash: Off, Did not fire.
What I’d like to see is:
- flash size (e.g., 35mm-targeting (big) or ~100mm-targeting (small))
- vertical angle of flash (firing forward vs above)
- horizontal angle of flash (firing forward vs to the side)
- any attempted exposure compensation
- flash synchronization (beginning or end of exposure)
- … and any of the myriad other settings that I don’t understand from the flash box itself
To record this, I’d have to write down all the data I care about for each photo I take.09 What a pain! At least this makes me really appreciate the camera metadata that photos do have.
I’ll be curious to see whether shooting the flash with a Sony camera stores any more of this info in the file, rather than just the (incorrect) 0/1 “did it fire” bit.
Anyway back to more photos.
Battling the flash’s brightness without any help from the camera called for more serious tools. So I dropped into full manual mode10 to try to dial in the exposure.
Unfortunately, because I was now properly exposing for the amount of light that we would see with the flash, the preview through the screen and viewfinder11 while I was setting up the shot was, let’s just say, not super helpful.

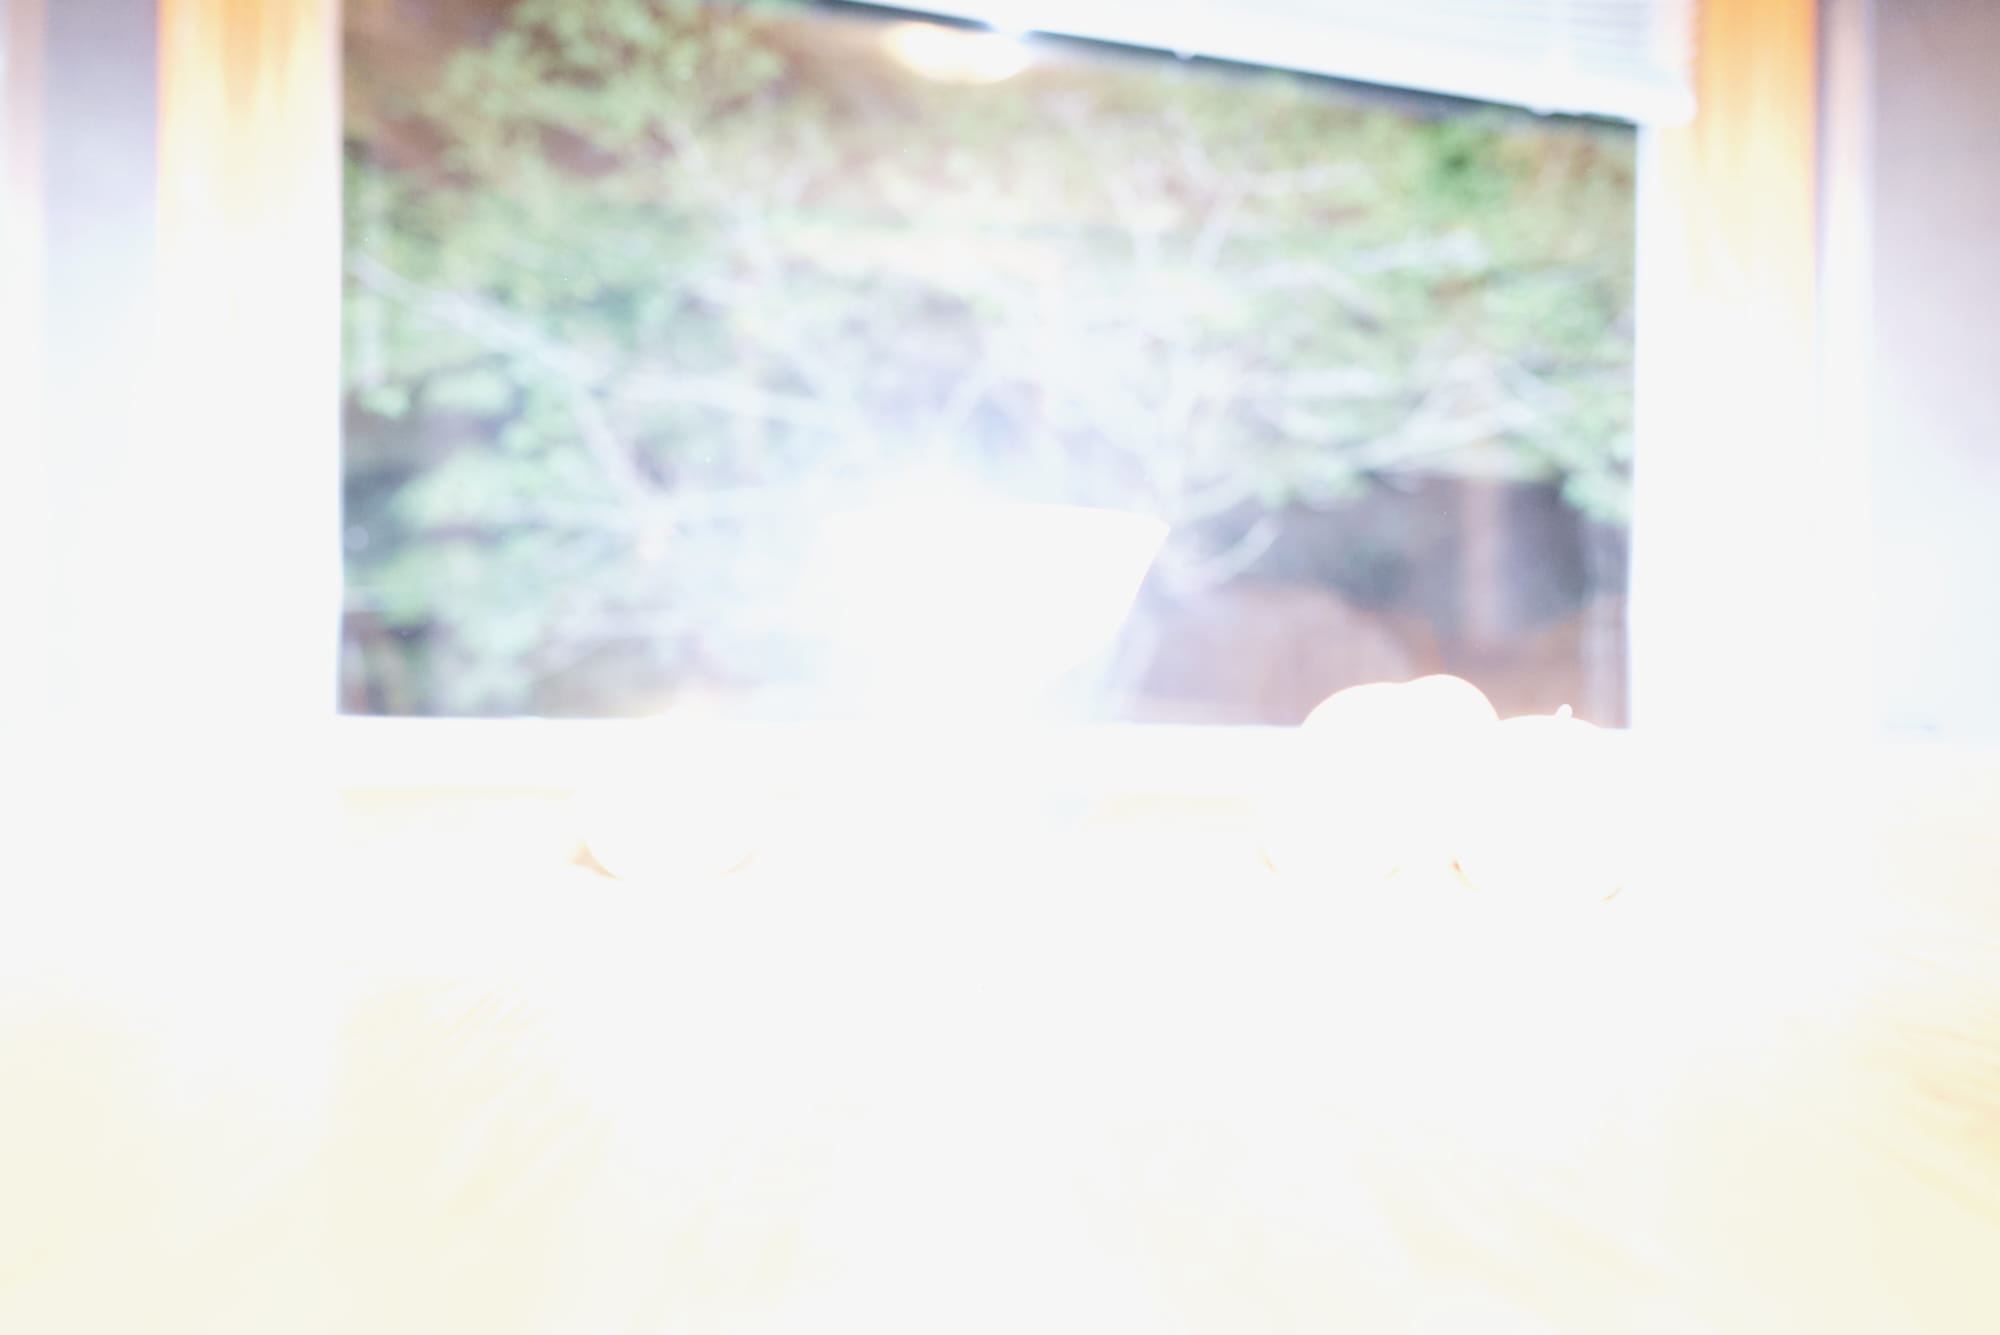
What the camera now showed at all times on both the screen and viewfinder. If I took a photo without flash, it came out this dark. Kind of hilariously, this photo is still 84 MB. [f1.7, 1/6400s, ISO 100]
It’s not a big issue, except for the fact that I was still manually focusing on the drink because the autofocus wasn’t quite right. So to take a shot, I’d need to
- Expose for ambient light
- Manual focus
- Expose for anticipated flash light
We started to get some more usable pictures out of this, where the subjects were lit and the highlights weren’t as awful. Here are a couple samples.
Manual exposure. Except for the table and window highlights, the lighting isn’t bad! Frustratingly, I can’t remember the flash setup I used, and I don’t think this information is saved. Given future photos, I think it was overhead (pointing up (v) and straight (h)). [f2.8, 1/1000s, ISO 100]
Same photo, edited. [f2.8, 1/1000s, ISO 100]
I tried to reduce the reflections by closing the blinds. At this point, it was fully night anyway. Blinds are a pretty boring backdrop, though.
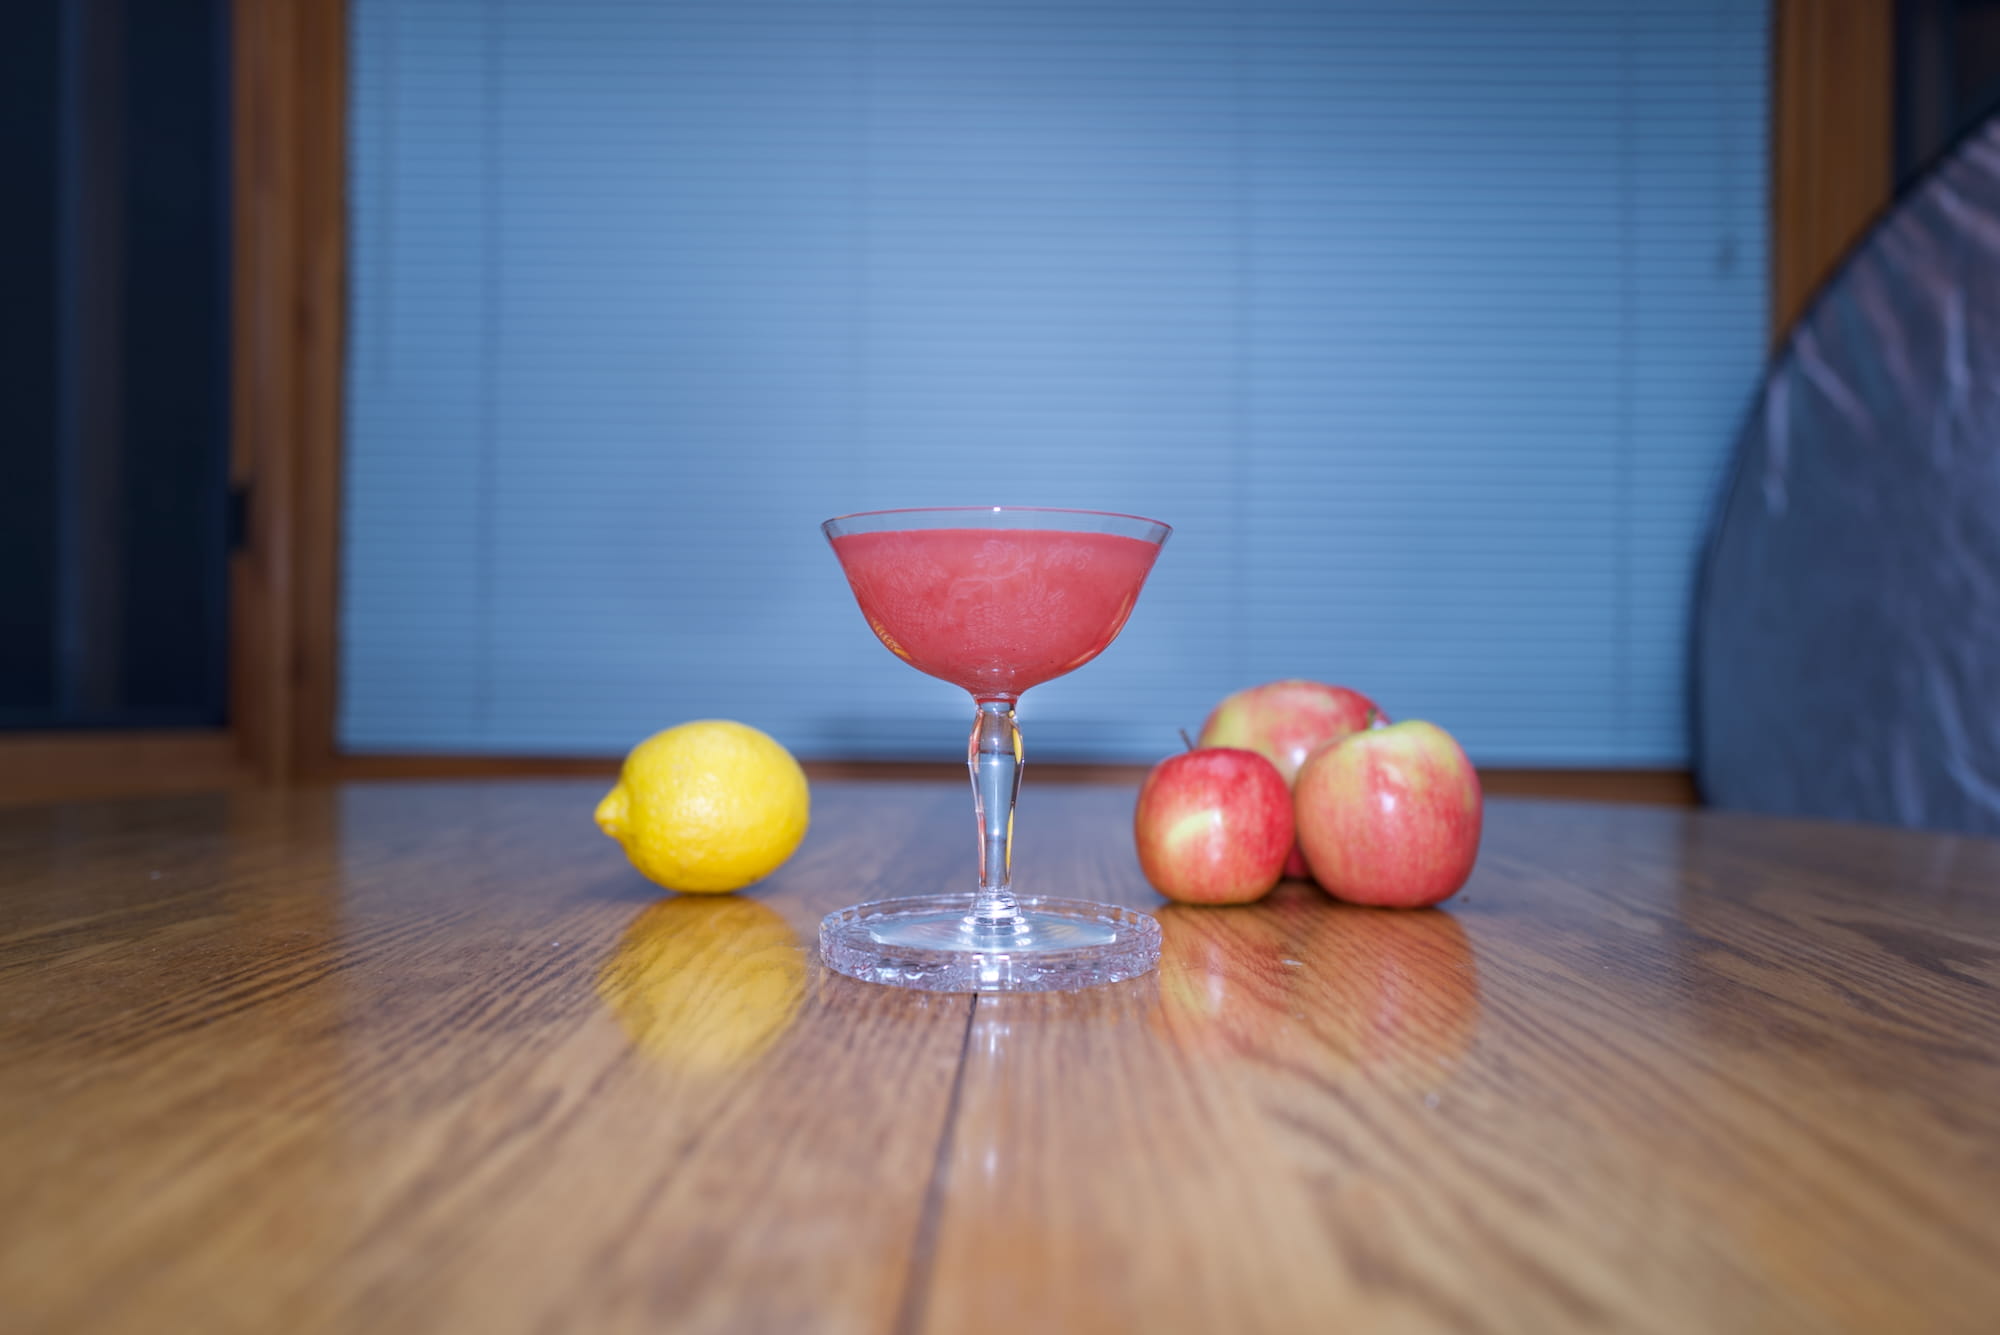
Manual exposure, blinds down, I think flash still up. [f2.8, 1/1000s, ISO 100]
Same photo, edited. [f2.8, 1/1000s, ISO 100]
I tried switching to a narrow (“~105mm”), straight-on (v), angled to reflector (h) flash. (My goal was to back-light the drink without the light reflecting directly back at the camera.)
Flash straight-on (v), towards reflector (h). Looks like I missed a little bit though (flash seems centered on edge of reflector). [f2.8, 1/1000s, ISO 100]
Same photo, edited. [f2.8, 1/1000s, ISO 100]
If you look closely at the glass in the above photos, you’ll see that not all of it is in focus. This might be particularly noticeable with this specific glass because there are patterns etched into it. I have seen some photos that only have part of the glass in focus. But I do think that in general, the photos look a bit better if more of the subject drink is in focus.
So, I closed the aperture a bit, down to f3.5. I like the effect this had—if you look higher up the glass, away from the stem, you’ll see the designs are in sharper focus now.
Narrowing the aperture to get more of the drink in focus.[f3.5, 1/2000s, ISO 100]
Same photo, edited. (Also, note: sorry, my edits aren’t very consistent here. I tried pumping the colors in the previous one, but I didn’t do that for this one. Rest assured the colors are pretty much the same between these shots.) [f3.5, 1/2000s, ISO 100]
Takeaway: While having an ultra-narrow DoF can be stylistically nice for some occasions, make sure you have at least one shot where the entire (front of the) drink is in focus.
Just to immediately prove myself wrong, I tried an even wider aperture (f1.7) than before, which still looks good. While having the whole drink in focus might be safest, the key may actually be having the most visually-prominent parts in focus.12
After about a dozen more overexposed images I will spare you, here’s a decently lit one.
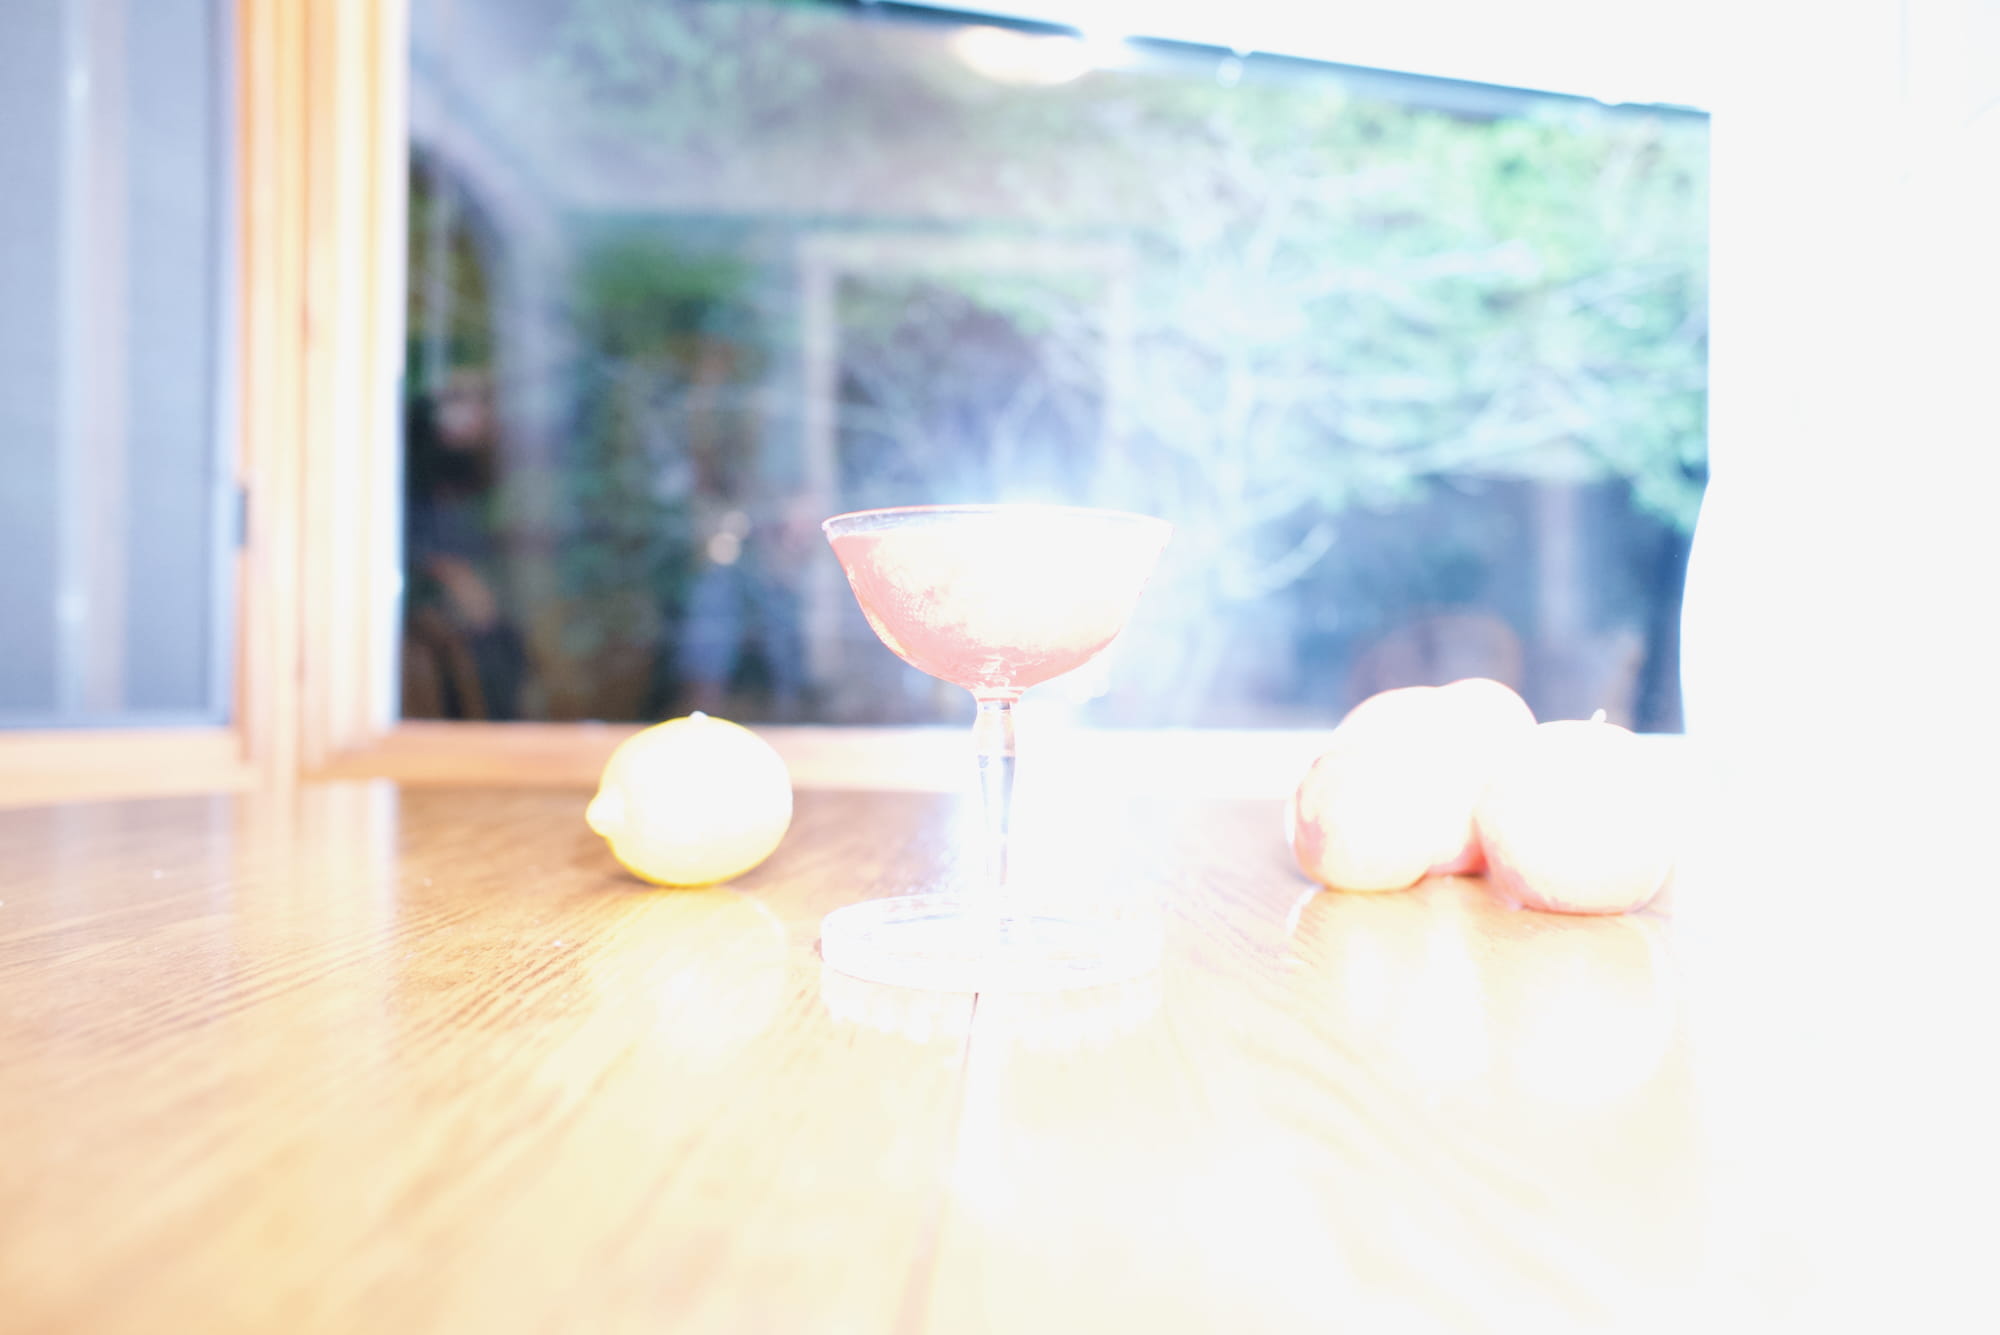
Opening up to f1.7. [f1.7, 1/2000s, ISO 50]

Same photo, edited. [f1.7, 1/2000s, ISO 50]
Flash Speed Limit
With my ISO bottomed out,13 and wanting to pick my aperture, the shutter speed was the the only knob to tweak. I was shooting at 1/2000s.
To my surprise, when I dialed to shorter than 1/2000s, the flash wouldn’t fire! This is conspicuous because the fastest the mechanical shutter will fire is 1/2000s.
Brief reading online confirms that the Q2 synchronizes with the flash at a fastest of 1/2000s.14 Further brief reading15 confirms that synchronizing quick events like moving objects, flickering lights, or a camera flash is more difficult with electronic shutters than mechanical ones, so limiting the flash sync to the mechanical shutter speed makes sense.
Experiment 3: 45°
I wanted to try at least one angled shot. While not my favorite angle, variety is good. I didn’t use the flash for this one. It’s not bad, but I think I would have closed the aperture a bit so the drink is more in focus,
45° shot. [f1.7, 1/250s, ISO 1250]
Same photo, edited. [f1.7, 1/250s, ISO 1250]
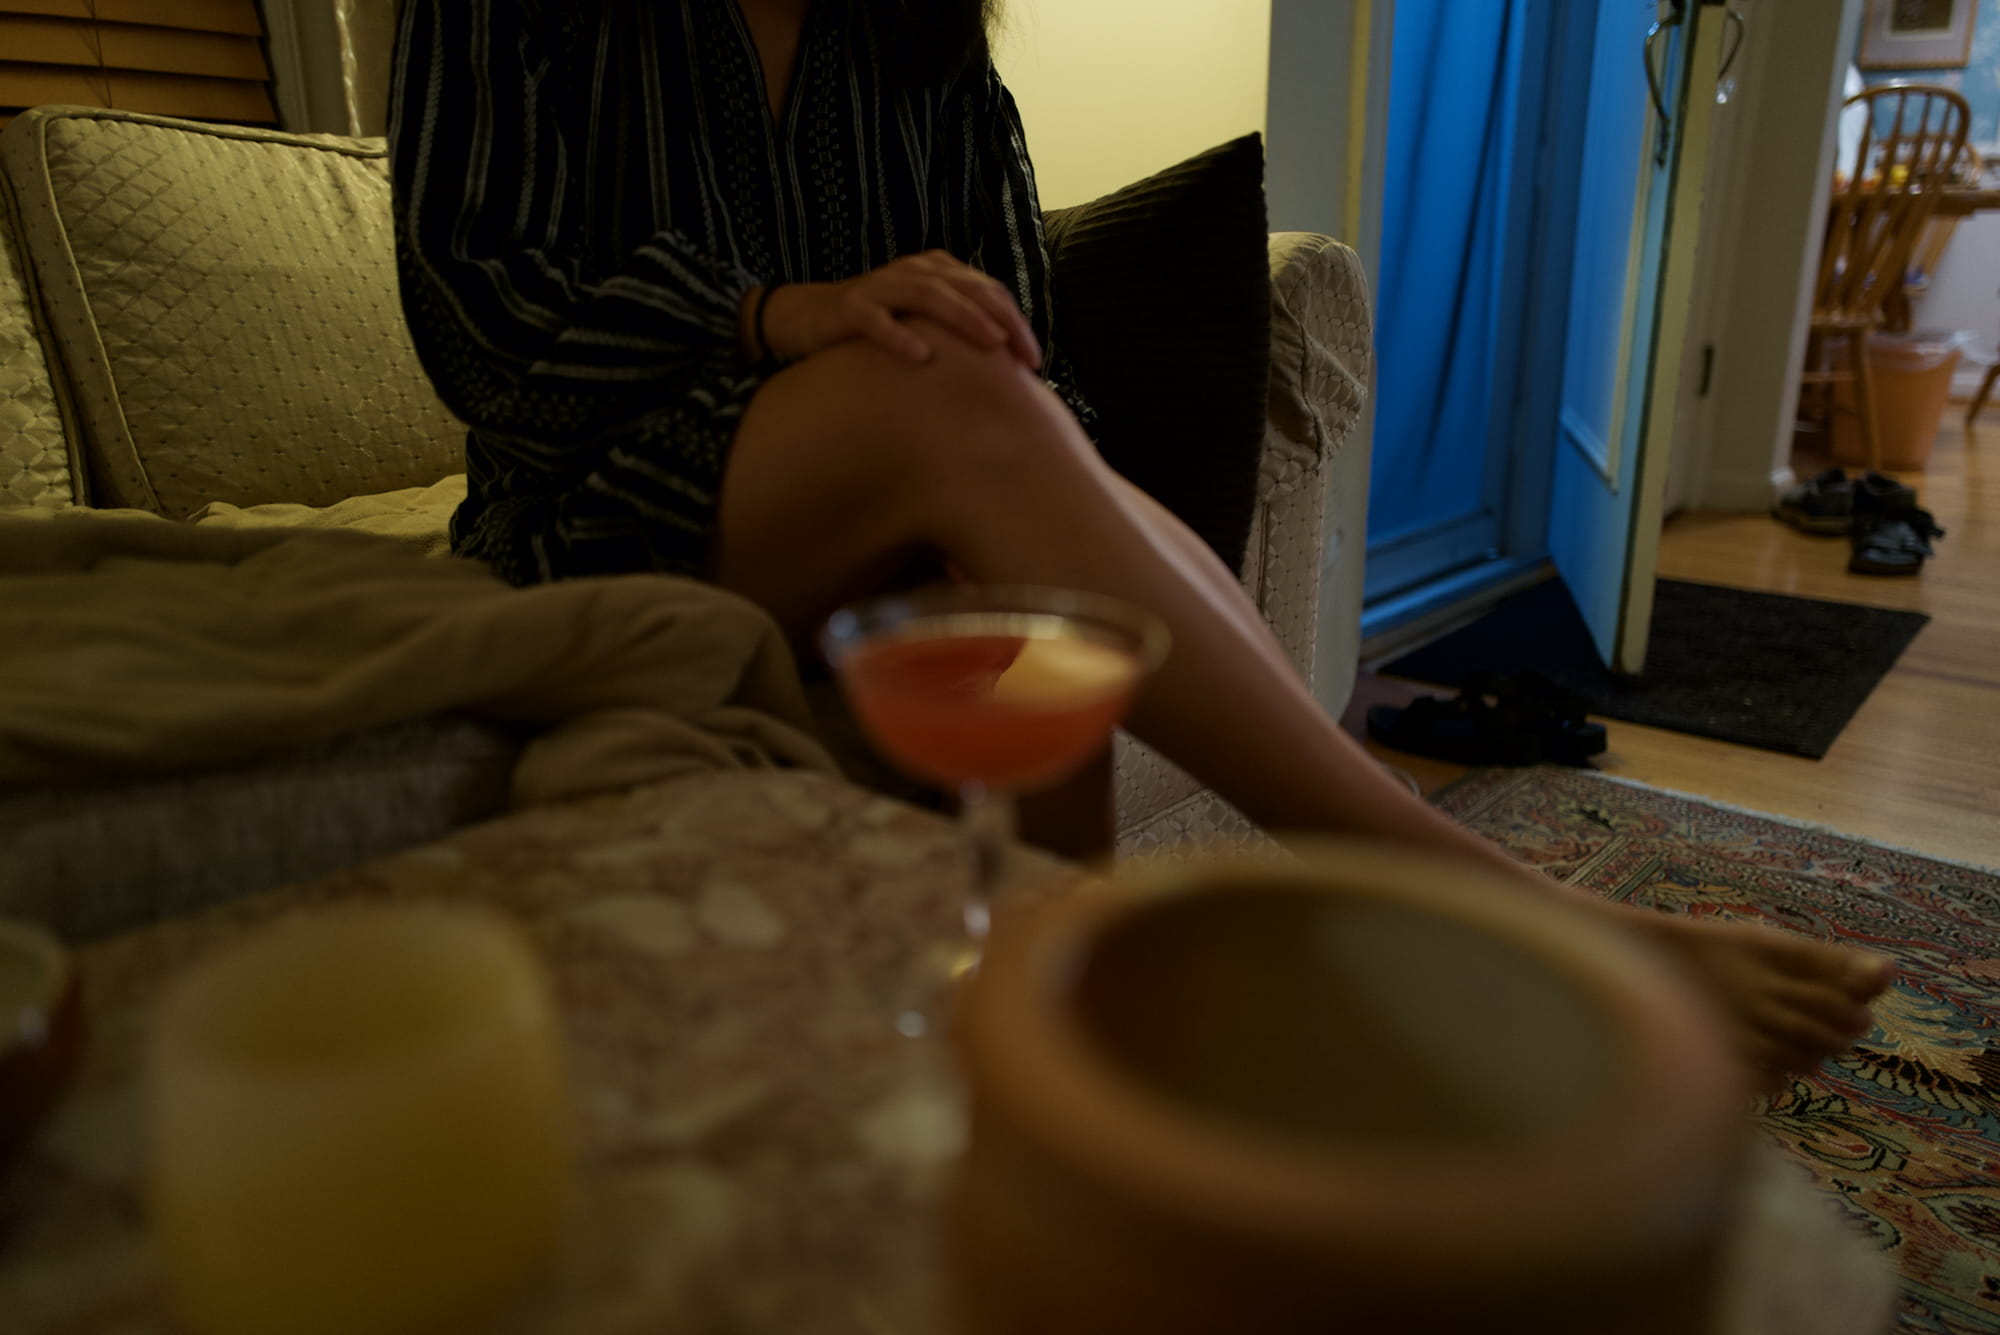
Experiment 4: Natural Shots
I tried using the flash for a couple of these shots.
Because I was shooting more actively,16 I wasn’t interested in manual exposure (where the preview would be entirely black), so I went back to aperture priority and just cranked the auto exposure down to -3ev.
This felt like a hack, so I went without flash for most of them.17 But now that I’m looking at the results, I like the flash shots more! Because I wasn’t paying attention to lighting or my ISO, the non-flash shots are under-lit, and the ISO values are pretty high. This makes the results grainy. Graininess is a look, and it’s not necessarily bad. But I think if it can be avoided by simply adding more lighting, it’s probably better to go without. Easier to artificially grain up a photo in post than to try to remove it from the original.
Takeaway: Pay attention to the ISO when staging. If it goes up, add more light.
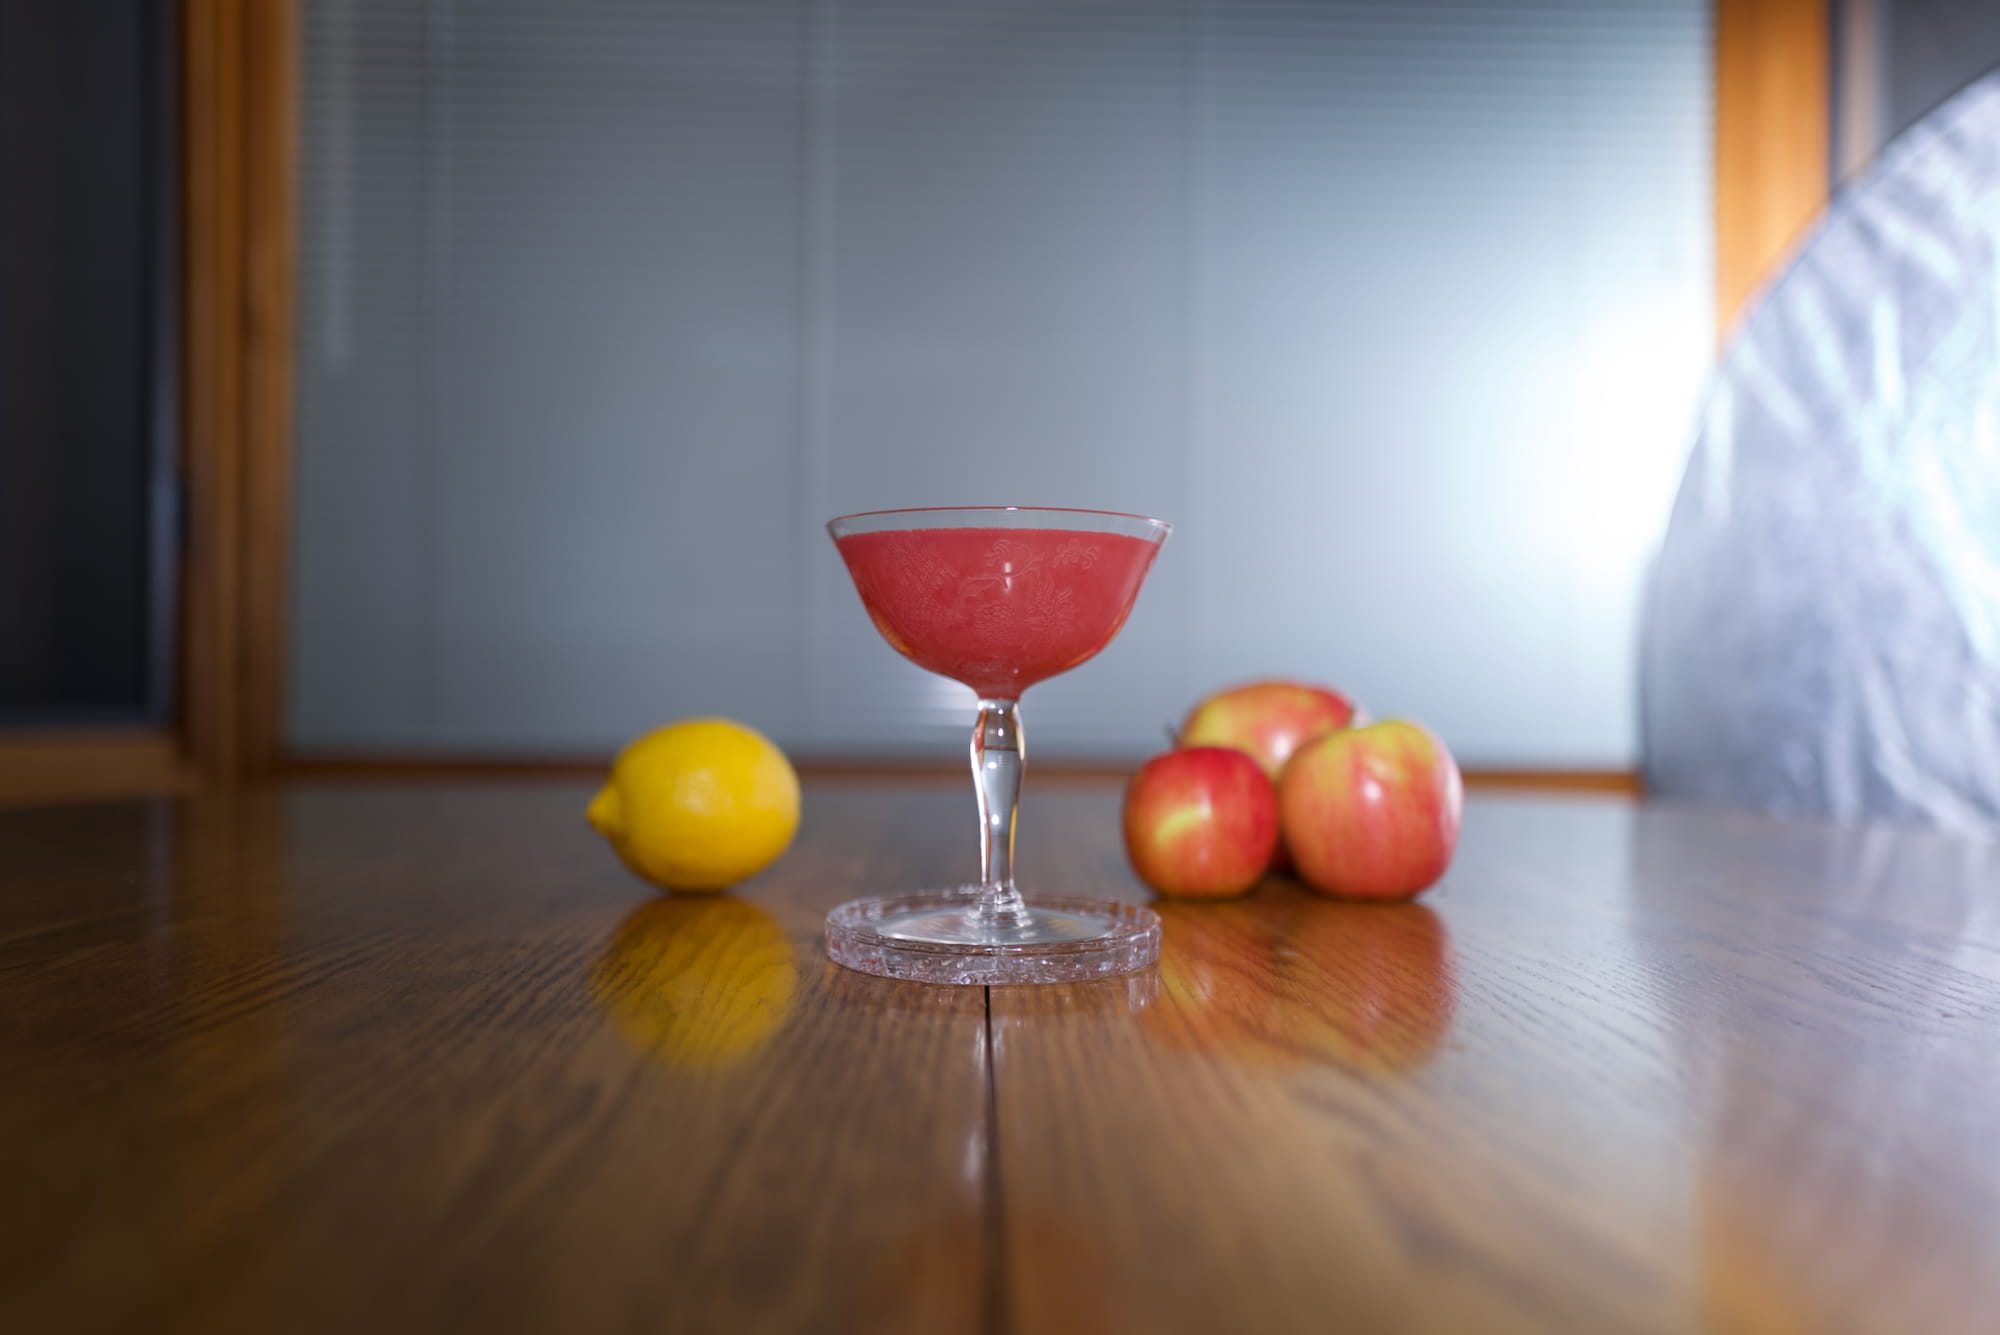
With flash (I think) [-3ev; f1.7, 1/250s, ISO 320].
Same photo (with flash, I think), edited. Good clarity. [-3ev; f1.7, 1/250s, ISO 320].
No flash (I think) [-1ev; f1.7, 1/250s, ISO 1250].
Same photo (no flash, I think), edited. You can see the graininess with the higher ISO. [-1ev; f1.7, 1/250s, ISO 1250].
Having the subject blurry. Cool idea, doesn’t look good. Or at least not in this case.
Blurry subject. [no flash; -1ev; f1.7, 1/250s, ISO 1600].
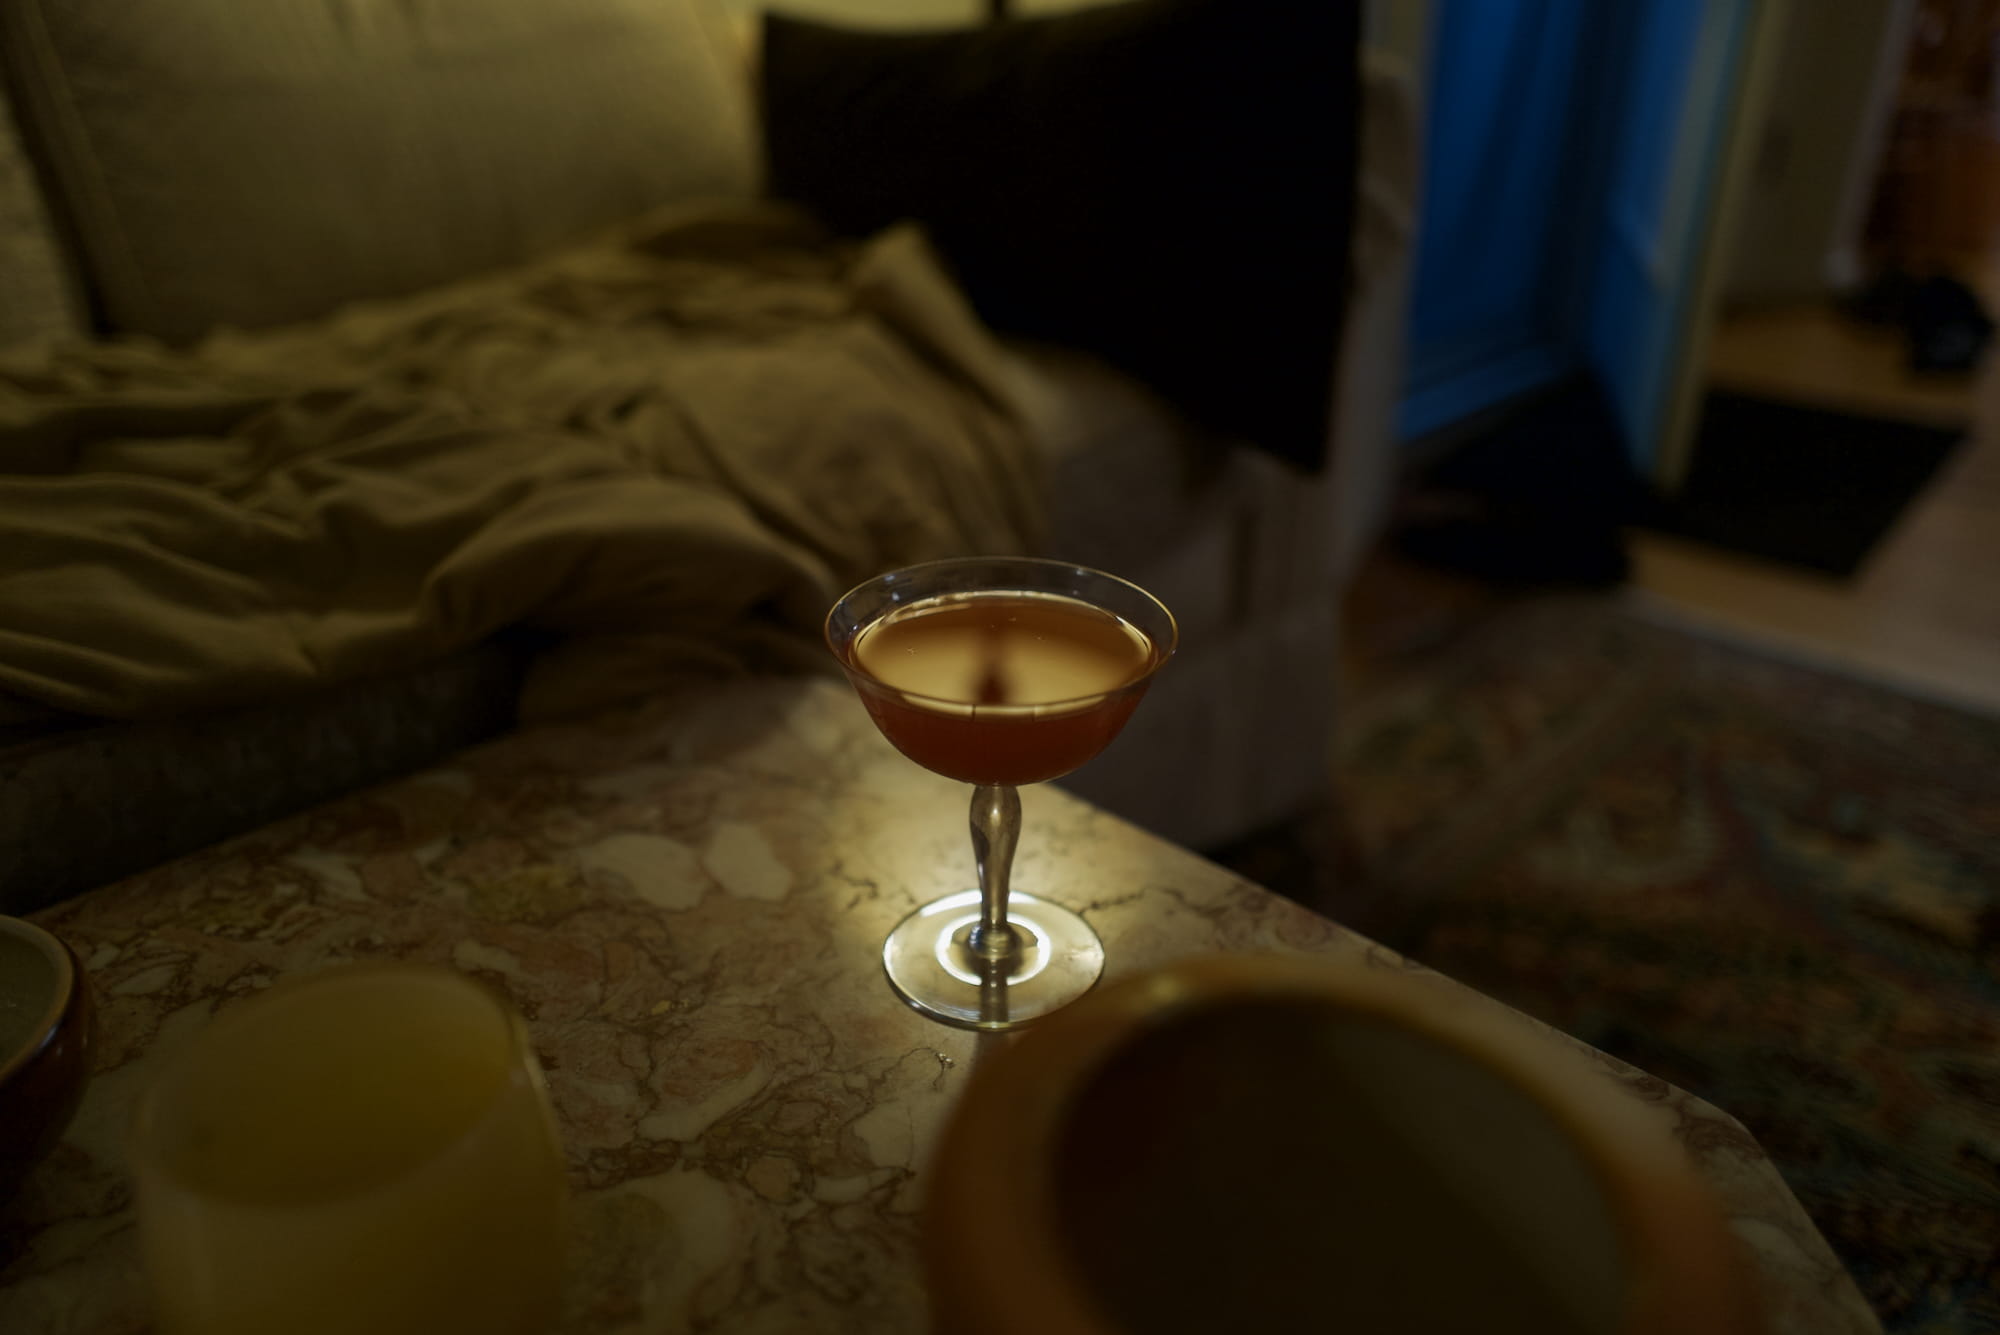
Trying some other shots positioned around this table.
Focused subject. [no flash; -1ev; f1.7, 1/250s, ISO 1600].
Same photo, edited. [no flash; -1ev; f1.7, 1/250s, ISO 1600].
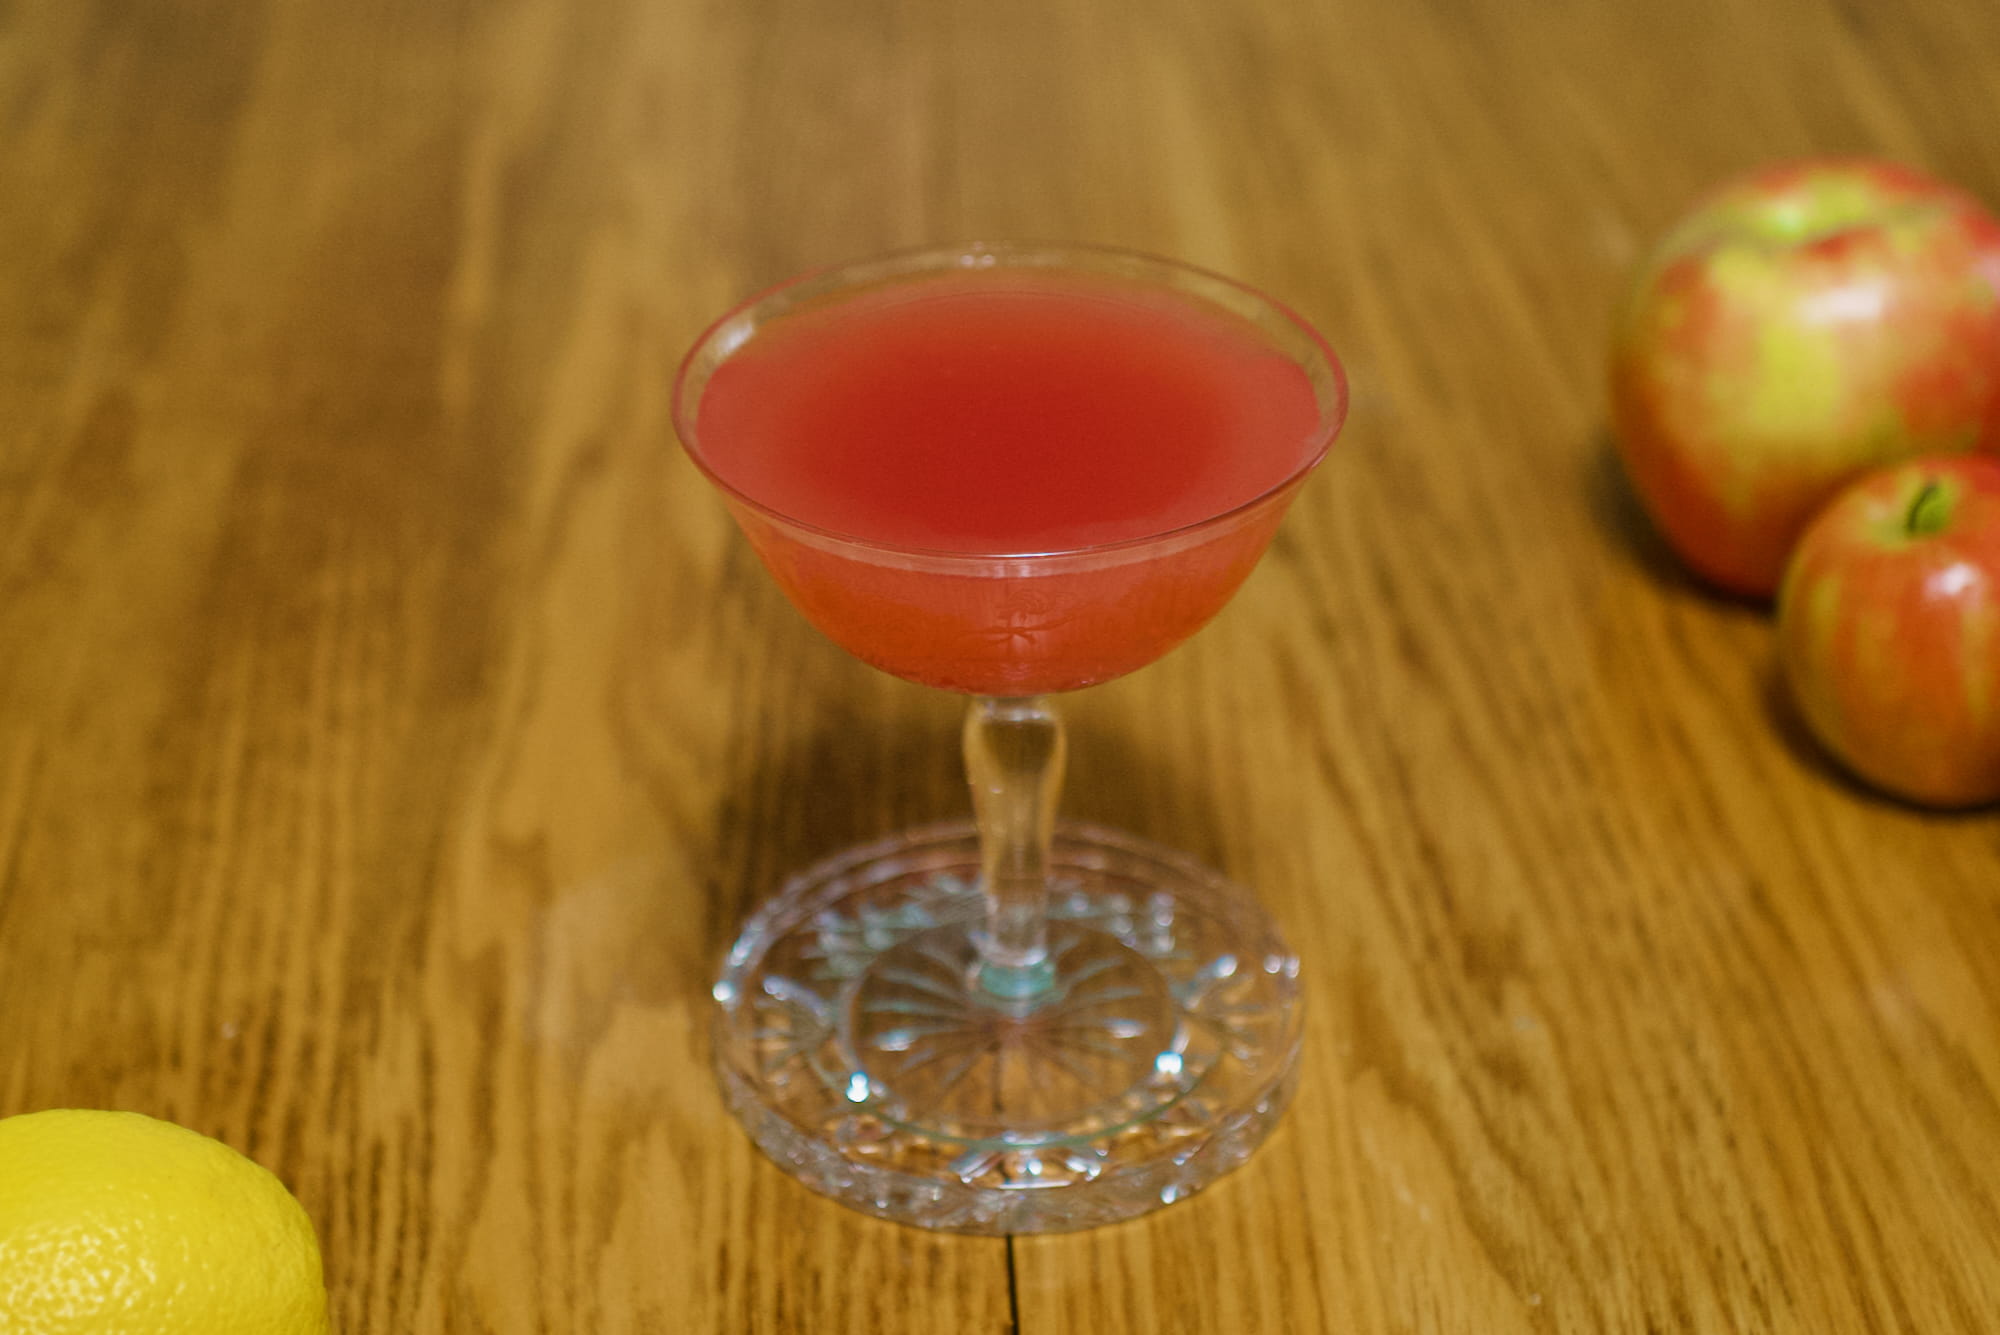
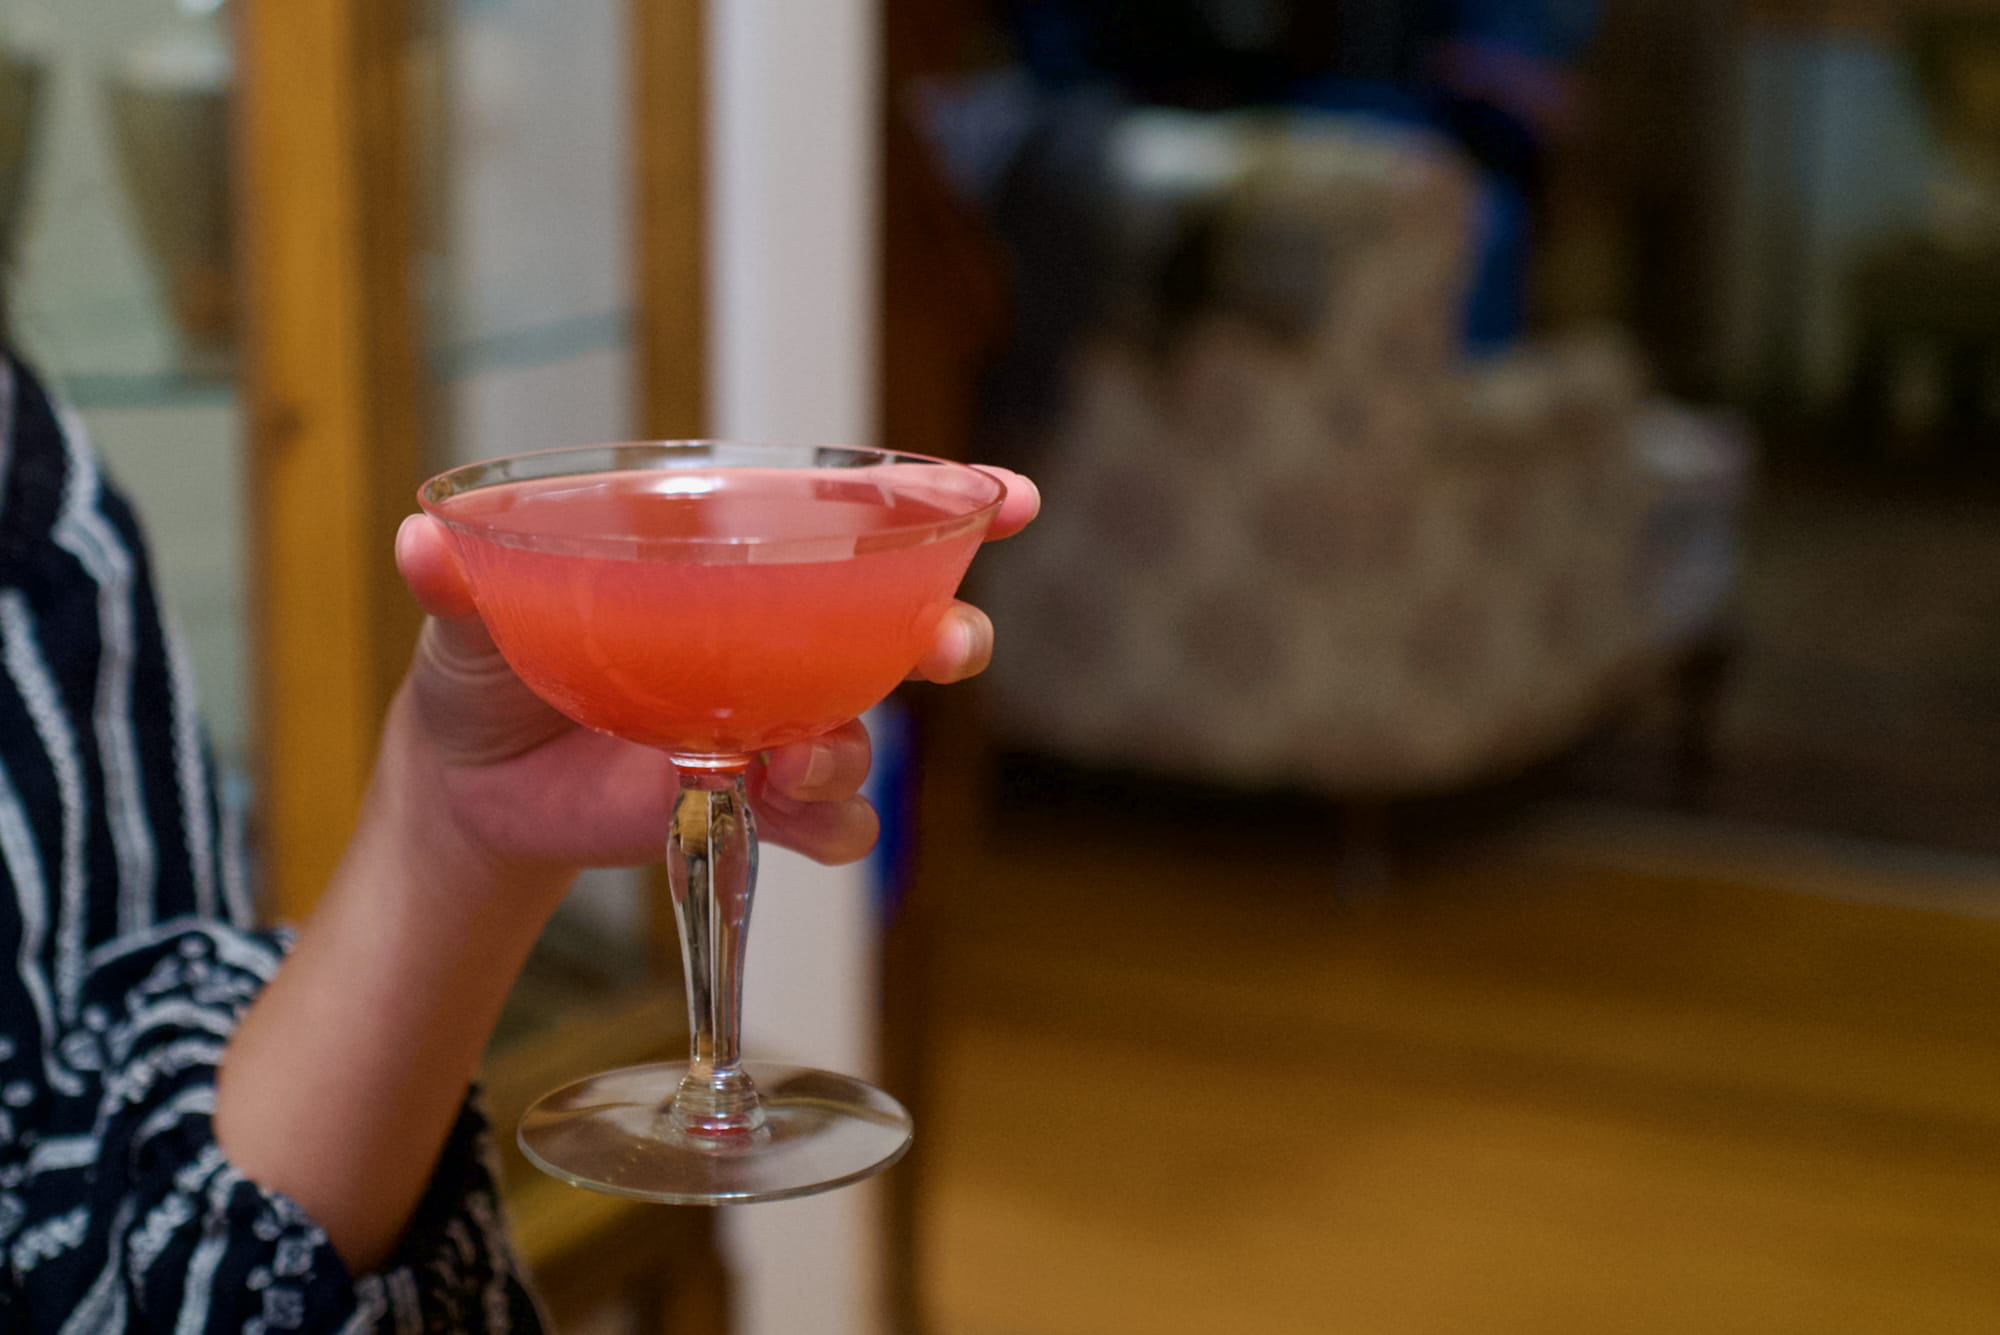
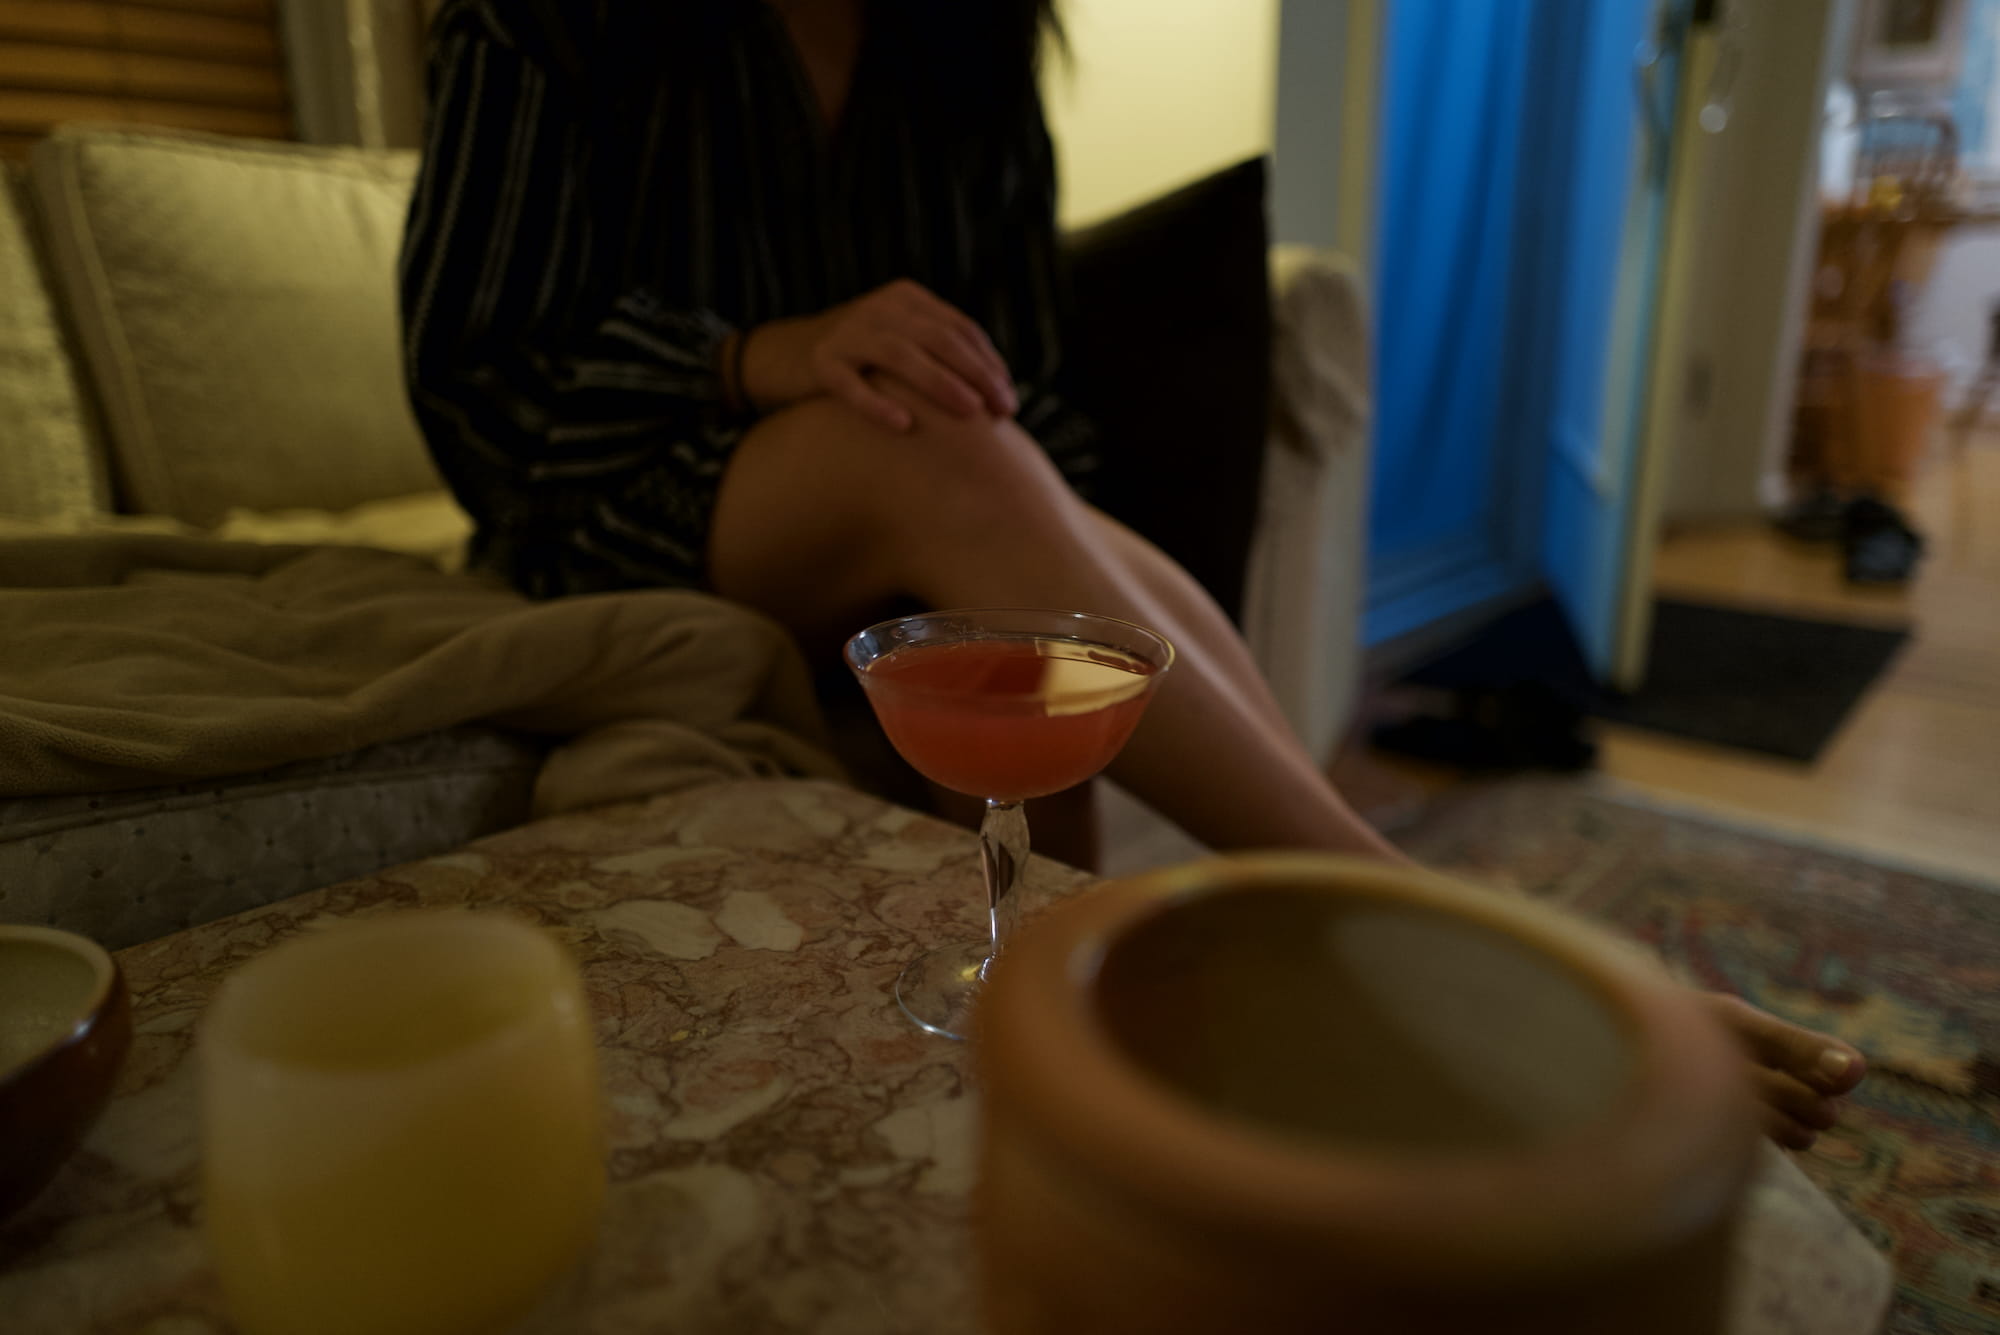
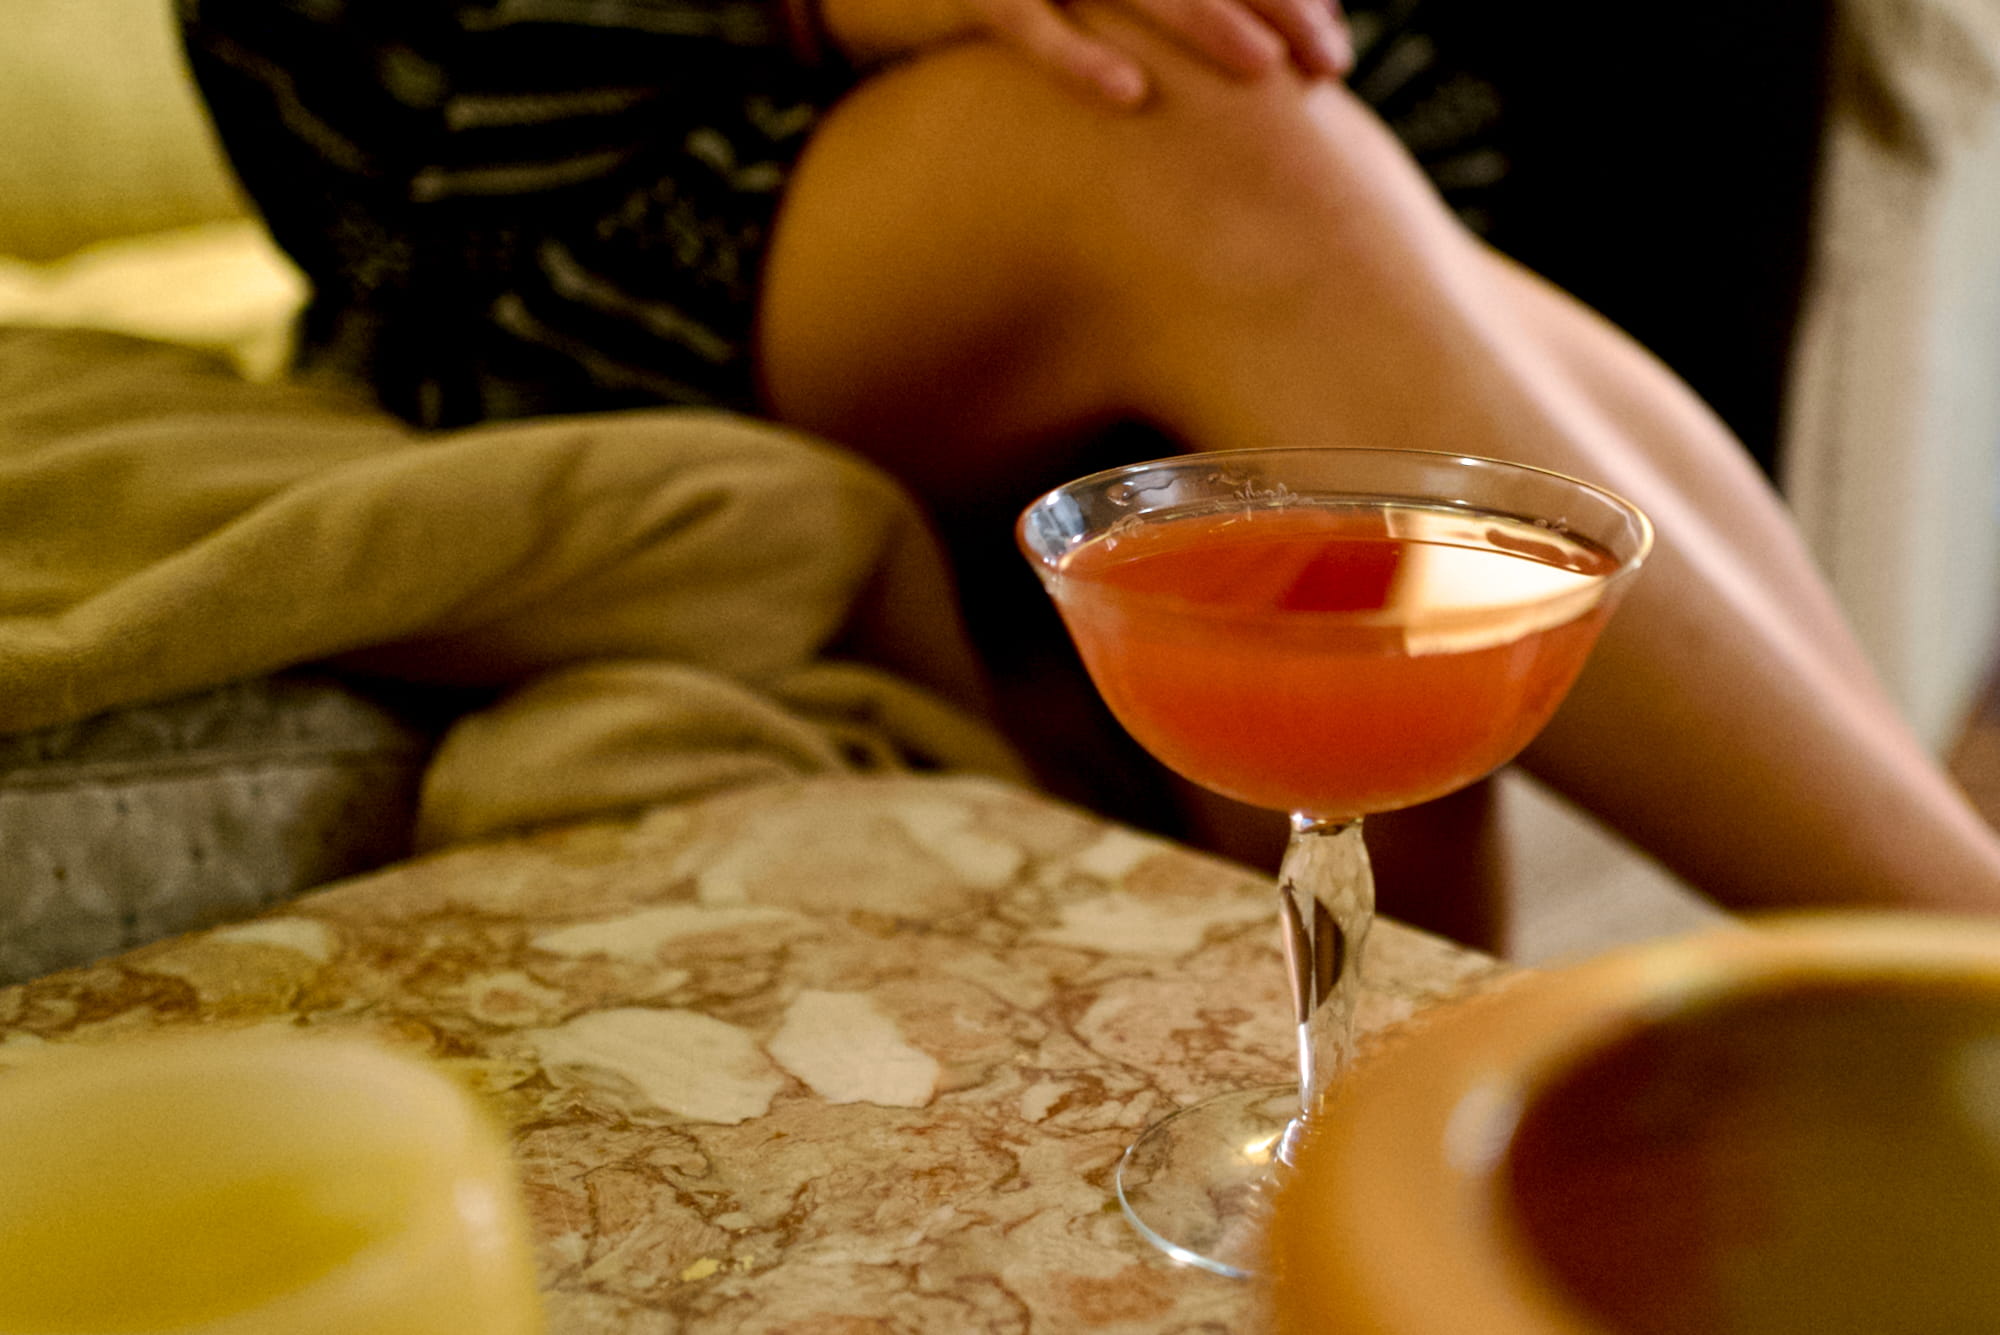
For the next drink-only shot, I took no-flash and flash variants. I just wish that I had closed the aperture a bit; f1.7 is so wide that only part of the drink is in focus.18
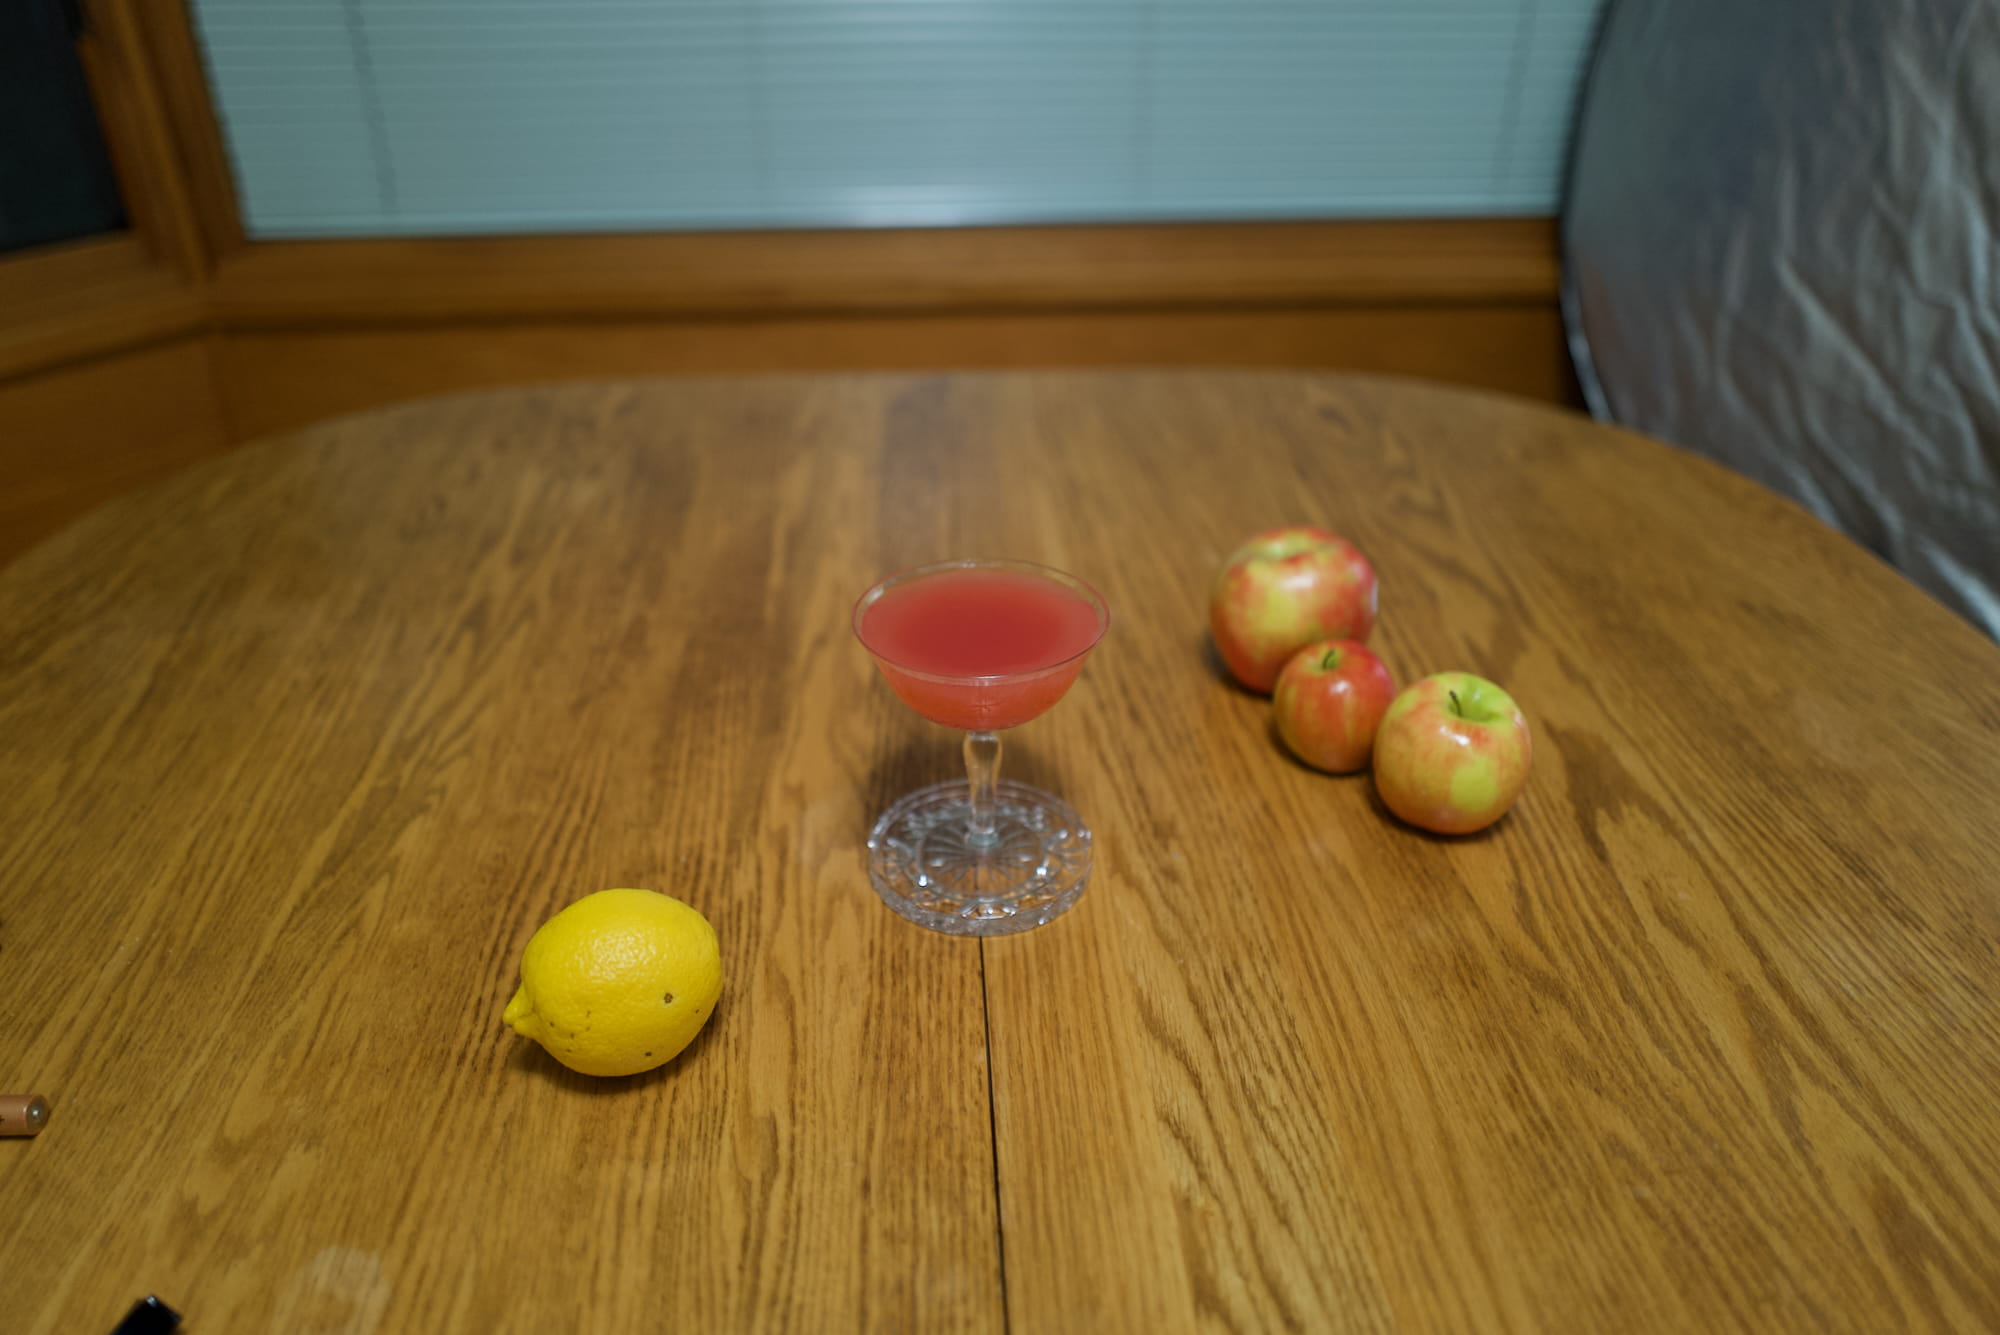
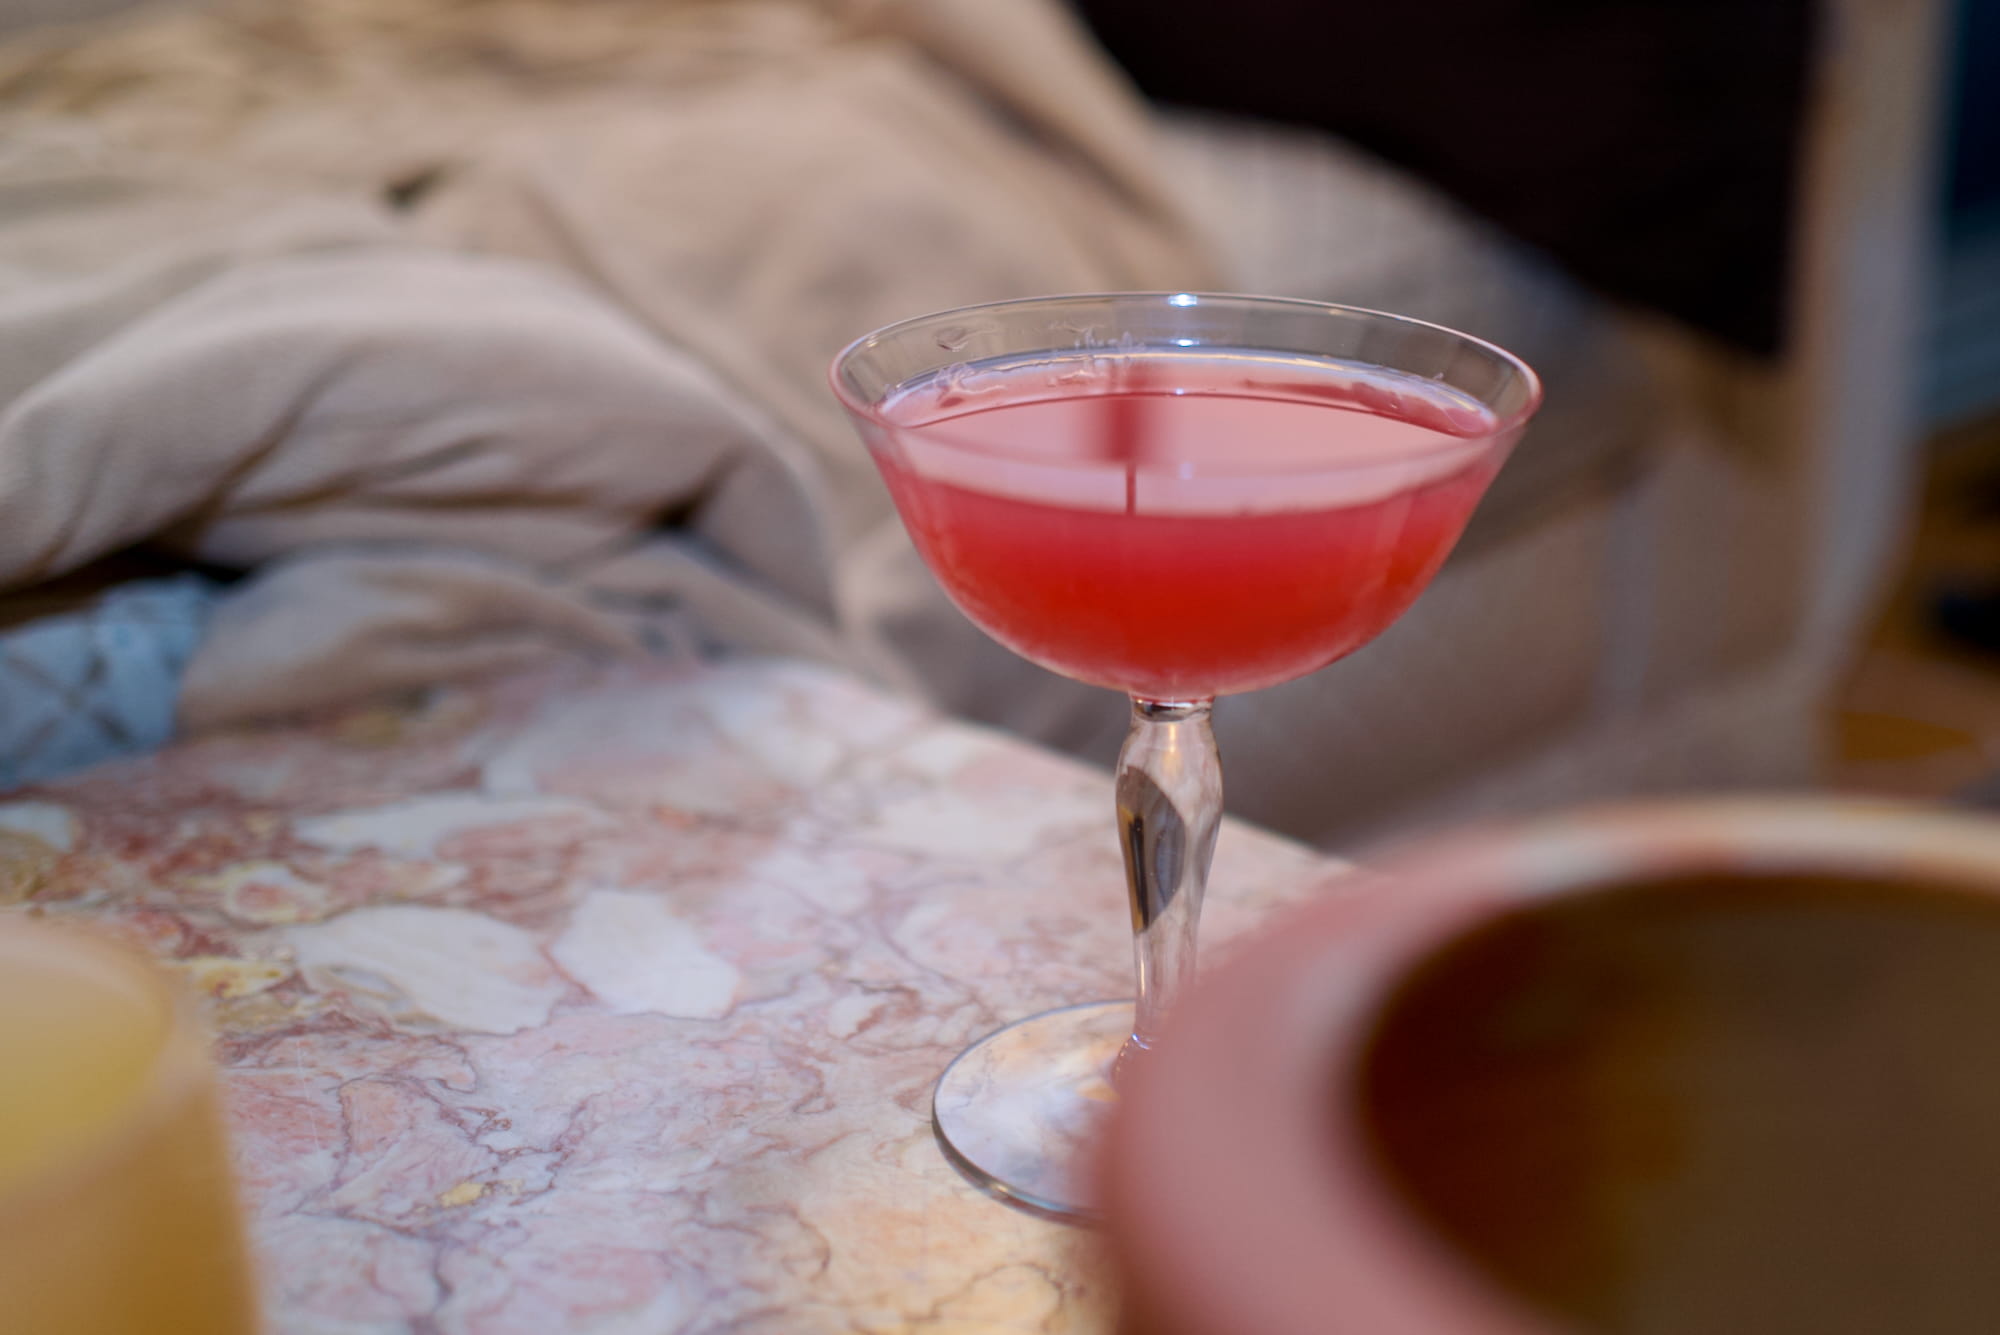
Casual tabletop. [no flash; -1.6ev; f1.7, 1/250s, ISO 640].
Same photo, edited. [no flash; -1.6ev; f1.7, 1/250s, ISO 640].

Casual tabletop w/ flash. [flash; -3ev; f1.7, 1/250s, ISO 320].
Same photo, edited. [flash; -3ev; f1.7, 1/250s, ISO 320].
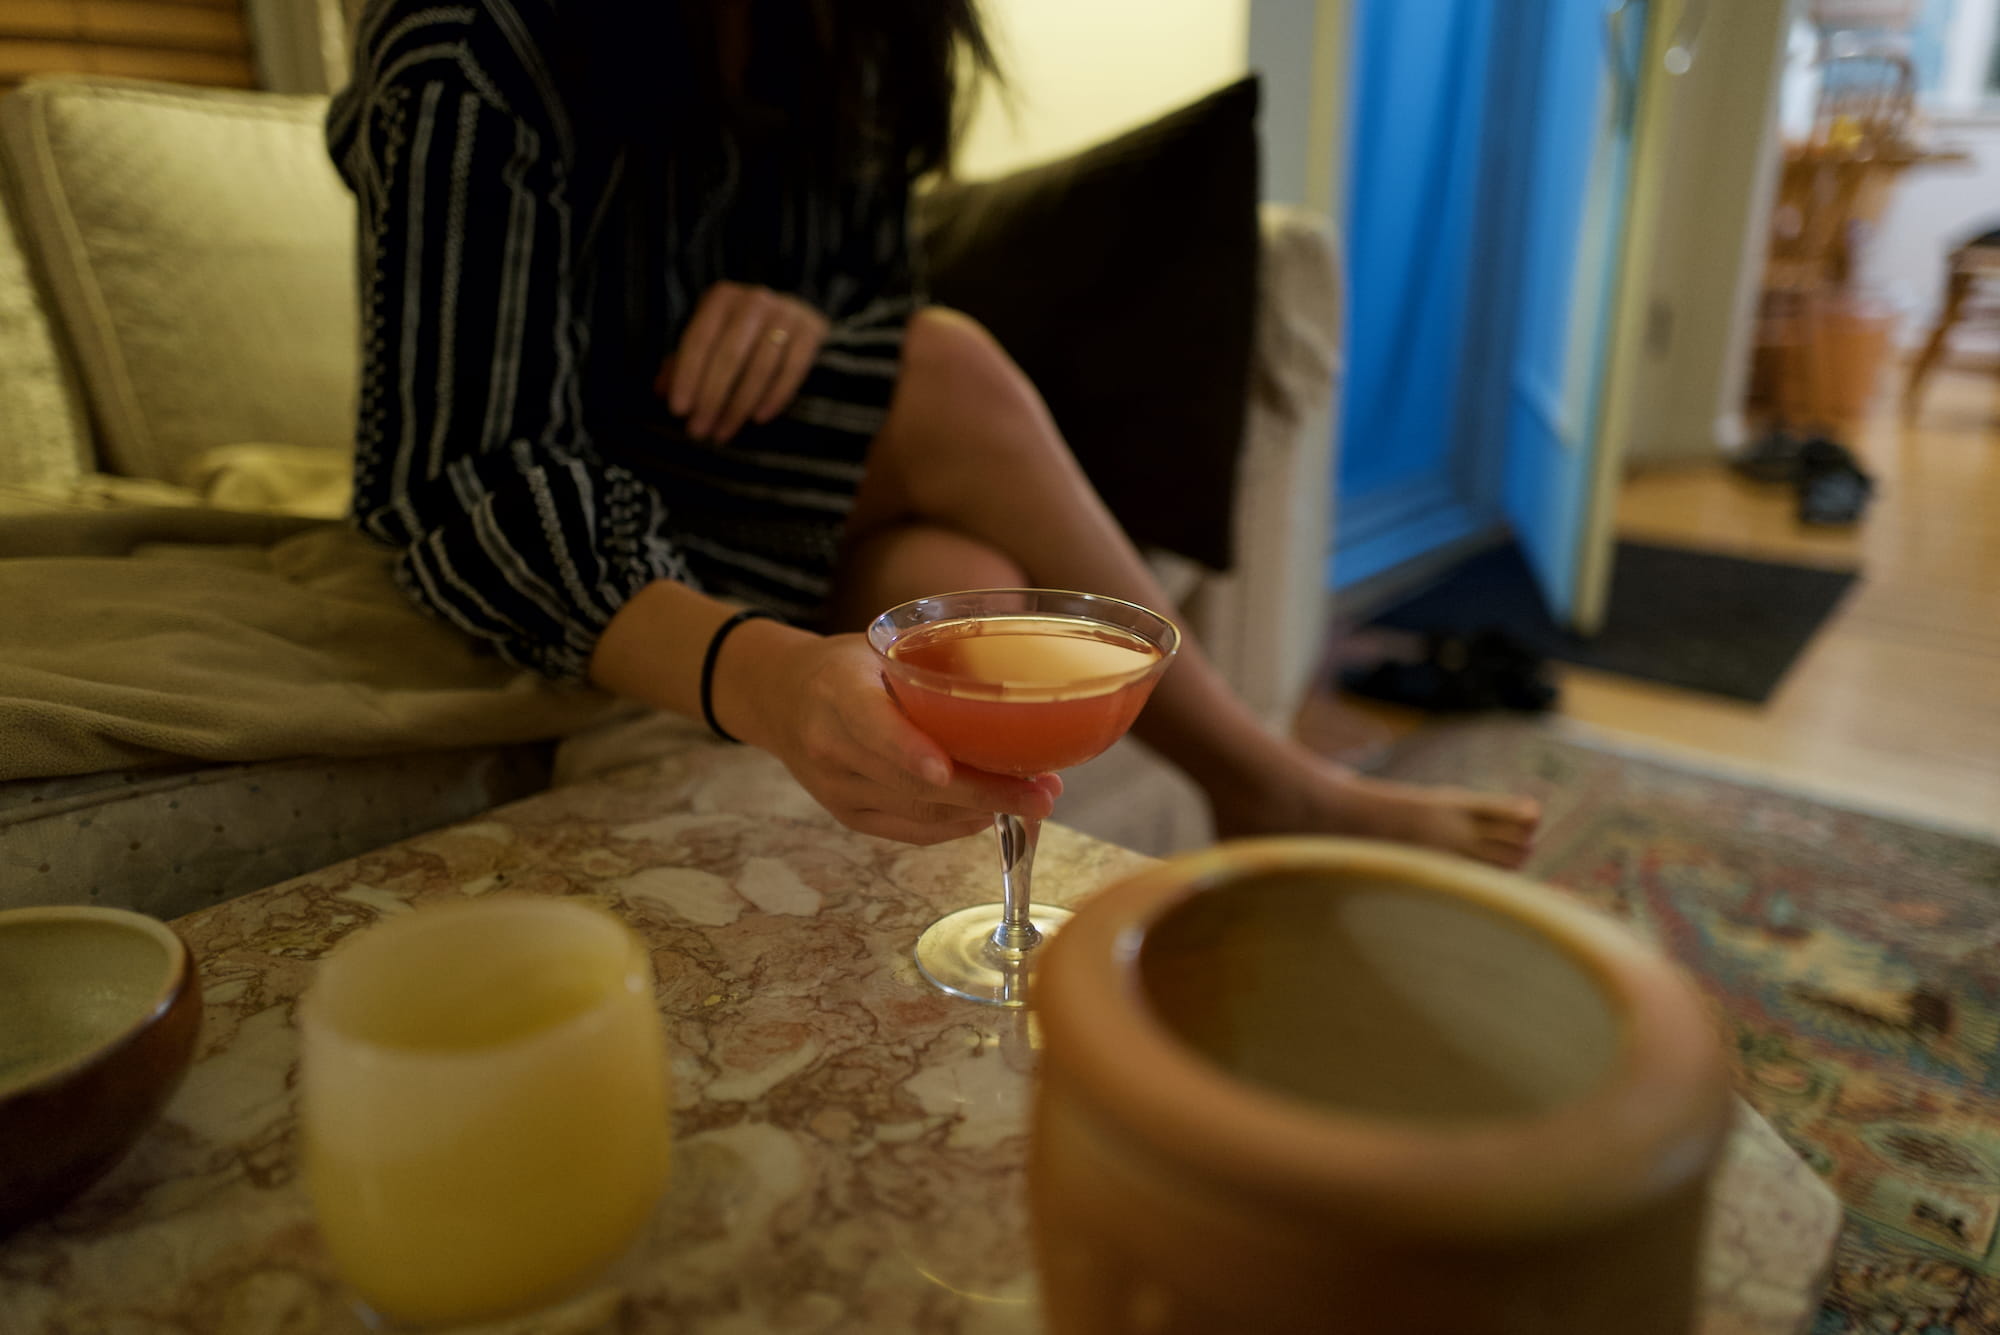
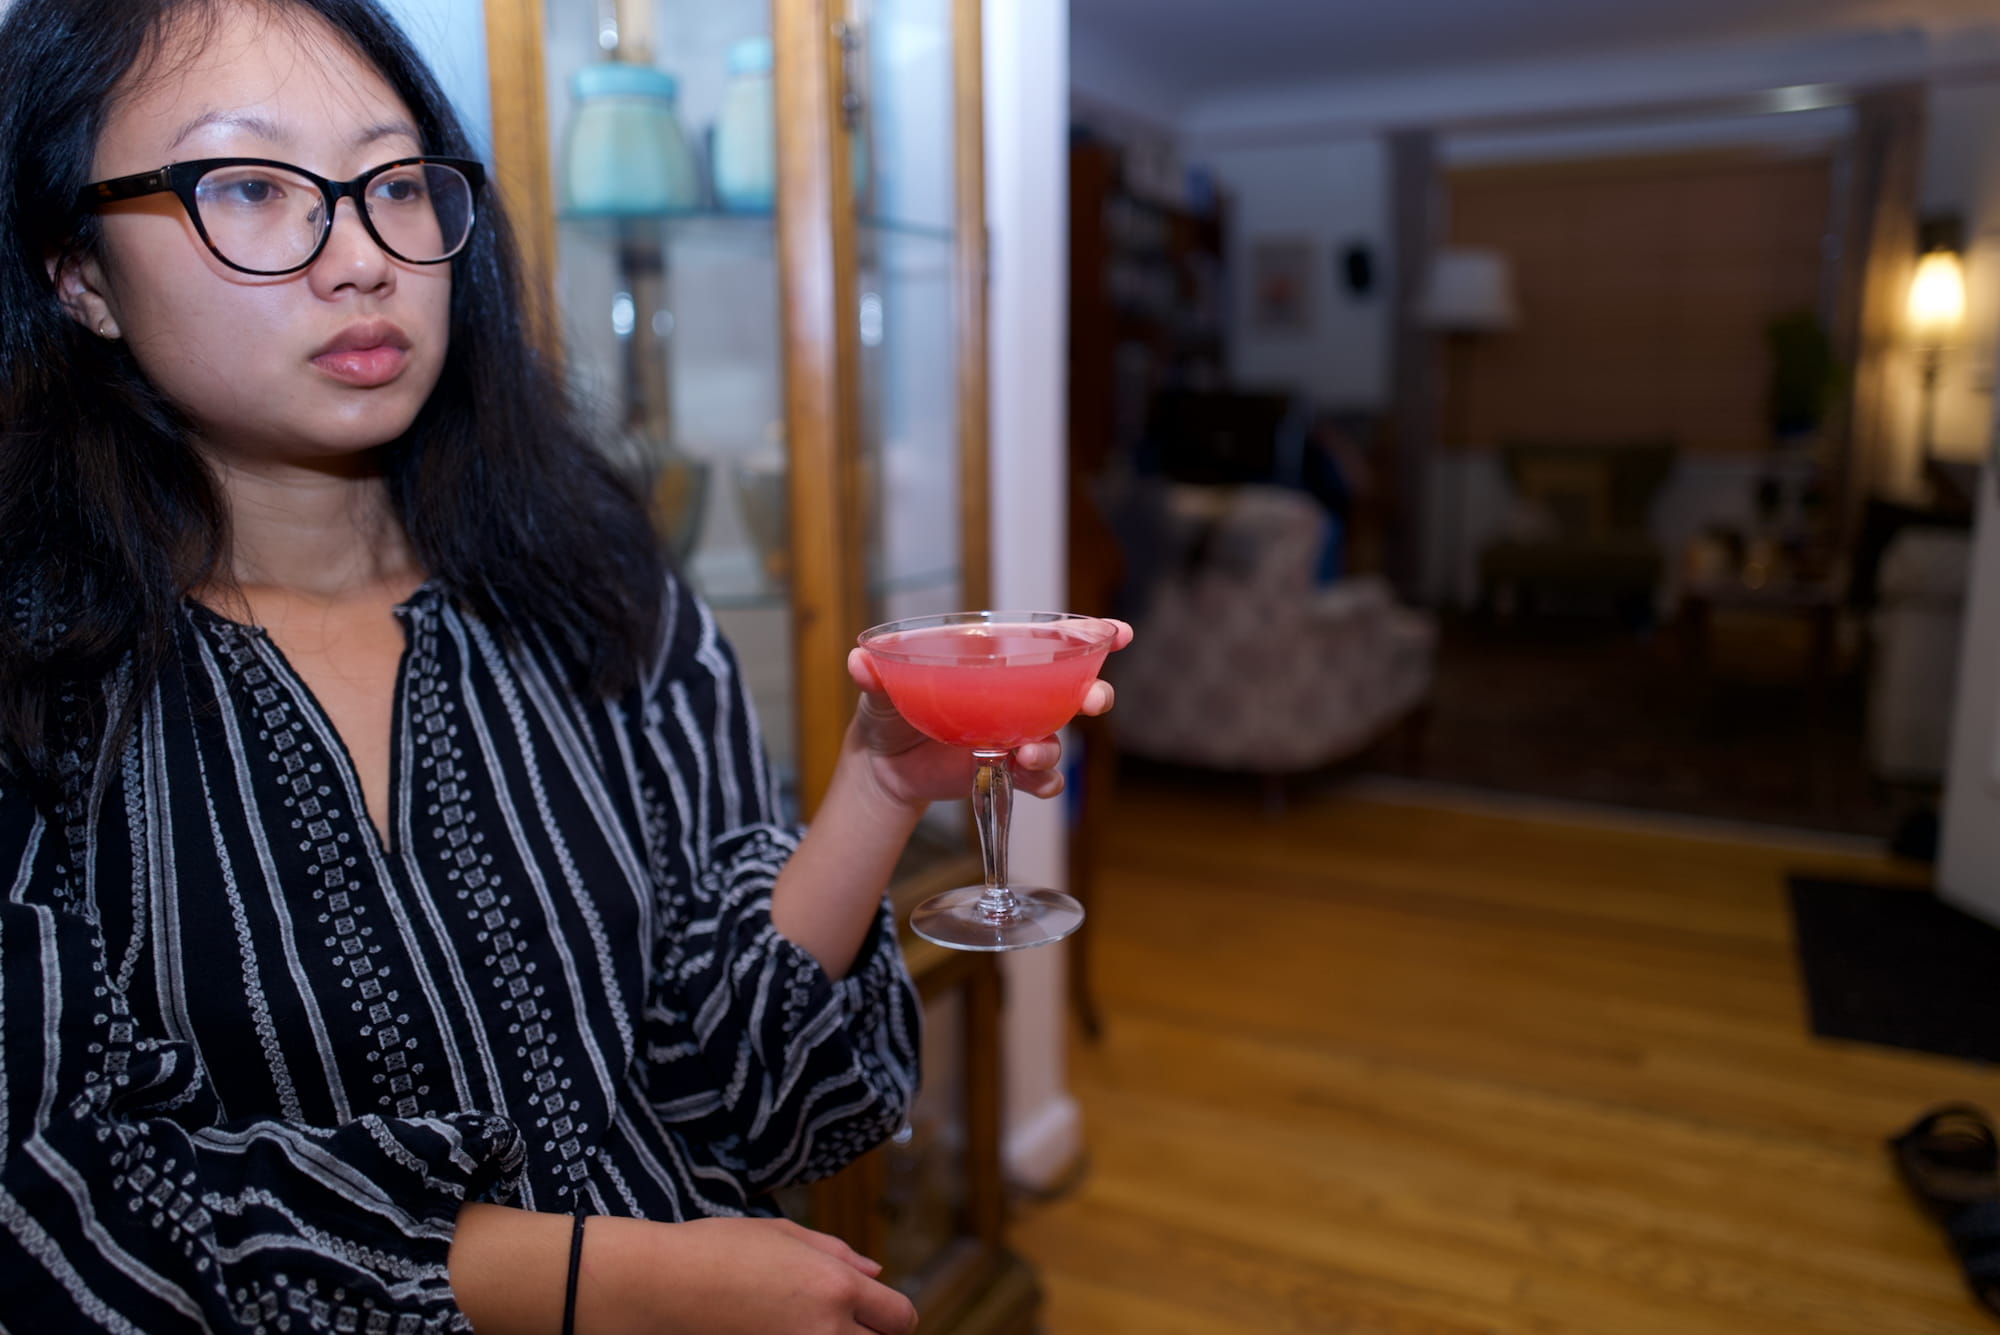
Grabbing drink, outside. [no flash; 0ev; f1.7, 1/250s, ISO 3200].
Same photo, edited. [no flash; 0ev; f1.7, 1/250s, ISO 3200].
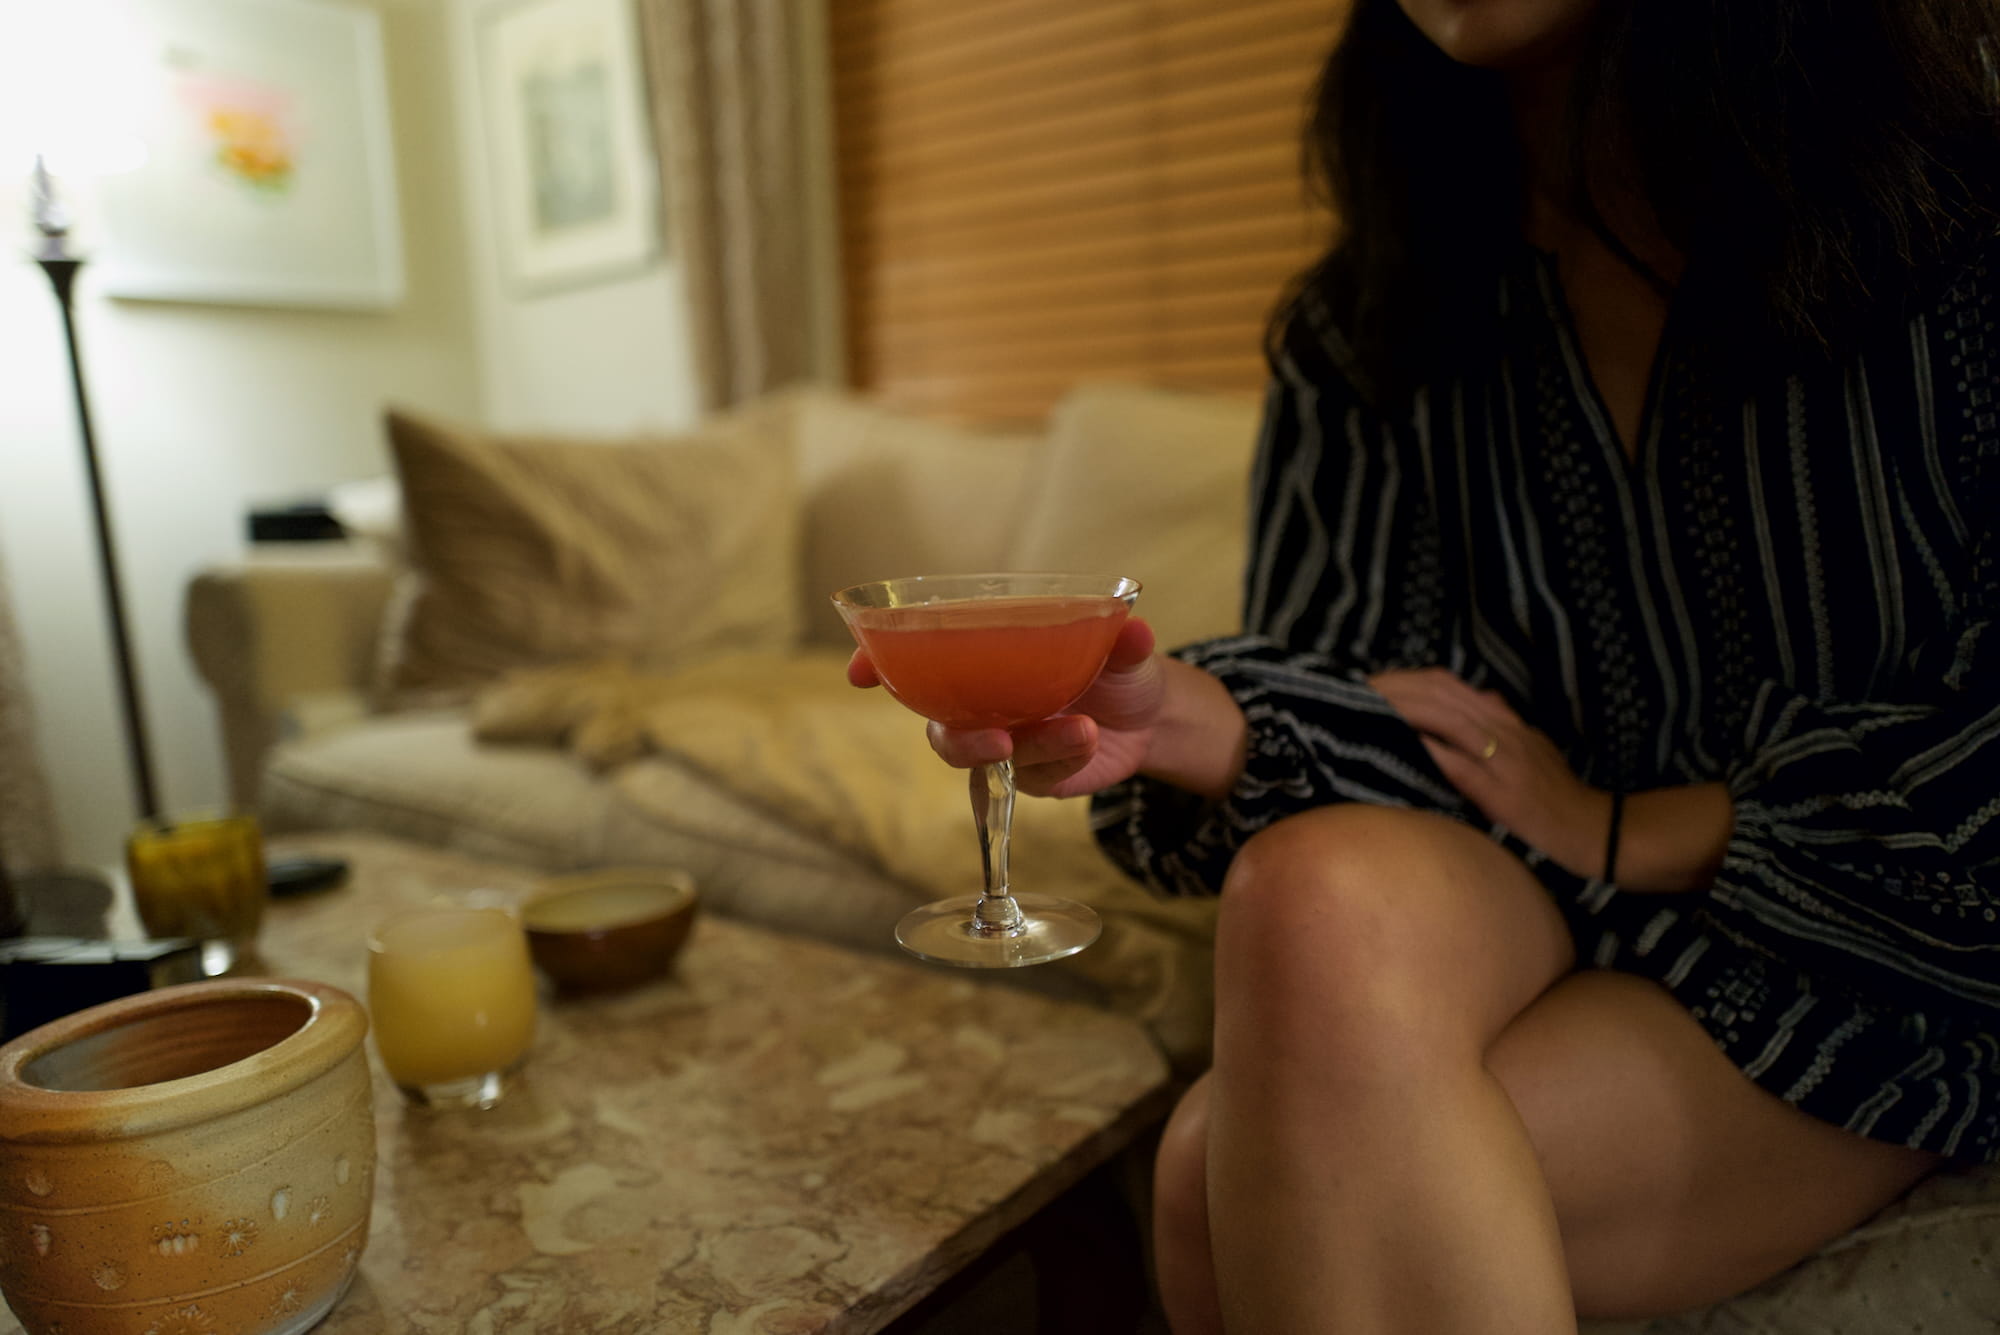
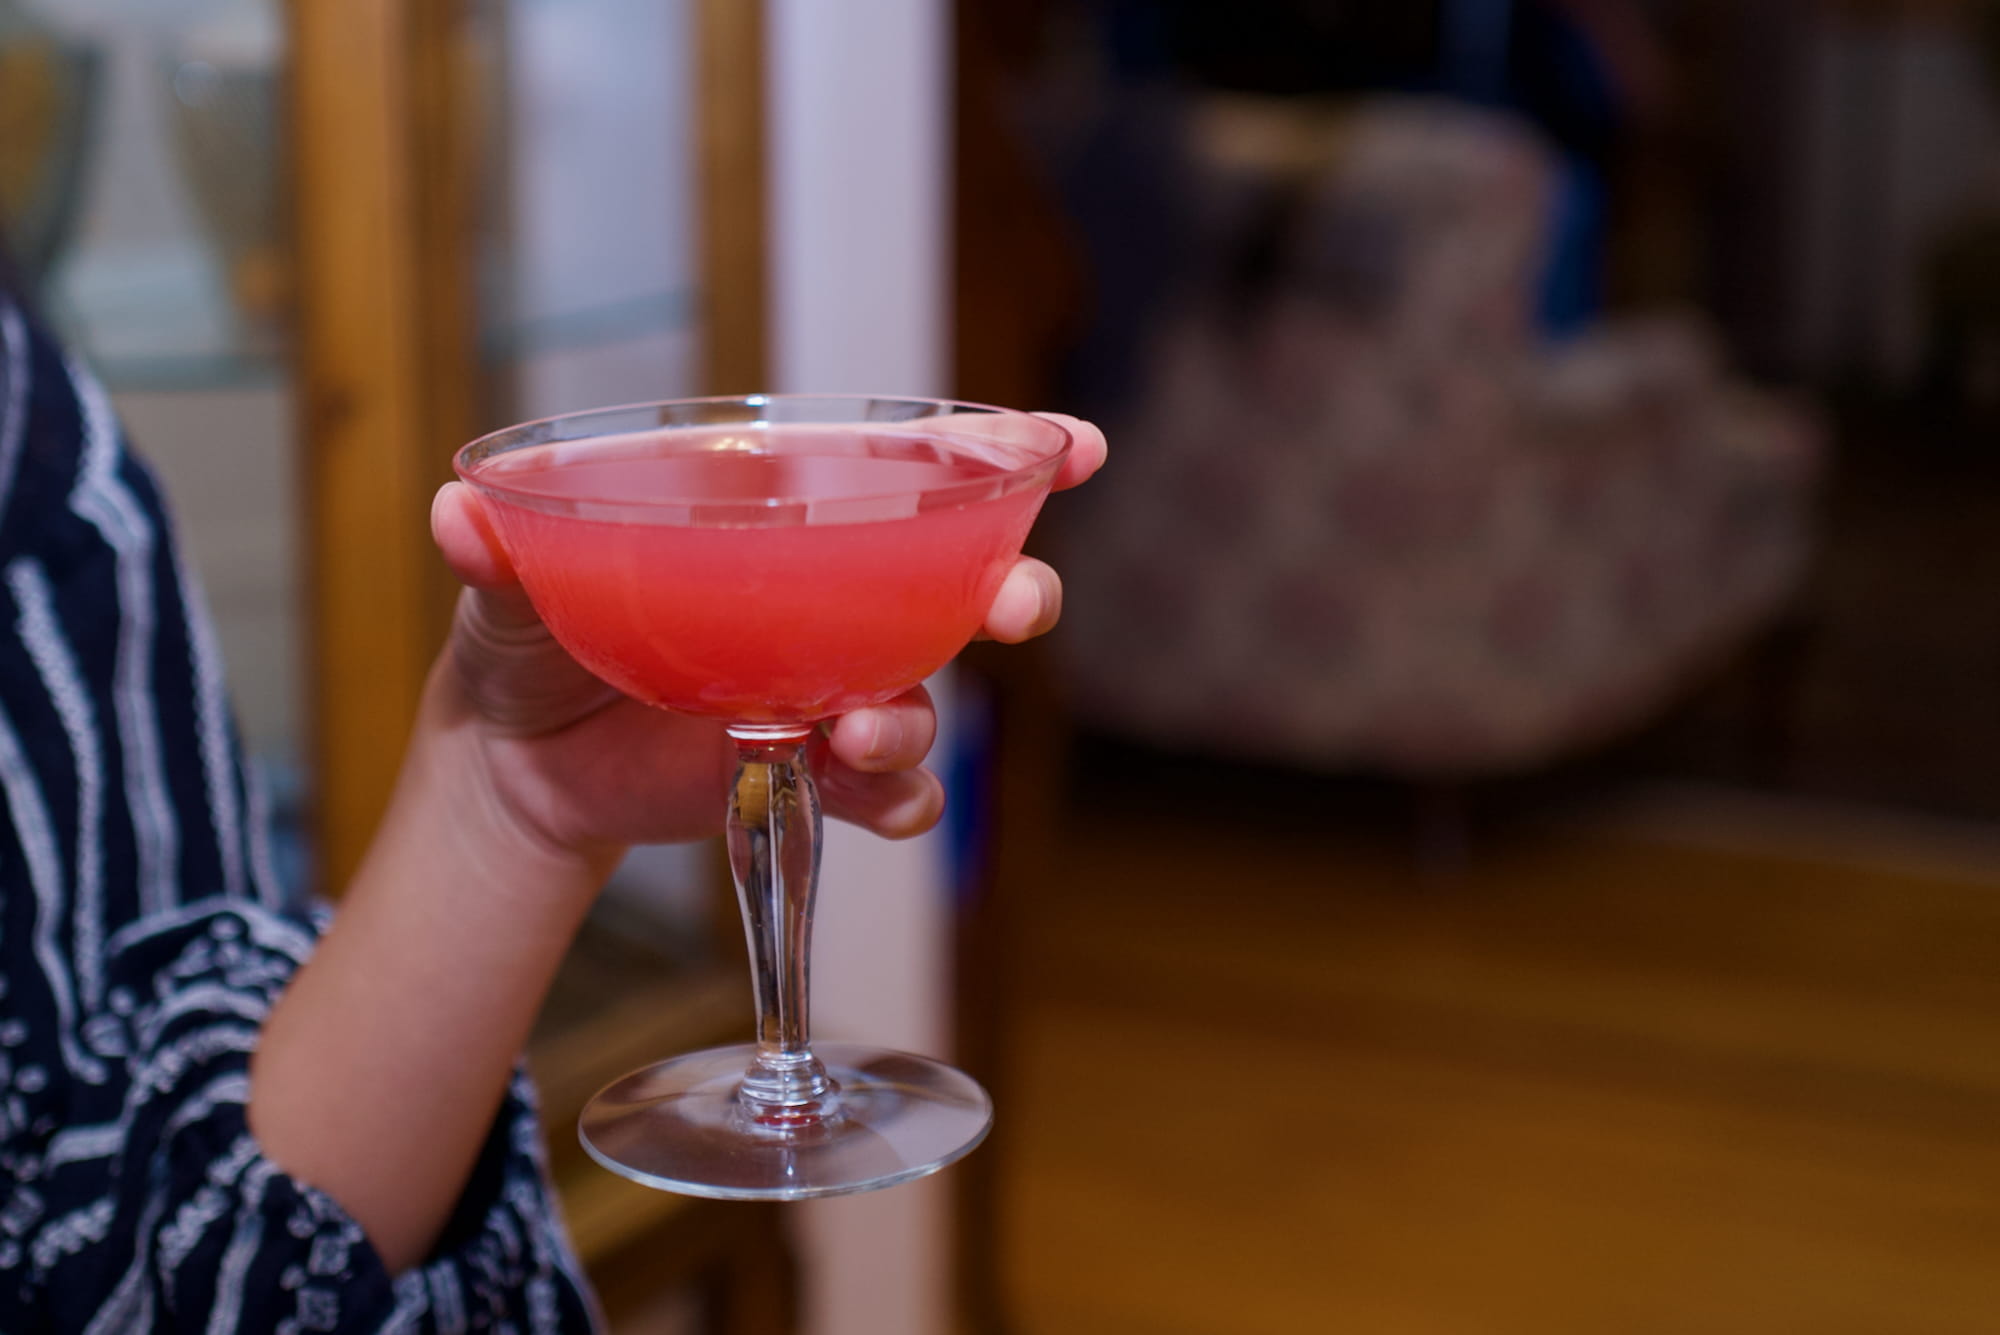
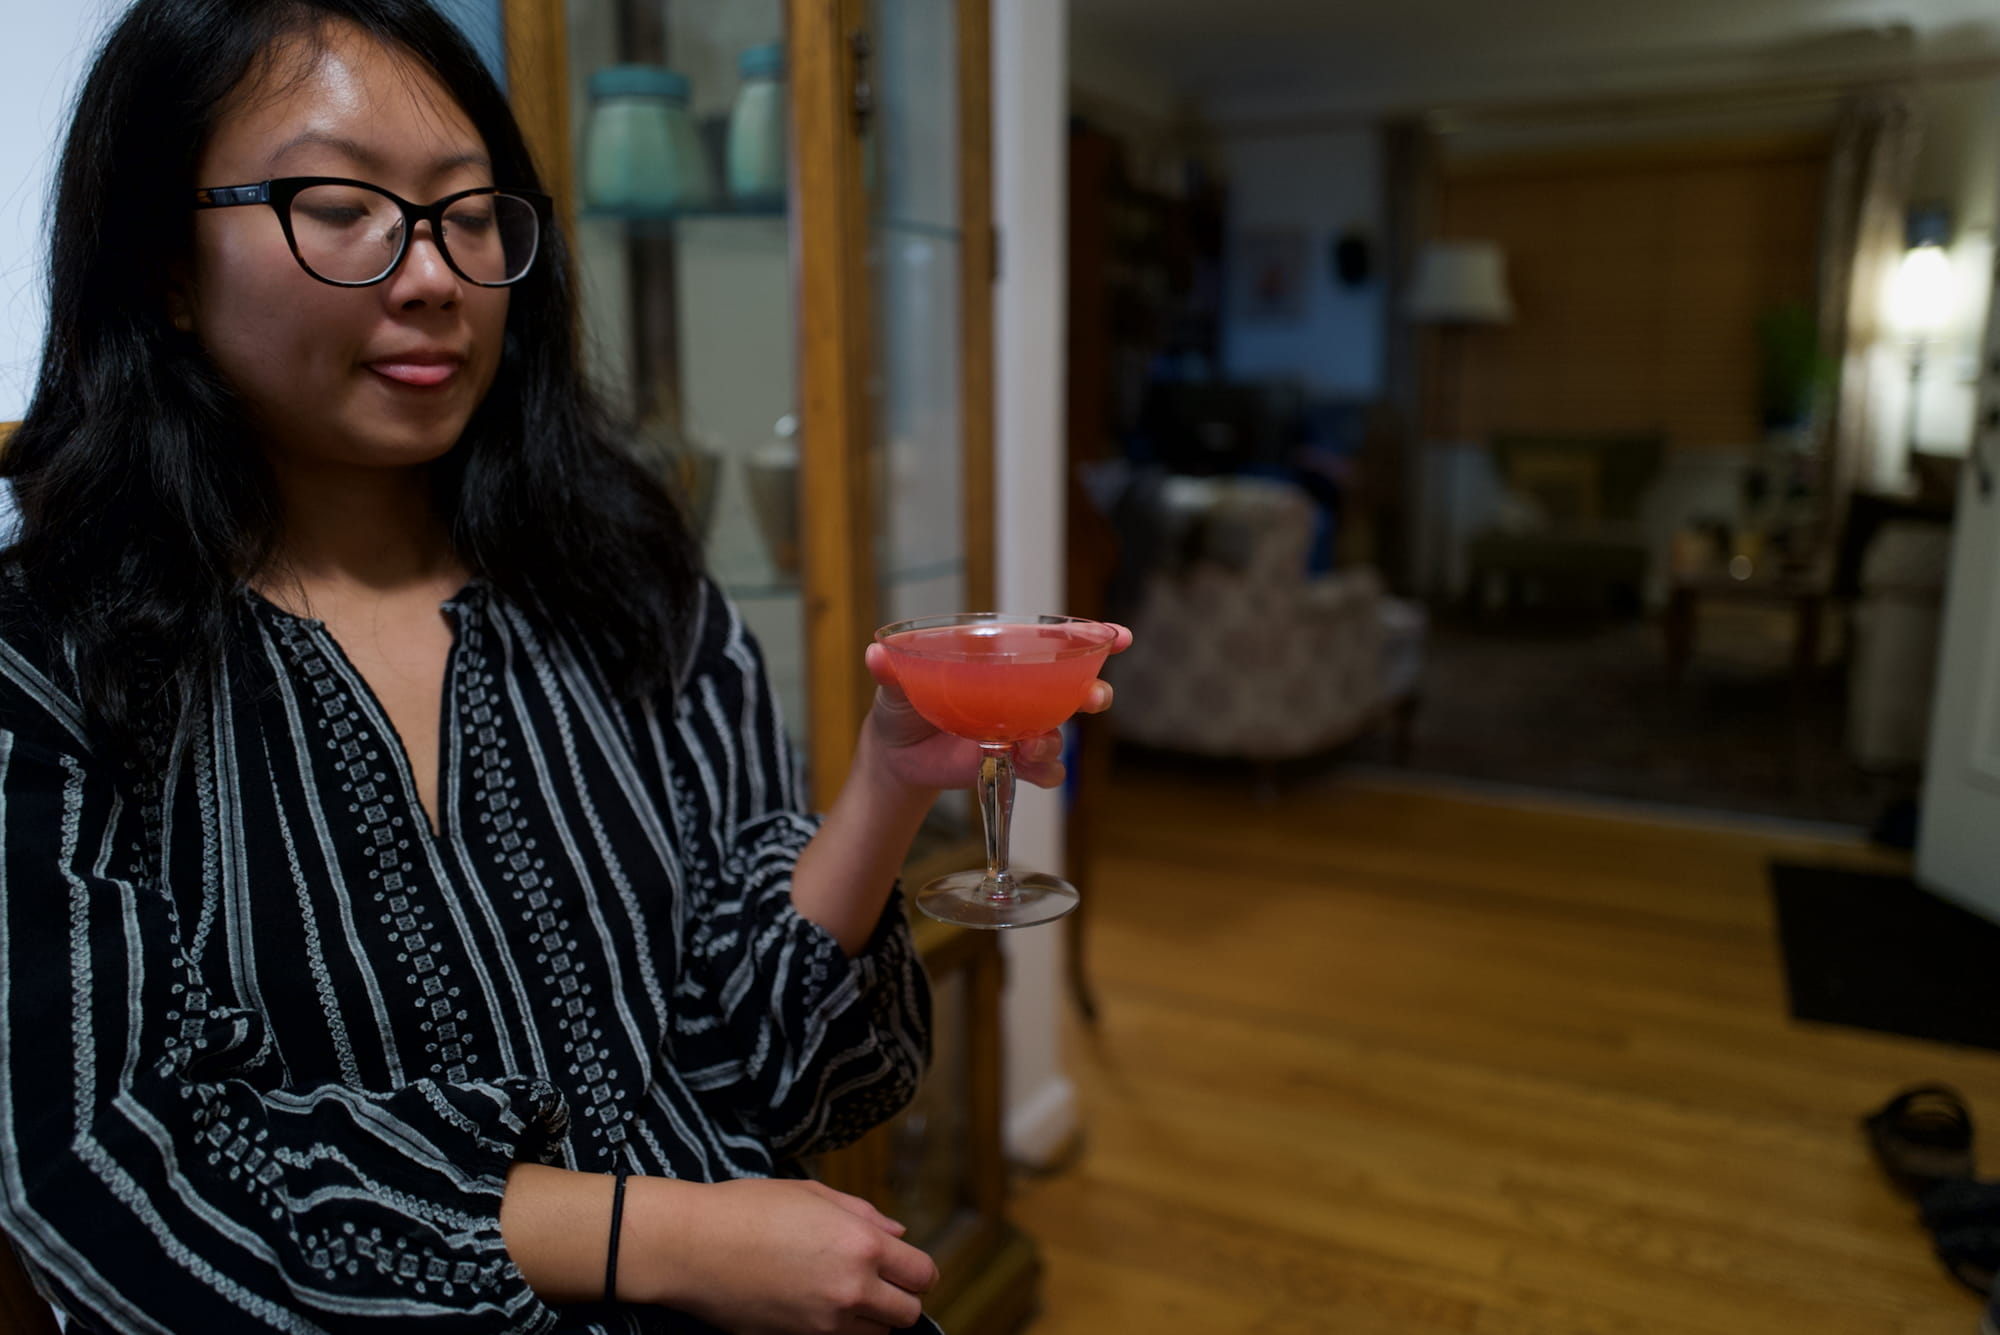
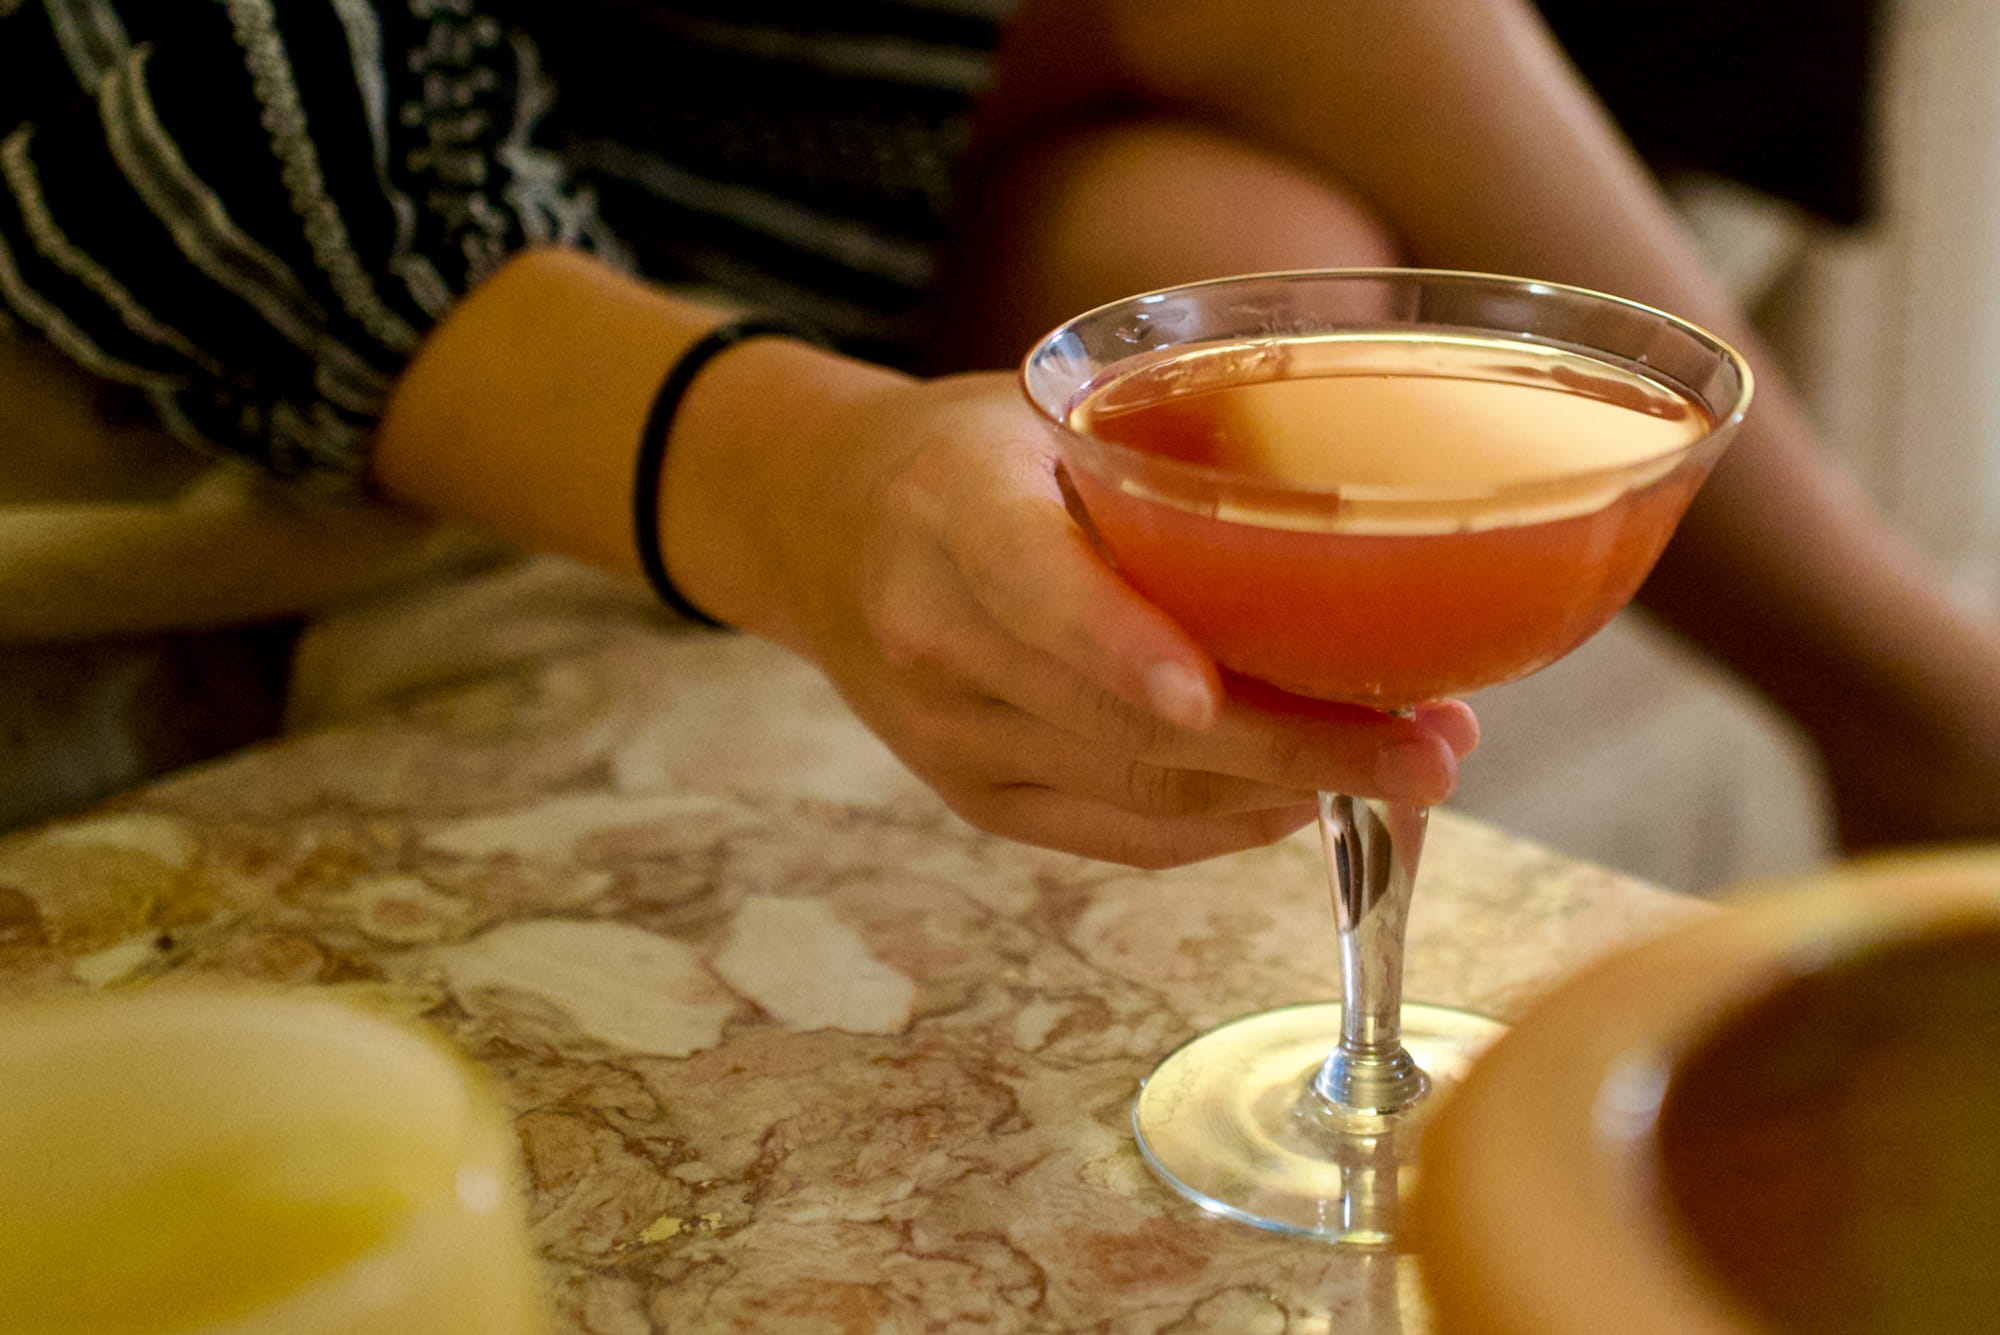
Holding drink, inside. [no flash; 0ev; f1.7, 1/250s, ISO 3200].
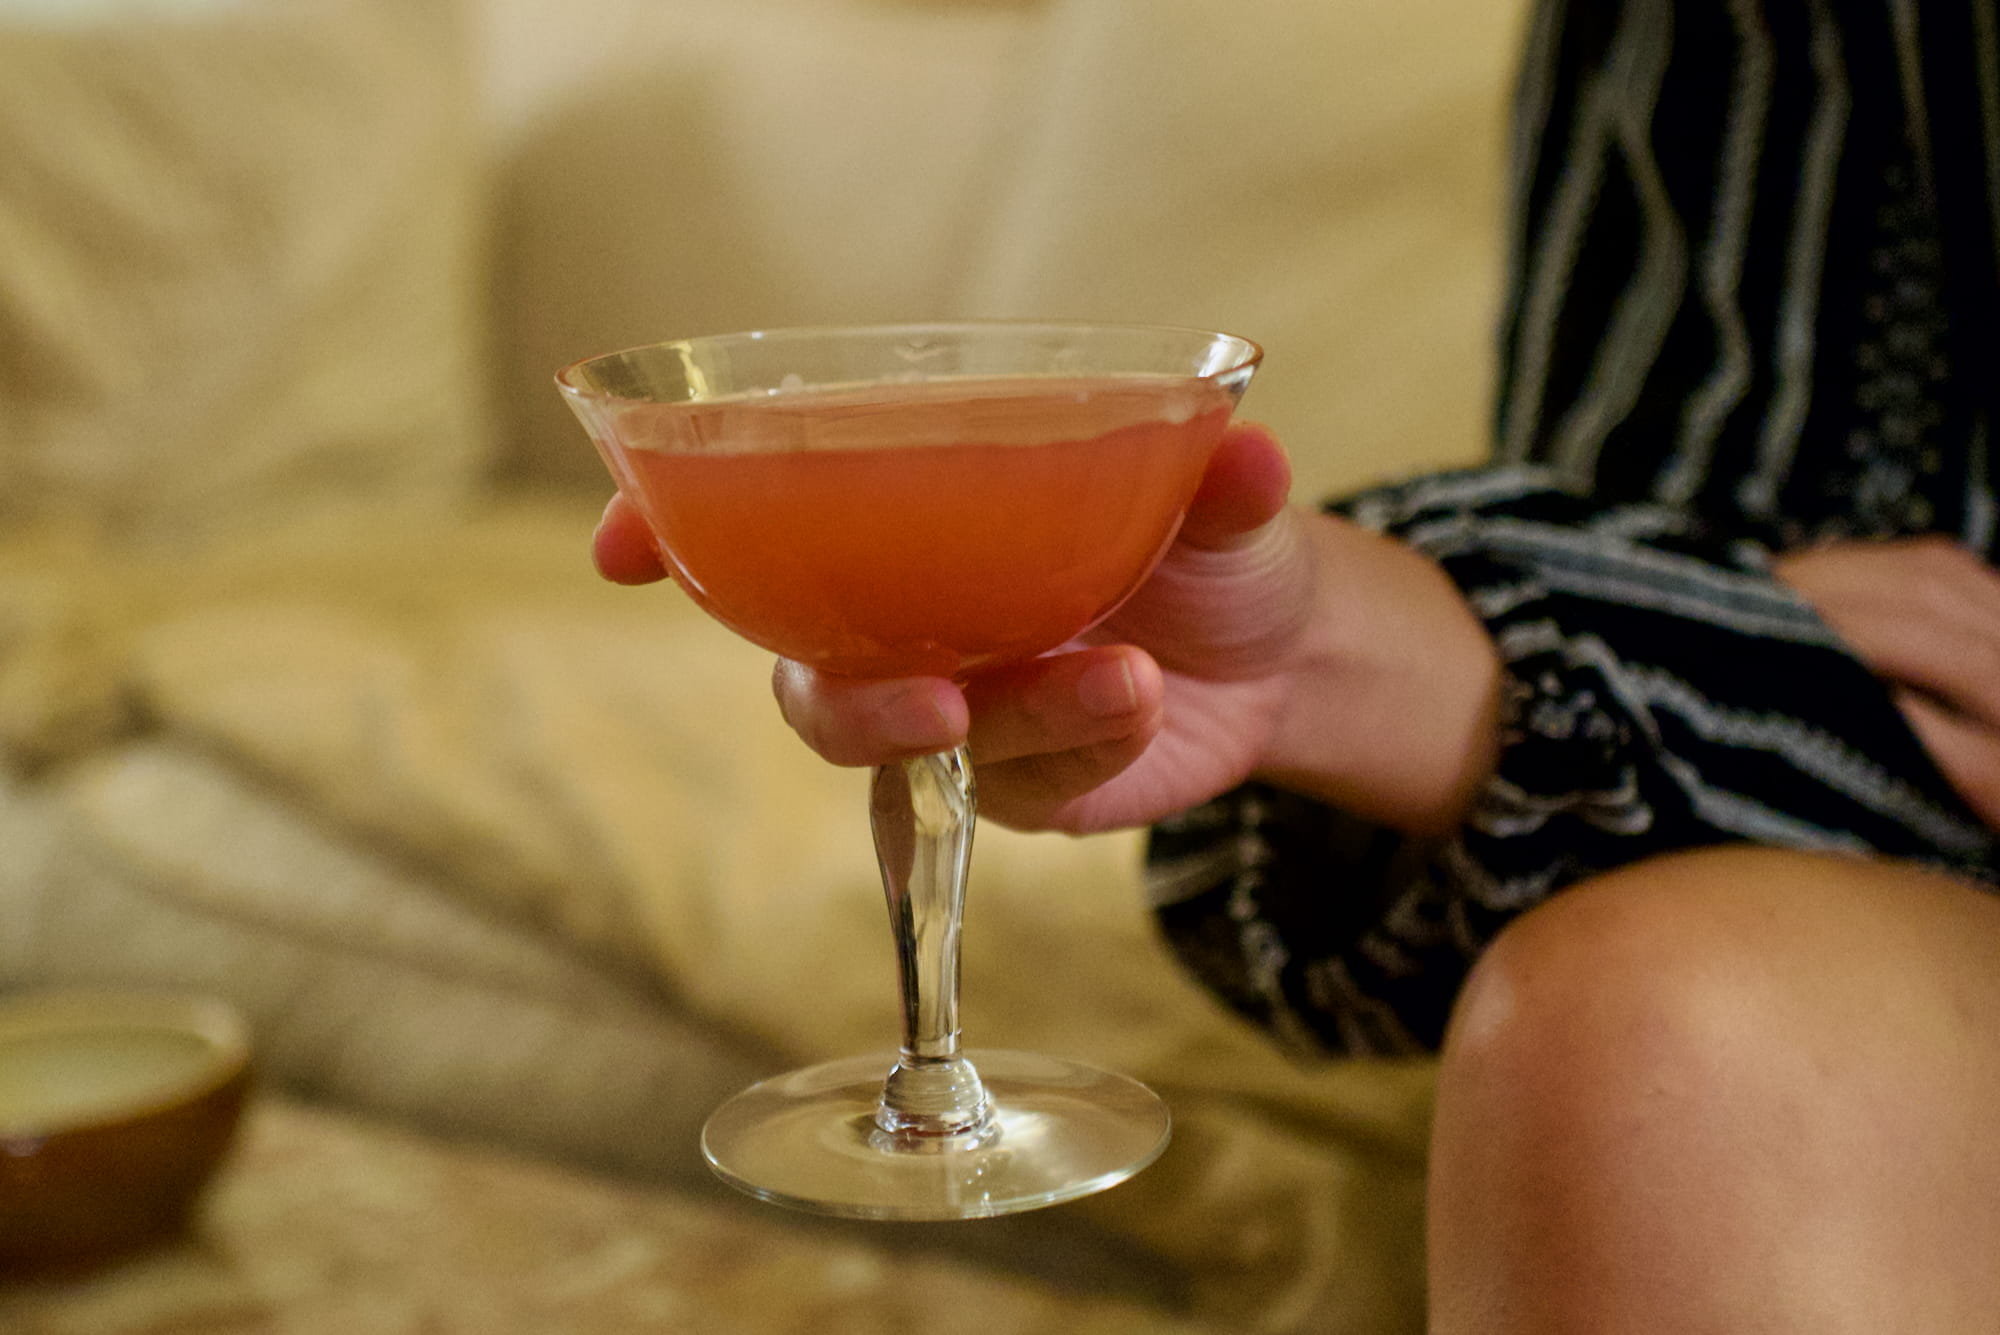
Same photo, edited. [no flash; 0ev; f1.7, 1/250s, ISO 3200].
Experiment 5: Beware of Banding
These photos are actually from other photo sessions, but they are of glasses and taken by the Q2, so I thought they’d be fitting to include.
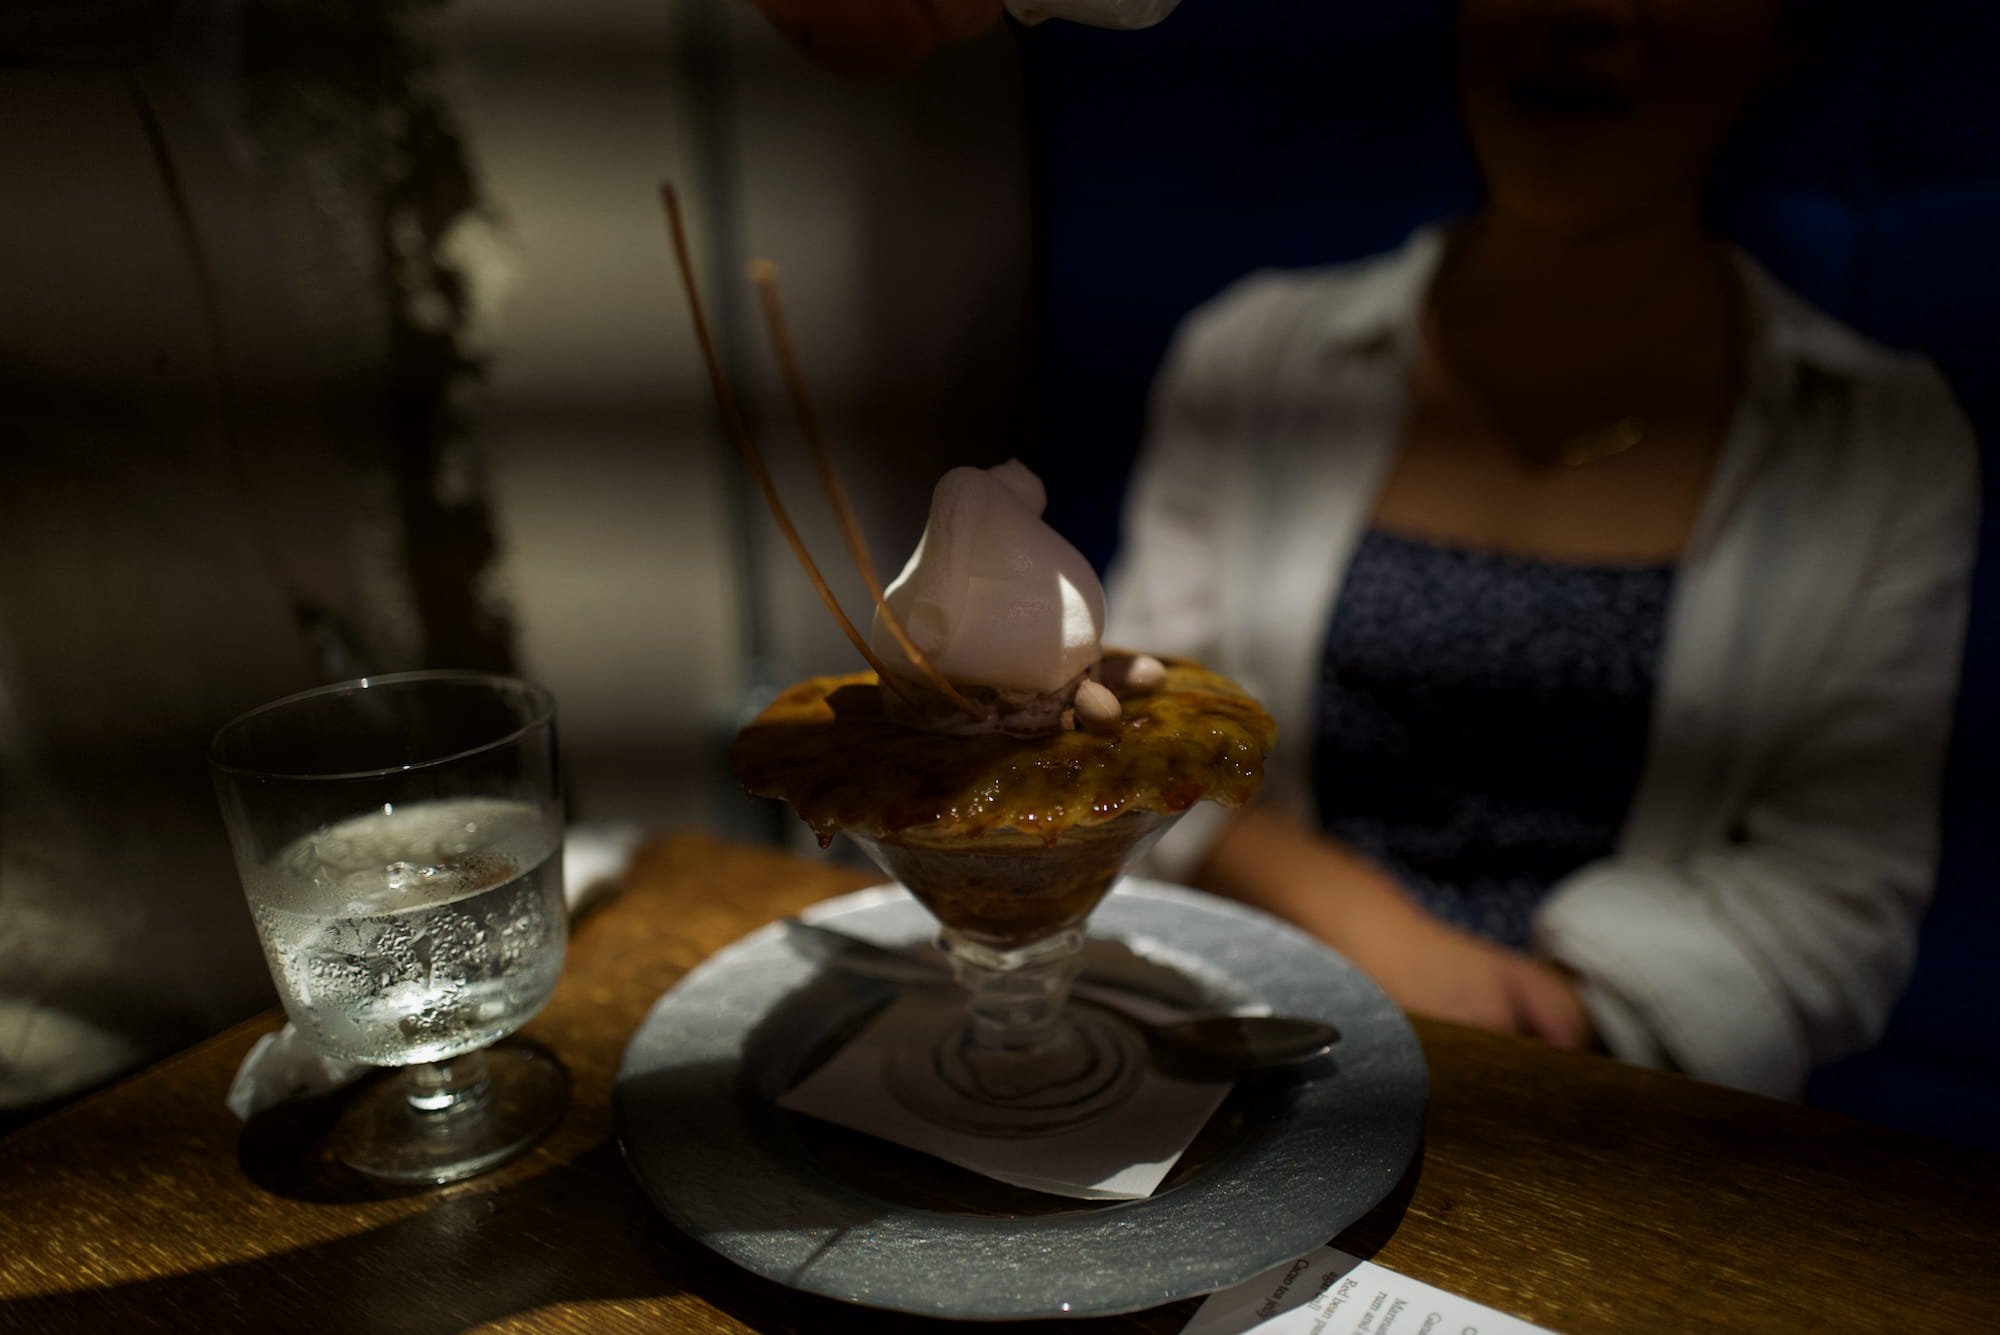
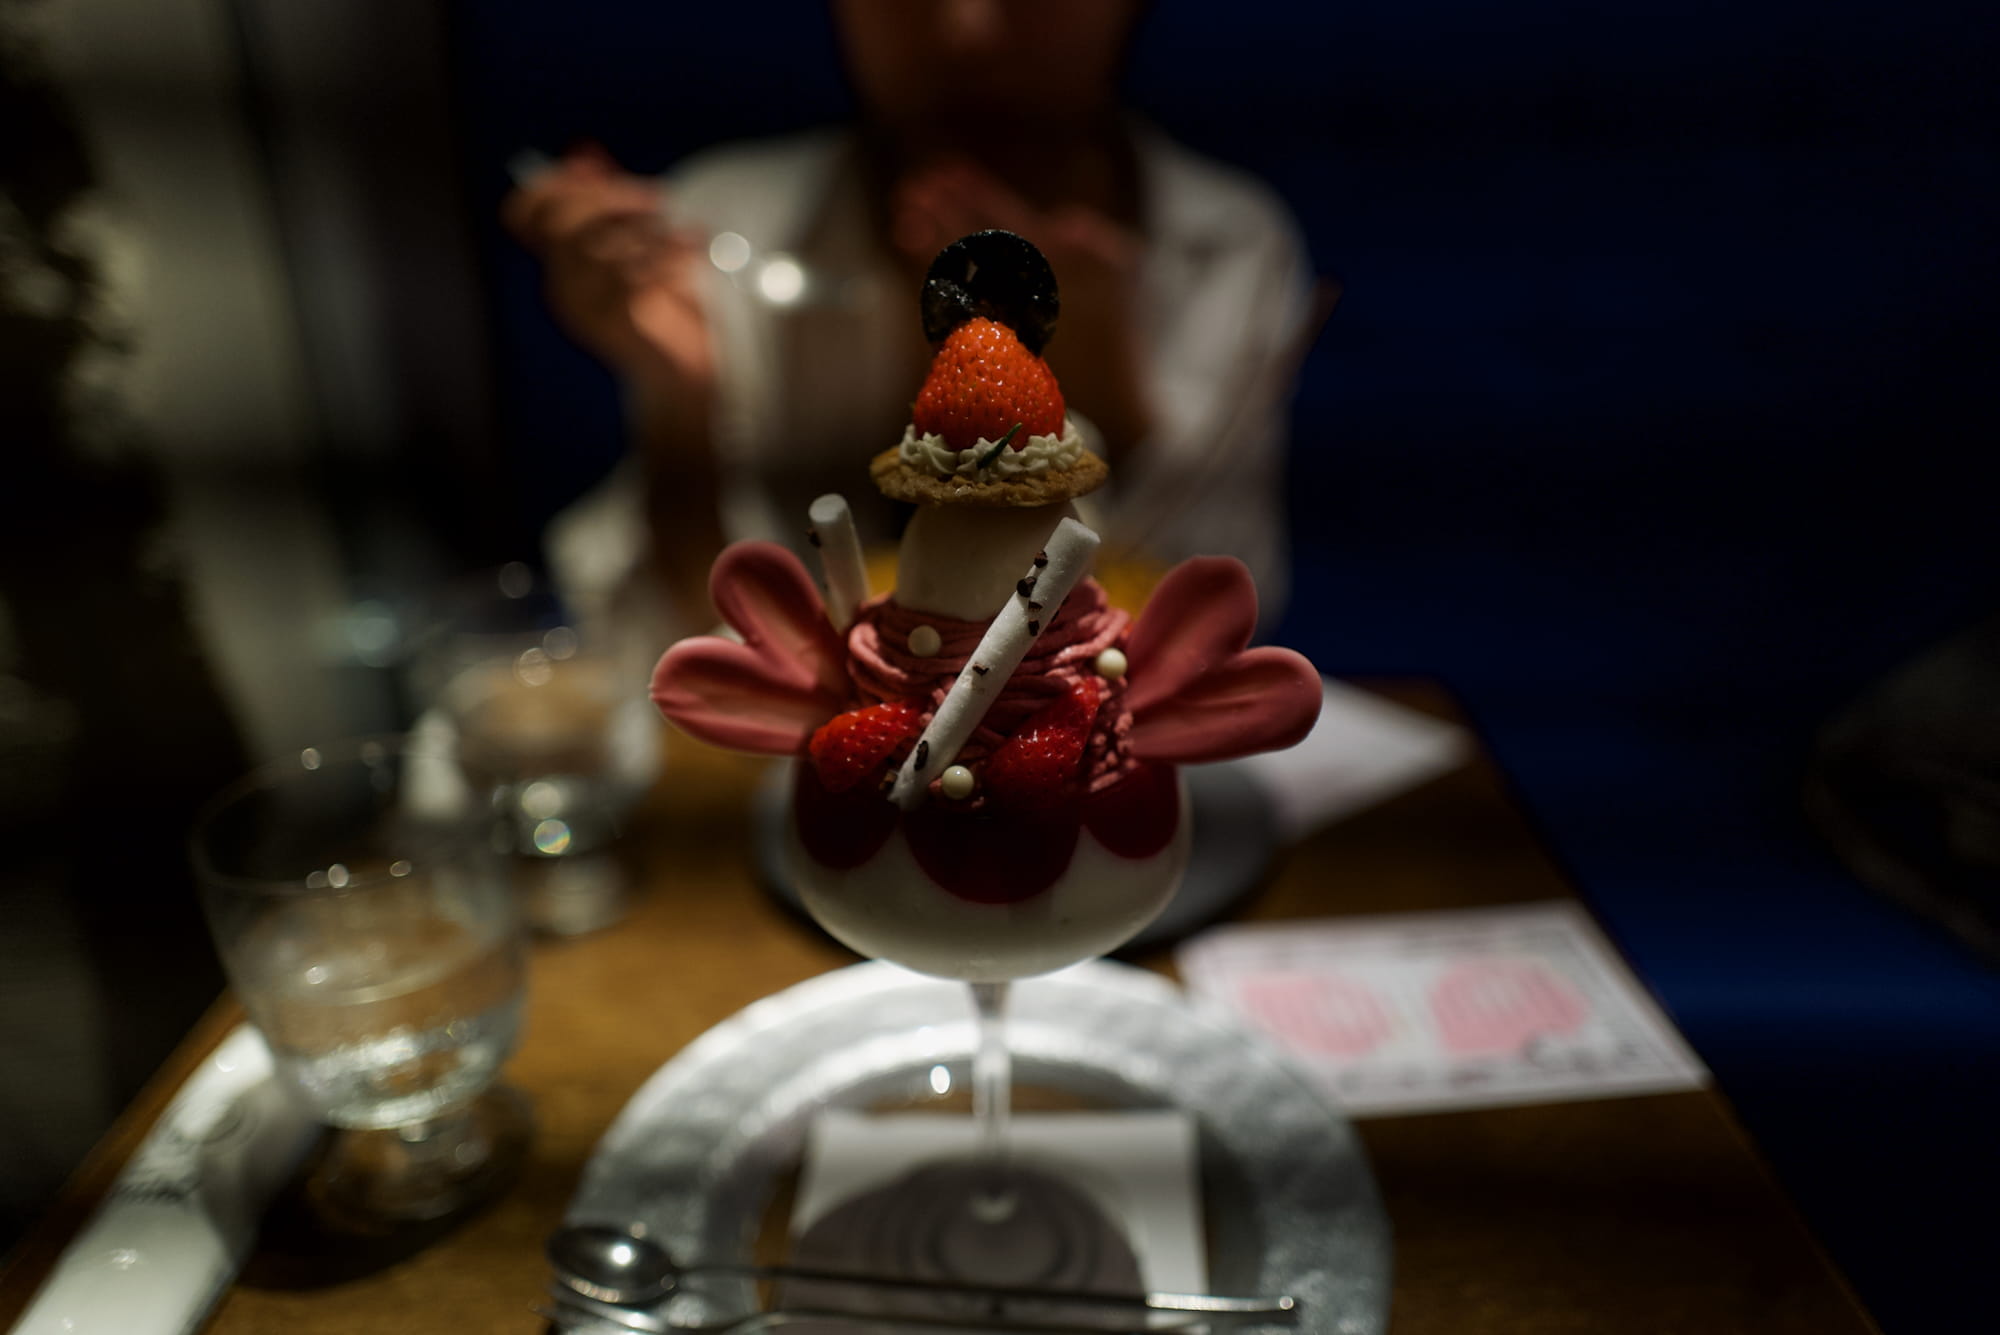
Bad banding on decadent Japanese parfaits. Both top and bottom: [-1ev; f1.7, 1/250s, ISO 1600].

Bad banding on pouring amaro. [f1.7, 1/400s, ISO 100]
I discovered after-the-fact on a few occasions that the photos had bad banding artifacts on them. I believe this is due to lights flickering with the natural power current. That is 50Hz in eastern Japan, like Hokkaido, where the dessert photos were taken; and 60Hz in the USA, where the amaro pouring photo was taken.
Because I have seen this so rarely, I have an unverified hypothesis that the effect might be worse with certain kinds of lights—perhaps LEDs?
I read have read both in forums and in this Canon article that to address banding, you want to:
- (a) ensure you’re using a mechanical shutter, and
- (b) set your shutter speed to synchronize with the frequency of the lights. So for a 1/60s light (USA), you’d want to shoot at either 1/60s or 1/125s.19 I’d also read an alternative approach for (b) is just to shoot slower than the phase to make sure you get the whole cycle in it. So for a 60Hz cycle, shoot at 1/50s or slower.
Aside: I was curious whether the EXIF metadata contains whether the shutter used was mechanical or electronic. It does not. It only contains the shutter speed.
I worry about both approaches to (b) (synchronizing shutter speed with light flickering). Wouldn’t it be possible you’re not quite synced up, so you’d still get bands? And if you shot slower, couldn’t you then capture multiple phases for some parts of the image? This is something to experiment with next time I find a banding light source! The biggest thing I have to remember is to turn the immediate preview back on in a potential banding situation. Otherwise, I don’t notice until I’m looking at the photos way water.
Experiment 6: Beware of Slow Burst
I tried a burst shot to get different stills of a pour. I wanted to capture several moments where the amaro hit the sparking water and the fluids beautifully mixed together.
Instead, I got this:
To be clear, it produced a series of photos, not a video. I just made it into a video for easier viewing. I paused for an extra second on the last photo so it didn’t loop as frantically. Settings for each photo: [f1.7, 1/400s, ISO 100]
I never made it to the pouring!
I remember the camera writing images to the memory card for a terrifyingly long time after I stopped pressing the shutter button. I can’t remember exactly how long I held down the shutter button, but I don’t think I let it up so early as to miss the event entirely. My working guess right now is that I totally filled up the camera’s buffer and then it just stopped taking photos.
I would need more experiments before I would confidently try burst shots. But the first thing I would try in my next attempt is to slow the interval way down. Probably one or two per second would even be good enough.
Takeaway: Next time trying burst shots, try it slow.
Also, note that you can see the banding here too (one of the photos was used for the above section), and with the video, you can see the bands slowly travel upwards. I’m not sure whether the mechanical shutter was used, or whether it’s possible to take burst photos with the mechanical shutter. (It seems like it ought to be possible?)
As a point of comparison, I took a photo using the same settings after the pouring was finished, and no bands are visible.
Amaro pouring complete. No bands. [f1.7, 1/400s, ISO 100]
Since I believe the parfait photos in the previous section used the electronic shutter,20 and I believe that the pour burst photos also used the electronic shutter,21 it may be that the mechanical shutter alone fixes the banding issue.
Takeaway: Next time I encounter banding, see whether the mechanical shutter alone fixes it.
Conclusion
I’m really glad I spent the time to go through these photos and write up this post.
My first phase was to discard totally awful photos, edit the best ones, exported both the originals and the best ones, sent a few best-of-the-best photos to others, and wrote the whole Summary of Findings section at the top.
After that, I thought I wouldn’t really gain anything by actually going through all the photos in detail, writing about each and laying them out.
But wow I did learn a lot! It forced me to not only realize some vital errors (tripod = can use way slower shutter speed = can use way lower ISO; use lamps for lighting; get at least one shot with full drink in focus), but it also made me look up many things ((lack of) flash settings in EXIF metadata, what ISO 50 means; mechanical vs electronic shutter effects and flash synchronization).
But perhaps most importantly, looking at all the photos in greater detail made me stop fretting over how bad they all looked because of common shortcomings (the ugly surface, reflective backdrop, poor props, and bad lighting), and made me start comparing and contrasting the relative strengths of each photo. Annotating them one-by-one helped me see which settings led to which effects, and what kinds of choices made photos look better.
Now I’m wishing I’d done this way earlier for my initial flurry of taking photos with my Q2 while on the road! I still haven’t edited weeks of travel photos taken with it. Oh well—good impetus to do it before hitting the road again.
Takeaway: Go through your photos in detail. You will learn a lot.
Footnotes
Someday: cocktails. Currently: expired strawberry lemonade. ↩︎
Though raising the table would have been a lot of work, and we didn’t have a mat available. ↩︎
i.e., background will be way too bright ↩︎
The depth of field is already so shallow that only part of the drink is in focus. ↩︎
As far as I can tell, whether the lens was set to macro is not recorded in the photo metadata, so I don’t note it on any of the photos here. It probably has subtle optical differences, but it’s beyond the level I’m worrying about at this stage. ↩︎
This tool was a 5-in-1 situation: a diffuser that had different covers you could wrap around it: white, black, silver, and gold. ↩︎
I think it’s battery acid; that white fuzzy caky gunk that comes out of batteries ↩︎
E-TTL turns out to mean “Evaluative-through the lens,” and is the Sony tech for calibrating exposure to the upcoming flash brightness. It works by using a “brief pre-flash before the main flash” and recording the light with a sensor. (Source). It seems that Nikon has its own system for this, and I imagine Leica does as well. I’m surprised that they don’t work together. There appears to be some common spec since you can throw the flash on the camera and it will fire. But that might be the extent of it ↩︎
I was thinking I could place little identifiers in the corner of the shot, kind of like how they do the clapperboard in film. But many of the photos with flash are so overexposed you wouldn’t even be able to make that out. ↩︎
I had been shooting in my usual mode aperture priority. ↩︎
The viewfinder itself shows a screen; it’s not a straight optical thing. I think this is a basic distinction between a DSLR (where you just look right through optically) and a mirrorless (where you are looking at a live digital view of what the sensor is capturing). ↩︎
This makes me realize another setting that I should consider changing from my street shooting defaults: turning previews back on. Though I don’t know if a few seconds would be long enough to really get in and zoom around and check things out. Maybe a moot point. ↩︎
Turns out ISO goes all the way down to 50. It seemed to never go below 100 while on auto. From briefly reading about it online, there appears to be debate among users of different cameras as to whether ISO 50 is a “true” extra stop, or whether it’s just a posprocess effect automatically applied. Users in one Sony forum seemed to think that ISO 50 just takes an ISO 100 shot and does some post FX on it; users in a Leica Q2 forum seemed to think it could provide more dynamic range, but that there were potential issues about the “true” ISO value, unrecoverable clipping, and inaccurate previews. This is beyond my pay grade at the moment. ↩︎
This all helps me understand why the Q2’s shutter speed dial only goes up to 1/2000s. The electronic shutter can hit 1/40,000s, so I wondered why they didn’t keep going up. I guess the heuristic of mechanical shutter only is a reasonable one. Plus, you can only add so many click points on a dial of that size before it’s a poor experience to twist it. ↩︎
For example, this post by Canon on electronic vs manual shutters. ↩︎
By “shooting more actively” I just mean I was walking around holding the camera rather than using a tripod. ↩︎
Also, the flash is damn heavy and quite awkward on a smaller camera. I probably need to practice holding with one. ↩︎
I think I didn’t because without flash, I was already getting so little light the ISO was high, and with flash, I was wary of changing settings because it was so easy to get totally blown out (overexposed) images. ↩︎
I believe it’s 1/125s and not 1/120s because of the limitations of cameras. I guess they have hardcoded setting increments that they like to use. This strikes me as strange because they’re digital devices, you’d think they could take arbitrary shutter speeds like phones. E.g., I’ve noticed my iPhone is perfectly happy to take 1/1261s or 1/1754s exposures. Maybe it’s possible? ↩︎
I had my camera set to always use the electronic shutter during that time period to be as quiet as possible. ↩︎
I don’t remember hearing the repeated clicking of the mechanical shutter during the burst. ↩︎
